소개
빠른 시작
바쁘신가요? 바로 시작하기로 가보세요.
번역
다양한 기여자들이 여러 언어로 문서를 번역하였습니다. 단 아래의 번역이 항상 최신인 것은 아닙니다.
- Bahasa Indonesia
- Deutsch
- Español
- Français
- Italiano
- Polski
- Português Brasileiro
- русский язык
- العربية
- فارسى
- 日本語
- 简体中文
만약 이 문서를 다른 언어로 번역하는 것을 돕고 싶으시면, 이 번역 가이드를 참고하세요.
현재 보고계시는 번역은, gangjun06/anki-manual에서 수정하실 수 있습니다.
원본문서는 https://docs.ankiweb.net 에서 보실 수 있습니다.
배경지식
Anki는 기억을 쉽게 할 수 있도록 도와주는 프로그램입니다. 기존의 공부 방법보다 훨씬 더 효율적이기 때문에 공부하는 시간을 크게 줄이거나 배우는 양을 크게 늘릴 수 있습니다.
일상생활에서 무언가를 기억할 필요가 있는 사람은 누구나 Anki의 혜택을 받을 수 있습니다. 콘텐츠에 구애받지 않고 이미지, 오디오, 비디오 및 과학적 마크업(LaTeX)을 지원하므로 가능성은 무한합니다. 예를 들어 다음과 같습니다:
-
외국어 공부
-
의학과 법학 시험을 위한 공부
-
사람의 이름과 얼굴을 외우는 것
-
지리학 복습
-
긴 시를 마스터
-
심지어 기타 코드도 연습까지!
Anki의 배경에는 액티브 리콜 테스트와 간격 반복 학습이라는 두 가지 단순한 개념이 있습니다. 그것들은 과학 문헌에 오랫동안 쓰여졌음에도 불구하고 대부분의 학습자들에게는 알려져 있지 않습니다. 이를 어떻게 작동하는지 이해하면 더 효과적인 학습자가 될 수 있습니다.
액티브 리콜 테스트
'액티브 리콜 테스트'는 질문을 받고 답을 기억하려고 노력하는 것을 의미합니다. 이것은 우리가 답을 알고 있는지 고려하기 위해 중단 없이 무언가를 읽고, 보고, 듣는 '수동적 공부'와는 대조적입니다. 연구에 따르면 능동적 리콜 테스트가 '수동적 공부'보다 강력한 기억을 구축하는 데 훨씬 효과적입니다. 여기에는 두 가지 이유가 있습니다.
-
무언가를 떠올리는 행동은 기억을 강화시키고, 우리가 그것을 다시 기억할 수 있는 가능성을 증가시킨다.
-
질문에 대답할 수 없는 경우, 질문을 검토하거나 다시 학습하기 위해 자료로 돌아가야 합니다.
당신은 아마 학창 시절에 자신도 모르는 사이에 적극적인 리콜 테스트를 접했을 것입니다. 좋은 선생님들이 글을 읽고 답해야 할 일련의 문제를 내거나 매주 쪽지시험 보게 할 때, 그것은 단순히 여러분이 내용을 이해했는지 확인하기 위해서 하는 것이 아닙니다. 그들은 학생들을을 테스트함으로써 학생들이 미래에 그 정보를 더 잘 떠올릴 수 있도록 하고 있습니다.
액티브 리콜 테스트를 자신의 공부에 통합하는 좋은 방법은 플래시 카드를 사용하는 것입니다. 전통적인 종이 플래시 카드에서는, 카드의 한쪽 면에 질문을 쓰고, 다른 한쪽 면에 답을 씁니다. 답을 생각할 때까지 카드를 뒤집지 않음으로써 수동적인 공부보다 훨신 효과적으로 학습할 수 있습니다.
사용하지 않으면 잃어버린다
우리의 뇌는 효율적인 기계이고, 유용해 보이지 않는 정보를 빠르게 버립니다. 2주전에 뭘 무엇을 먹었는지는 보통 유용하지 않기 때문에 대부분 쉽게 기억하지 못할 것입니다. 하지만 만약 그날 환상적인 레스토랑에 간 후 2주동안 사람들에게 그것이 얼마나 훌륭했는지 이야기하며 보냈다면, 여전히 생생하게 기억할 것입니다.
뇌의 "사용하지 않으면 잃어버린다" 원리은 우리가 배우는 모든 것에 적용됩니다. 만약 반나절동안 과학 용어를 외웠지만, 2주동안 외운 내용을 생각하지 않는다면 아마 외운 대부분을 잊어버렸을 것입니다. 실제로 연구에 따르면 48시간 내에 학습한 자료의 약 75%를 잊어버리는 것으로 나타났습니다. 많은 정보를 배워야 할 때 이 내용은 매우 암울할 수 있습니다! 하지만 해결책은 간단합니다. 새롭게 학습한 정보를 복습함으로써 망각을 크게 줄일 수 있습니다.
유일한 문제는 전통적으로 복습이 그다지 실용적이지 않았다는 것이다. 만약 종이 플래시 카드를 사용하고 있다면 복습할 내용이 30개일땐 그것을 모두 훓어보는 것이 쉽지만, 그 수가 300개, 3000개로 늘어나면 쉽게 복습하기가 어려워 집니다.
간격 반복 학습
간격 효과 는 1885년 독일의 심리학자 헤르만 에빙하우스에 의해 발표되었다. 간격 효과 는 일정한 간격을 두고 여러 차례 공부하는 것이 한번에 몰아서 공부하는 것보다 도움이 된다는 효과입니다. 1930년대 이후 이 간격 효과를 활용하여 학습을 개선하자는 여러 가지 말들이 있어 왔는데, 이를 간격 반복 학습이라고 부릅니다.
1972년 세바스찬 라이트너라는 독일 과학자가 종이 플래시 카드로 간격을 두고 반복하는 방법을 대중화했을 때 한 예가 있습니다. 종이 카드를 일련의 박스로 분리하여 기억에 성공하거나 실패할 때마다 카드를 다른 박스로 이동시킴으로써 카드를 얼마나 잘 기억하는지, 언제 다시 복습해야 하는지에 관한 대략적인 내용을 한눈에 알 수 있었습니다. 이는 하나의 박스에 모든 카드를 집어넣는 방식에 비해 매우 발전된 것으로, 이러한 방식은 컴퓨터화된 플래시 카드 프로그램에서 널리 사용되고 있습니다. 그러나 다시 복습해야 하는 정확한 날짜를 알려 줄 수 없고 다양한 난이도의 내용에 잘 대처하지 못하기 때문에 그다지 좋지않은 방법입니다.
그러던 중, 지난 30년 동안 가장 큰 발전은 간격 반복 학습을 구현하는 상용 플래시 카드 프로그램인 SuperMemo의 개발자들로부터 왔습니다. SuperMemo는 사용자의 성과에 따라 내용을 다시 학습하기 위한 최적의 시간을 찾고 업데이트하는 시스템을 만들었습니다.
SuperMemo의 간격 반복 학습에서 질문에 대답할 때마다 내용을 완전히 잊어버렸는지, 약간 까먹었는지, 쉽게 기억되었는지 등을 알려줍니다. 프로그램은 이 피드백을 사용하여 질문을 다시 표시할 최적의 시간을 결정합니다. 기억은 정상적으로 기억될 때마다 강화되기 때문에 재학습 간격은 점점 더 커집니다. 따라서 처음 질문을 받고 3일 후, 15일 후, 45일 후 등으로 늘어납니다.
이것은 학습에 있어서 혁명이었습니다. 필요한 최소한의 노력으로 자료를 배우고 유지할 수 있다는 것을 의미했습니다.
SuperMemo의 슬로건은 다음과 같이 요약하고 있습니다. 간격 반복 학습을 계속하면, "잊어버리는 것을 잊는다".
왜 Anki?
SuperMemo가 이 분야에 큰 영향을 끼치긴 하였지만, 종종 버그가 심하고 탐색이 어렵다는 비판을 받습니다. 또한 윈도우에서만 실행되는 사유 소프트웨어인지라 사용자가 이를 확장하거나 원시 데이터에 접근할 수 없습니다. 아주 오래된 버전이 무료로 제공되고 있긴 하지만 현대에는 상당히 제한적입니다.
Anki는 이러한 문제를 해결하기 위하여 출시되었습니다. 다양한 플렛폼에서 무료로 이용할 수 있기 때문에 돈이 없는 학생들도 걱정없이 쓸 수 있습니다. Anki는 오픈소스이며, 여러 사용자들이 만든 에드온들이 이미 널리 쓰이고 있습니다. Anki는 Windows, MacOS, Linux/FreeBSD 및 모바일에서 실행되는 멀티 플렛폼 입니다. Super Memo보다 훨씬 사용하기 쉽습니다.
Anki의 간격 반복 시스템은 SM-2라고 불리는 이전 버전의 SuperMemo 알고리즘에 기초하고 있습니다.
플렛폼 노트
Anki 설치 방법 및 발생할 수 있는 문제는 사용 중인 컴퓨터의 운영체제에 따라 다릅니다.
설치 & Windows의 Anki 업그레이드
요구 사항
최신 Anki 버전은 윈도우 7, 8, 10 or 11 64비트 버전을 요구합니다.
마지막으로 32비트를 지원하는 버전은 Anki 2.1.35-alternate 입니다. 만약 오래된 컴퓨터를 사용하는 경우, 릴리즈 페이지 에서 이전 버전을 확인하실 수 있습니다.
설치
Anki를 설치하려면:
- https://apps.ankiweb.net 에서 Anki 다운로드.
- 바탕화면 또는 다운로드 폴더에 installer를 설치.
- 더블클릭하여 installer를 설치합니다. 만약 오류 메시지가 뜬다면, 왼쪽의 링크를 참고하세요.
- Anki가 설치되면, 바탕화면의 Anki 를 더블클릭하여 실행할 수 있습니다.
업그레이드
Anki 2.1.6 이상 버전에서 업그레이드하는 경우 이전 버전을 제거할 필요가 없습니다. Anki가 열려 있는 경우 Anki를 닫고 위의 설치 단계를 따르기만 하면 됩니다. 카드는 업그레이드 시 유지됩니다.
2.1.6 이전 Anki 버전에서 업그레이드하거나 표준 버전에서 대체 버전으로 전환하거나 그 반대로 전환한 경우 먼저 이전 버전을 제거할 것을 권장합니다. 그러면 Anki의 프로그램 데이터가 삭제되지만 카드 데이터는 삭제되지 않습니다.
이전 버전으로 다운그레이드하려면 다음 사항을 확인하십시오. 다운그레이드.
에드온 호환성
일부 애드온은 최신 Anki 릴리스를 지원하도록 아직 업데이트되지 않았습니다. 사용하고 있는 애드온이 아직 최신 릴리스로 이식되지 않은 경우 릴리즈 페이지)에서 2.1.44를 이용할 수 있습니다.
문제
Anki 설치 또는 시작 시 문제가 발생할 경우 왼쪽에 있는 링크를 참조하십시오.
윈도우 설치 문제
Anki 설치 시 발생할 수 있는 오류 메시지:
먼저 셋업 문제 글을 봐 주세요.
"쓰기 위해 파일을 여는 중 오류 발생"
Anki와 탐색기를 닫고도 해결되지 않으면 컴퓨터를 다시 시작한 후 설치 프로그램을 다시 실행하십시오.
"Windows에 의해 PC가 보호됨"
새로운 Anki 버전이 출시되면 Windows는 새로운 버전을 사용하는 사용자를 충분히 생길 때까지 무시무시한 메시지를 표시할 수 있습니다. 앱 설치를 계속하려면 Run anyways을 사용하십시오.
백신 프로그램에서 때떄로 잘못된 판정을 할 수 있습니다.
윈도우 셋업 문제
- 에러는 없지만, 앱이 켜지지 않음
- 윈도우 업데이트
- 윈도우 7/8
- 비디오 드라이버 문제
- 다중 디스플레이
- 백신 / 방화벽 프로그램
- 관리자 접근
- 업데이트후 여러개의 Anki
- 디버깅
- 다른 모든 것이 실패했을 경우
에러는 없지만, 앱이 켜지지 않음
최근 Anki가 에러메시지를 표시하지 않고 나타나지 않는다는 제보가 있었습니다. 이러한 상황이 발생하면 다음 중 하나를 시도할 수 있습니다:
- 최신 windows-qt6 beta (애드온 호환성 문제가 있는 경우 qt5를 사용해 보세요)
- 또는 adjusting your decimal separator
- 또는 이전 버전인
2.1.35-alternate를 사용할 수 있습니다.
윈도우 업데이트
Anki를 실행할때, 다음과 같은 메세지가 표시되는 경우가 있습니다.
- Error loading Python DLL
- The program can't start because api-ms-win.... is missing
- Failed to execute script runanki
- Failed to execute script pyi_rth_multiprocessing
- Failed to execute script pyi_rth_win32comgenpy
일반적으로 이러한 오류는 컴퓨터에 Windows 업데이트 또는 Windows 라이브러리가 없기 때문입니다.
Windows 업데이트를 열고 시스템에 모든 업데이트가 설치되어 있는지 확인하세요. 설치가 필요한 경우는, 설치 후에 컴퓨터를 재시작하여 주세요.
윈도우 7/8
윈도우 7/8 에서는, 추가 업데이트를 수동으로 설치해야 할 수 있습니다.
- https://www.microsoft.com/en-us/download/details.aspx?id=48234
- https://aka.ms/vs/15/release/vc_redist.x64.exe
- http://www.catalog.update.microsoft.com/Search.aspx?q=kb4474419
- http://www.catalog.update.microsoft.com/Search.aspx?q=kb4490628
비디오 드라이버 문제
드라이버 문제 글을 확인하여 주세요.
다중 디스플레이
LoadLibrary failed with error 126 이 표시되면 Anki가 다중 디스플레이에 문제가 있는 툴킷이 원인일 수 있습니다.
백신 / 방화벽 프로그램
컴퓨터에 써드파티 소프트웨어가 있으면 Anki가 로드되지 않을 수 있습니다. Anki를 예외에 추가하거나 백신/방화벽을 일시적으로 비활성화하여 작동하는지 확인할 수 있습니다.
관리자 접근
일부 사용자는 Anki 아이콘을 마우스 오른쪽 버튼으로 클릭하고 관리자로 실행을 선택할 때 Anki가 실행되지 않았다고 제보했습니다.
Anki는 모든 데이터를 사용자 폴더에 저장하므로 관리자 권한이 필요하지 않습니다.
그러나 다른 방법을 전부 해 보았을땐 시도할 수 있습니다.
업데이트후 여러개의 Anki
업데이트 프로세스로 인해 여러개의 Anki가 설치된 경우 (C:\Program Files\Anki 및 C:\Program Files (x86)\Anki)
동작하지 않는 상태가 되어, Anki가 에러 메세지의 없이 작동하지 않는 경우가 있습니다.
설치된 모든 Anki를 제거해 보세요. Windows의 앱 & 기능 설정 메뉴를 사용하거나
각 Anki 프로그램 폴더에서 uninstall.exe를 실행하여 제거할 수 있습니다.
그 후 새로운 Anki를 다시 설치합니다.
디버깅
콘솔에서 Anki 를 실행하면, 에러에 관한 더욱 상세한 정보가 표시됩니다.
최신 버전의 Anki를 설치하고 모든 Windows 업데이트가 설치되어 있는지 확인한 후
Anki를 직접 실행하는 대신 Win+R을 사용하여 cmd.exe를 입력합니다. 콘솔 창이 뜨면
cd \program files\anki & anki-console
아마 Anki는 이전처럼 열리지 않을 것이지만, 문제의 원인을 분석할 수 있습니다.
다른 모든 것이 실패했을 경우
위의 방법들을 시도해도 Anki를 실행할 수 없는 경우에는, 2가지 옵션이 있습니다:
- 파이썬으로 실행 을 시도하여 보세요.
- 2.1.35-alternate 또는 2.1.15 과 같은 이전 버전을 사용하여 보세요.
윈도우 디스플레이 문제
Windows 에서는, 컨텐츠가 화면에 표시되는 3개의 방법이 있습니다. 기본값은 software로 속도는 느리지만 호환성이 가장 높습니다. 더 빠른 옵션은 'OpenGL'과 'ANGLE' 두 가지가 있습니다. 대신 고속이지만 동작하지 않거나, 메뉴바가 없거나, 창이 공백인 등의 디스플레이 문제가 발생할 수 있습니다. 어떤 것이 가장 잘 작동하는지는 컴퓨터에 따라 달라집니다.
이 표시 방식을 변경할 수 있는 경우 및 방법은 사용하는 Anki 버전에 따라 달라집니다. (정확히는 사용하는Qt 툴킷의 버전에 따라 달라집니다)
Qt5
이 툴킷은 2.1.50 이전 버전의 Anki에서 사용됩니다. 여기서는 툴 -> 설정 메뉴에서 디스플레이 드라이버를 설정할 수 있습니다. 디스플레이 드라이버를 변경한 후에는 Anki를 다시 시작해야 합니다.
Anki 설정 화면으로 들어갈 수 없구나 다시 시작해도 해결되지 않는 경우 cmd.exe를 시작하고 다음을 입력하여 드라이버를 변경할 수 있습니다:
echo auto > %APPDATA%\Anki2\gldriver
기본값은 소프트웨어 이며, angle과 auto를 사용할 수 있습니다.
Qt6
Anki 2.1.50+는 최신 Qt6 툴킷에서 사용할 수 있습니다.
이 버전에서는 디스플레이 드라이버를 쉽게 변경할 수 없고 angel드라이버도 지원되지 않습니다.
단, 다음 명령어를 실행한 후 cmd.exe에서 Anki를 실행하여 소프트웨어드라이버를 사용할 수 있습니다.
set QT_OPENGL=software
이 설정을 영속적으로 사용하려면 이 명령어를 anki-console.bat 파일 상단에 추가하여 anki.exe 대신 실행해야 합니다.
전체화면
Anki 2.1.50+는 전체화면 모드가 기본 제공되지만 여러 가지 문제로 OpenGL을 사용하는 동안은 전체화면을 사용할 수 없습니다.
위와 같이 software 렌더링을 켜면 전체 화면 옵션을 사용할 수 있으나 렌더링 성능이 저하될 수 있습니다.
복사 붙여넣기 문제
복사 및 붙여넣기에 문제가 있는 경우 사전 프로그램, 클립보드 관리자 또는 클리핑 도구와 같은 클립보드를 모니터하는 다른 프로그램을 컴퓨터에서 실행하고 있는지 확인하십시오. Anki가 사용하는 툴킷은 이러한 프로그램을 실행할 때 문제가 발생할 수 있습니다.
글자 크기
텍스트 크기가 올바르지 않은 경우 다음 두 가지 환경 변수를 사용할 수 있습니다.:
-
ANKI_NOHIGHDPI=1 QT의 High DPI 지원의 일부가 꺼집니다
-
ANKI_WEBSCALE=1 는 메뉴바등의 인터페이스 요소는 그대로 두고, Anki 의 Web 뷰(뭉치 리스트, 스터디 화면등)의 크기을 변경합니다. 1을 1.5 또는 0.75와 같은 원하는 비율로 변경합니다.
Windows 에서는, Anki 를 보다 간단하게 시작할 수 있도록 배치 파일에 이러한 내용을 추가할 수 있습니다. 예를 들어 바탕 화면에 startanki.bat라는 이름의 파일을 다음 텍스트로 생성합니다:
set ANKI_WEBSCALE=0.75
start "Anki" "C:\Program Files\Anki\anki"
저장 후 파일을 더블 클릭하여 Anki를 시작할 수 있습니다.
윈도우 권한 문제
권한 문제
"접근 거부" 메시지가 표시되면 Anki의 파일 중 일부가 읽기 전용 모드로 설정될 수 있습니다. 즉, Anki는 파일에 쓸 수 없습니다.
이 문제를 해결하려면 다음 작업을 수행합니다.:
윈도우키+R로 시작 메뉴를 연 후cmd를 입력하고 Enter 키를 누릅니다.- cmd창에서 다음을 입력하고 Enter 키를 눌러 사용자 이름을 확인합니다.
whoami
- 아래의 커맨드를 각각 cmd에 붙여놓은 후 Enter을 누릅니다. 단 두번째 명령의 ____는 위에서 얻는 사용자 이름으로 대체합니다. (:F는 지우시 마시오)
cd %APPDATA%
icacls Anki2 /grant ____:F /t
이 명령어를 실행하면 Anki의 데이터 폴더에 대한 권한이 수정되어 프로그램을 시작할 수 있습니다.
백신/방화벽
컴퓨터에 설치된 보안 소프트웨어로 인해 "권한 거부" 또는 "읽기 전용" 오류가 발생한 사용자도 있습니다. Anki에 대한 예외를 추가하거나 소프트웨어를 일시적으로 비활성화하여 원인이 되지 않도록 해야 할 수 있습니다. 일부 사용자는 소프트웨어를 꺼도 문제가 해결되지 않으며 Anki에 대한 예외를 추가하거나 소프트웨어를 제거해야 한다고 보고했습니다.
권한 문제 디버깅
백신 및 관련 프로그램을 비활성화 하고 위의 절차를 통하여 권한을 수정한 후 OneDrive를 사용하지 않은 후에도 문제가 해결되지 않으면 cmd.exe에서 다음 명령을 실행하여 각 명령어 뒤에 Enter 키를 누르십시오.
whoami
cd %APPDATA%
icacls Anki2 /t
그러면 보이는 것을 복사하여 붙여넣기 또는 스크린샷을 찍어 지원 티켓에 업로드하여 주십시오.
Installing & Upgrading Anki on macOS
Requirements
Recent Anki releases require a Mac running macOS 10.13.4 or later.
The last Anki release that supported macOS 10.10 to 10.13.3 was 2.1.35-alternate. If you're on an old machine, you can obtain the old version from the releases page.
Installing
- Download Anki from https://apps.ankiweb.net
- Save the file to your desktop or downloads folder.
- Open it, and drag Anki to your Applications folder or desktop.
- Double-click on Anki in the location you placed it.
Upgrading
To upgrade, close Anki if it is open, and then follow the steps above. Drag the Anki icon into the same location you previously stored it, and when prompted, overwrite the old version. Your card data will be preserved.
Add-on Compatibility
Some add-ons have not been updated to support the latest Anki release yet. If an add-on you depend on has not been ported to the latest release yet, you may have more luck with 2.1.44 from the releases page.
Problems
If you encounter any issues when installing or starting Anki, please see the following links on the left.
Display Issues on macOS
eGPUs
If you experience blank screens when using an external graphics card on a Mac, you can ctrl+click on the Anki app, click "Get Info", and enable the "prefer eGPU" option.
Monitors with different resolutions
Please see this forum post.
Installing & Upgrading Anki on Linux
Requirements
The packaged version requires a recent 64 bit Intel/AMD Linux, and common libraries like libwayland-client and systemd. If you are on a different architecture, or a barebones Linux distro, you will not be able to use the packaged version, but you may be able to use the Python wheels instead.
On recent Ubuntu installations, please use the following before installing:
sudo apt install libxcb-xinerama0
If Anki fails to start after installing, you may be missing other libraries.
Installing
To install Anki:
- Download Anki from https://apps.ankiweb.net to your Downloads folder.
- Open a terminal and run the following commands, replacing the version number as appropriate.
tar xjf Downloads/anki-2.1.XX-linux.tar.bz2
cd anki-2.1.XX-linux
sudo ./install.sh
- You can then start Anki by typing 'anki' and hitting enter. If you encounter any issues, please see the links on the left.
Upgrading
If you were running Anki from a .deb/.rpm/etc in the past, please make sure to remove the system version before installing the package provided here.
If you're upgrading from a previous package, simply repeat the installation steps to upgrade to the latest version. Your user data will be preserved.
If you wish to downgrade to a previous version, please make sure you downgrade first.
Add-on Compatibility
Some add-ons have not been updated to support the latest Anki release yet. If an add-on you depend on has not been ported to the latest release yet, you may have more luck with 2.1.44 from the releases page.
Problems
If you encounter any issues when installing or starting Anki, please see the following links on the left.
Missing Libraries
If Anki fails to start, please run it from a terminal with anki. If it says a
library is missing, please install it and try again.
If it complains about no platform being available, please start Anki with the following command line, which should reveal a missing library:
QT_DEBUG_PLUGINS=1 anki
After installing the library with apt-get or similar, repeat the process. You may need to do this a few times before all required libraries are installed.
Display Issues on Linux
Hardware acceleration defaults to off on Linux. Enabling it in the preferences screen and restarting Anki may make Anki’s interface more responsive, but some users may experience missing menubars, blank windows or crashes when it is enabled.
You can adjust the display driver in Anki's Preferences screen. We recommend you try both settings, and see which one works best for you.
If you're unable to open Anki, you can adjust the driver in a terminal,
by writing either auto or software into
~/.local/share/Anki2/gldriver. Please note that if
you’re using nouveau, it is known to be buggy, and it only supports
software mode.
Blank Main Window
Some Linux distos have recently updated glibc. Recent versions break the web toolkit that Anki is built on, causing Anki's main window to appear blank.
There are two ways to work around this:
- Install the latest Qt6 version of Anki, which uses an updated toolkit:
- Use one of the workarounds posted on the following threads:
- https://forums.ankiweb.net/t/please-use-file-import-popup-on-startup/14695
- https://forums.ankiweb.net/t/setting-disable-seccomp-filter-sandbox-by-default-on-linux/13765
- https://forums.ankiweb.net/t/fedora-35-and-anki-2-1-47-updates-with-blank-anki-window/13431/11
Packages Distributed by Linux Distributions
We have seen a lot of issues caused by the customized versions of Anki distributed by Linux distributions:
- Anki depends on third-party libraries like Qt, and Linux distributions often substitute different versions of those libraries, without testing the impact of those changes.
- Sometimes the version of Anki they distribute is years old, or is an alpha/beta version not intended for stable release. Distributions will often disable the built-in update check as well, to prevent you from being notified of newer versions.
Compiled builds of Anki are available on https://apps.ankiweb.net. Most of the necessary libraries are included, and Anki has been tested to work with these library versions. If you're experiencing issues with your distro's version, the first thing you should try is switching to the latest packaged version we provide.
You are welcome to continue using your distro's version of Anki if you prefer, but if you run into any issues, you will need to report them to your distribution's package maintainers.
Anki not picking up GTK theme on Gnome/Linux
You can work around this issue by explicitly telling Anki what the GTK theme is. Run the following commands in a terminal:
theme=$(gsettings get org.gnome.desktop.interface gtk-theme)
echo "gtk-theme-name=$theme" >> ~/.gtkrc-2.0
echo "export GTK2_RC_FILES=$HOME/.gtkrc-2.0" >> ~/.profile
Then log out and log back into your computer, and Anki should pick up the GTK theme.
Wayland
From Anki 2.1.48, you can force Anki to use Wayland by defining ANKI_WAYLAND=1 before starting Anki. Wayland may give you better rendering across multiple displays, but it is currently off by default, due to the following issues:
- On some distros, Windows are rendered without borders.
- Bringing windows to the front is not possible, so for example, clicking on Add to reveal an existing Add Cards window will not work.
Input Methods on Linux
Fcitx
The standard Anki build includes fcitx support, but it may not work on all distributions. If you are unable to use fcitx, you may want to run Anki from Python wheels instead.
시작하기
설치 및 업그레이드
본인의 OS에 맞는 문서를 참고하여 주세요:
영상
Anki에 대하여 빠른 설명을 보고 싶으시면, 아래의 영상들을 참고하여 주세요. 몇몇 영상은 이전 버전의 Anki를 기준으로 제작되었지만, 개념은 같습니다.
만약 현재 국가에서 유튜브를 사용할 수 없으면, 영상 다운로드 를 대신 이용할 수 있습니다.
주요 개념
카드
질문과 답의 쌍을 카드 라고 부릅니다. 이것은, 한쪽에는 질문이, 뒷면에는 답이 있는
종이 플래시 카드에 근거하고 있습니다. Anki에서 카드는 실제 카드처럼 보이지 않습니다.
기본적으로 질문을 표시한 상태로 답을 같이 보여줍니다. 예를 들어,
기초 화학을 공부하고 있을 때 이런 질문을 볼 수 있을 겁니다.
Q: 산소의 원소 기호는?
생각해 보고 답을 O로 정한 후 답 보기 버튼을 누르면,
Anki는 다음과 같이 표시해줄 것입니다:
Q: 산소의 원소 기호는?
A: O
그것이 옳다는 것을 확인한 후 Anki에게 얼마나 잘 기억하고 있는지 말하면, Anki는 다음에 보여줄 시간을 선택할 것입니다.
뭉치(Decks)
뭉치 는 카드의 그룹입니다. 카드를 다른 뭉치에 배치하여, 모든 카드를 공부하는 대신
카드 뭉치의 일부를 학습합니다. 각각의 뭉치는 새로 학습할 카드수, 얼마나 후에 카드를
다시 학습할 것인지 등을 설정할 수 있습니다.
뭉치는 다른 뭉치를 포함할 수 있으며, Anki는 ::을 통하여 뭉치안의 뭉치를 구별합니다.
예시로, 영어::일상영단어라는 뭉치는 영어뭉치안에 포함된 일상영단어뭉치를 뜻합니다.
영어::일상영단어를 선택하면 일상영단어에 포함된 단어만 학습할 수 있고,
영어를 선택하면 영어뭉치내의 모든 단어(일상영단어를 포함하는) 단어를 학습할 수 있습니다.
위와같이 뭉치를 사용하고 싶으면, 뭉치의 이름을 ::을 사용하여 표현하거나, 뭉치목록에서
드래그&드롭으로 중첩시킬 수 있습니다. 이와같이 중첩된 뭉치를 자식뭉치 라고 하고, 자식뭉치의
상위에 있는 뭉치를 부모뭉치라고 부릅니다.
Anki는 기본이라는 뭉치로 시작합니다. 어떠한 뭉치에도 속하지 않은 카드는, 이곳으로 들어갑니다.
기본뭉치에 카드가 없거나 다른 뭉치가 추가된 경우에는 Anki는 기본뭉치를 숨깁니다.
또는 이 뭉치의 이름을 바꾸어 다른 카드에 사용할 수도 있습니다.
뭉치는 "음식 단어" 나 "레슨 1"과 같은 다양한 카테고리의 카드를 정리하는데 적합합니다. 이에 대한 자세한 내용은 뭉치를 적절하게 사용하기 섹션을 참고하여 주세요.
덱이 표시되는 카드 순서에 미치는 영향에 대해서는, 표기 순서 섹션을 참조하십시오.
노트 & 필드
플래시 카드를 만들때는, 하나의 카드보다는 여러장의 카드를 만드는 것이 바람직합니다.
예를들어 일본어를 배우고 있을때 こんにちわ(곤니치와)가 안녕을 뜻하는 것을 학습하기 위해
こんにちわ(곤니치와)를 보여주고 안녕을 기억하도록 하는 카드와,
안녕을 보여주고 こんにちわ(곤니치와)를 기억하도록 하는 카드를 만들 수 있습니다.
하나는 외국어를 인식하는 능력을 테스트하고, 다른 하나는 외국어 단어를 생성하는 능력을
테스트하는 것입니다.
종이 플래시카드를 이용하는 경우에는 이를 위해서 카드마다 한번씩 총 2번을 작성하는 방법밖에 없습니다. 하지만 플래시 카드 프로그램은 앞면과 뒷면을 뒤집는 기능을 제공함으로써 더욱 쉽게 만들도록 도와줍니다. 이는 종이 플래시카드를 개선한 것이지만, 두가지 단점이 존재합니다.
-
이러한 프로그램은 인식과 생성의 성과를 개별적으로 추적하지 않기 때문에 카드는 최적의 시간에 표시되지 않는 경향이 있습니다. 즉, 원하는 것보다 더 많은 것을 잊거나 필요한 것보다 더 많이 공부하게 됩니다.
-
이러한 방식은 질문과 대답이 완전히 동일할때만 정상적으로 동작합니다. 예를 들어 각 카드의 뒷면에 추가 정보를 표시할 수 없습니다.
Anki는 카드를 분활함으로써 이러한 문제를 해결하였습니다. Anki에 각 카드의 형태를 설정하면, 카드 추가 및 업데이트시 Anki 는 자동으로 학습할 카드목록을 업데이트 합니다.
우리가 일본어 단어를 학습하고 있고 각 카드의 뒷면에 해당하는 페이지 번호를 포함하고 싶다고 다음과 같이 상상하여 보세요:
Q: こんにちわ
A: 안녕
   페이지 #12
외국어 단어를 생성하는 능력을 테스트하는 카드:
Q: 안녕
A: こんにちわ
   페이지 #12
이 예제에서는 3개의 정보가 있습니다: 일본어, 한국어, 페이지. 만약 이 정보를 합치면 다음과 같이 됩니다:
일본어: こんにちわ
한국어: 안녕
페이지: 12
Anki에서는 이러한 정보를 노트라고 하며 각각의 정보를 필드라고 합니다.
이 노트에는 3가지 필드가 있습니다: 일본어, 한국어, 페이지
필드를 추가 및 편집하려면 노트를 추가하거나 편집하는 동안 필드...버튼을 클릭합니다.
필드에 관한 자세한 설명은 필드 커스터마이징 섹션을 참고하세요.
카드 타입
Anki가 노트를 바탕으로 카드를 만들기 위해서는 각 카드의 앞면 또는 뒷면에 어떤 정보를를 표시해야 하는지 템플릿을 제공해야 합니다. 이 템플릿을 '노트 타입'이라고 합니다. 각 노트 타입에는 하나 이상의 카드 유형이 있을 수 있습니다. 노트를 추가하면 Anki는 각 카드 유형에 대해 하나의 카드를 만듭니다.
각 카드 유형에는 질문용과 답변용 두 개의 '템플릿'이 있습니다. 아래의 일본어 예에서는 인식 카드를 다음과 같이 표시하려고 했습니다.
Each card type has two 'templates', one for the question and one for the answer. In the above French example, we wanted the recognition card to look like this:
Q: Bonjour
A: Hello
   Page #12
To do this, we can set the question and answer templates to:
Q: {{French}}
A: {{English}}<br>
   Page #{{Page}}
By surrounding a field name in double curly brackets, we tell Anki to replace that section with the actual information in the field. Anything not surrounded by curly brackets remains the same on each card. (For instance, we don’t have to type “Page #” into the Page field when adding material – it’s added automatically to every card.) <br> is a special code that tells Anki to move to the next line; more details are available in the templates section.
The production card templates work in a similar way:
Q: {{English}}
A: {{French}}<br>
   Page #{{Page}}
Once a card type has been created, every time you add a new note, a card will be created based on that card type. Card types make it easy to keep the formatting of your cards consistent and can greatly reduce the amount of effort involved in adding information. They also mean Anki can ensure related cards don’t appear too close to each other, and they allow you to fix a typing mistake or factual error once and have all the related cards updated at once.
To add and edit card types, click the “Cards…” button while adding or editing notes. For more information on card types, please see the Cards and Templates section.
Note Types
Anki allows you to create different types of notes for different material. Each type of note has its own set of fields and card types. It’s a good idea to create a separate note type for each broad topic you’re studying. In the above French example, we might create a note type called “French” for that. If we wanted to learn capital cities, we could create a separate note type for that as well, with fields such as “Country” and “Capital City”.
When Anki checks for duplicates, it only compares other notes of the same type. Thus if you add a capital city called “Orange” using the capital city note type, you won’t see a duplicate message when it comes time to learn how to say “orange” in French.
When you create a new collection, Anki automatically adds some standard note types to it. These note types are provided to make Anki easier for new users, but in the long run it’s recommended you define your own note types for the content you are learning. The standard note types are as follows:
Basic Has Front and Back fields, and will create one card. Text you enter in Front will appear on the front of the card, and text you enter in Back will appear on the back of the card.
Basic (and reversed card)
Like Basic, but creates two cards for the text you enter: one from
front→back and one from back→front.
Basic (optional reversed card) This is a front→back card, and optionally a back→front card. To do this, it has a third field called “Add Reverse.” If you enter any text into that field, a reverse card will be created. More information about this is available in the Cards and Templates section.
Basic (type in the answer) This is essentially Basic, with an extra text box on the front where you can type your answer in, after flipping to the back your input would be checked and compared with the answer. More information is available in the Checking Your Answer section.
Cloze
A note type which makes it easy to select text and turn it into a cloze
deletion (e.g., “Man landed on the moon in […]” → “Man landed on the
moon in 1969”). More information is available in the cloze
deletion section.
To add your own note types and modify existing ones, you can use Tools → Manage Note Types from the main Anki window.
Notes and note types are common to your whole collection rather than limited to an individual deck. This means you can use many different types of notes in a particular deck, or have different cards generated from a particular note in different decks. When you add notes using the Add window, you can select what note type to use and what deck to use, and these choices are completely independent of each other. You can also change the note type of some notes after you’ve already created them.
Collection
Your 'collection' is all the material stored in Anki – your cards, notes, decks, note types, deck options, and so on.
Shared Decks
You can watch a video about Shared Decks and Review Basics on YouTube.
The easiest way to get started with Anki is to download a deck of cards someone has shared:
-
Click the “Get Shared” button at the bottom of the deck list.
-
When you’ve found a deck you’re interested in, click the “Download” button to download a deck package.
-
Double-click on the downloaded package to load it into Anki, or File→Import it.
Please note that it’s not currently possible to add shared decks directly to your AnkiWeb account. You need to import them with the desktop program, then synchronize to upload them to AnkiWeb.
Creating your own deck is the most effective way to learn a complex subject. Subjects like languages and the sciences can’t be understood simply by memorizing facts — they require explanation and context to learn effectively. Furthermore, inputting the information yourself forces you to decide what the key points are, leading to a better understanding.
If you are a language learner, you may be tempted to download a long list of words and their translations, but this won’t teach you a language any more than memorizing scientific equations will teach you astrophysics. To learn properly, you need textbooks, teachers, or exposure to real-world sentences.
Do not learn if you do not understand.
--SuperMemo
Most shared decks are created by people who are learning material outside of Anki – from textbooks, classes, TV, etc. They select the interesting points from what they learn and put them into Anki. They make no effort to add background information or explanations to the cards, because they already understand the material. So when someone else downloads their deck and tries to use it, they’ll find it very difficult as the background information and explanations are missing.
That is not to say shared decks are useless – simply that for complex subjects, they should be used as a 'supplement' to external material, not as a 'replacement' for it. If you’re studying textbook ABC and someone has shared a deck of ideas from ABC, that’s a great way to save some time. And for simple subjects that are basically a list of facts, such as capital city names or pub quiz trivia, you probably don’t need external material. But if you attempt to study complex subjects without external material, you will probably meet with disappointing results.
Studying
- Decks
- Study Overview
- Questions
- Learning/Relearning Cards
- Review Cards
- Due Counts
- Fuzz Factor
- Editing and More
- Display Order
- Siblings and Burying
- Keyboard Shortcuts
- Falling Behind
When you have found a deck you like or entered some notes in, it’s time to start studying.
Decks
Study in Anki is limited to the currently selected deck as well as any subdecks it contains.
On the decks screen, your decks will be displayed in a list. There are three columns. 'New' is the number of new cards that are ready to be learnt that day. The second column shows the number of cards currently in learning. 'Due' is the count of waiting reviews.
When you click on a deck, it will become the 'current deck', and Anki will change to the study screen. You can return to the deck list to change the currently selected deck at any time by clicking on “Decks” at the top of the main window. (You can also use the Study Deck action in the menu to select a new deck from the keyboard, or you can press the s key to study the currently selected deck.)
You can click the gears button to the right of a deck to rename or delete a deck, change its options, or export it.
Study Overview
After clicking on a deck to study, you’ll see a screen that shows you how many cards are due today. This is called the 'deck overview' screen. The cards are split into three types:
-
New refers to cards that you have downloaded or entered in, but have never been studied before.
-
Learning refers to cards that were seen for the first time recently, and are still being learnt.
-
To Review refers to cards that were previously learnt, and now need to be reviewed so you don’t forget them.
To start a study session, click the Study Now button. Anki will proceed to show you cards until the cards to be shown for the day have run out.
While studying, you can return to the overview by pressing the s key on your keyboard.
Questions
When a card is shown, only the question is shown at first. After thinking about the answer, either click the Show Answer button, or press the spacebar. The answer will then be shown. It’s okay if it takes you a little while to recall the answer, but as a general rule if you can’t answer within about 10 seconds, it’s probably better to give up and show the answer than keep struggling to remember.
When the answer is shown, you should compare the answer you thought of with the answer which is shown and tell Anki how well you remembered. If you don’t trust yourself to compare your answer accurately, you can ask Anki to prompt you to type in the answer rather than just showing it to you.
Learning/Relearning Cards
When learning new cards, or when relearning cards that you have forgotten, Anki will show you the cards one or more times to help you memorize them. Each time is called a 'learning step'. By default there are two steps: 1 minute and 10 minutes. You can change the number of steps and the delays between them in the deck options.
There are four rating buttons when learning:
Again moves the card back to the first step.
Hard repeats the current step after the first step, and is the average of Again and Good on the first step.
Good moves the card to the next step. If the card was on the final step, the card is converted into a review card (it 'graduates'). By default, once the card has reached the end of the learning steps, the card will be shown again the next day, then at increasingly long delays (see the next section).
Easy immediately converts the card into a review card, even if there were steps remaining. By default, the card will be shown again 4 days later, and then at increasingly long delays. In the v1 scheduler, the "Easy" button will not be shown if you are in relearning mode as it would give the same interval as “Good.” With the v2 scheduler+, when cards are in relearning, the "Easy" button boosts the interval by 1 day.
When cards are seen for the first time, they start at step one. This means answering Good on a card for the first time will show it one more time in 10 minutes, and the initial 1 minute step will be skipped. If you push Again, though, the card will come back in 1 minute.
You can use the 1, 2, 3 and 4 keys on your keyboard to select a particular button, where 1 is Again. Pressing Space or Enter will select Good.
If there are no other cards to show you, Anki will show learning cards again even if their delay has not elapsed completely. If you’d prefer to wait the full learning delay, you can change this behaviour in Preferences>Scheduling>Learn Ahead Limit.
Review Cards
When a card has been previously learnt and is ready to be reviewed again, there are four buttons to rate your answer:
Again marks your answer as incorrect and asks Anki to show the card more frequently in the future. The card is said to have 'lapsed'. Please see the lapses section for more information about how lapsed reviews are handled.
Hard by default, shows the card at a slightly longer delay than last time, and tells Anki to show the card more frequently in the future.
Good tells Anki that the last delay was about right, and the card easiness doesn’t need to be adjusted down or up. At the default starting easiness, the card will be shown again approximately 2 1/2 times longer than the previous time, so if you had waited 10 days to see the card previously, the next delay would be about 25 days.
Easy tells Anki you found the delay too short. The card will be scheduled further into the future than 'Good', and Anki will schedule the card less frequently in the future. Because 'Easy' rapidly increases the delay, it’s best used for only the easiest of cards. Usually you should find yourself answering 'Good' instead.
As with learning cards, you can use 1, 2, 3 and 4 on the keyboard to select an answer. Pressing the spacebar or Enter will select Good.
See Deck Options and the FAQ to learn more about how the algorithm works.
Due Counts
When only the question is shown, Anki shows three numbers like 12 + 34 + 56 at the bottom of the screen. These represent the new cards, cards in learning, and cards to review. If you’d prefer not to see the numbers, you can turn them off in Anki’s preferences.
In the v1 scheduler, the numbers count reviews needed to finish all the cards in that queue, not the number of cards. If you have multiple steps configured for lapsed cards, the number will increase by more than one when you fail a card, since that card needs to be shown several times.
From the v2 scheduler, the numbers count cards, so the number will always increase by one regardless of the steps remaining.
When the answer is shown, Anki shows an estimate of the next time a card will be shown above each button. If you’d prefer not to see the estimates, you can disable them in Anki’s preferences.
Fuzz Factor
When you select an ease button on a review card, Anki also applies a small amount of random “fuzz” to prevent cards that were introduced at the same time and given the same ratings from sticking together and always coming up for review on the same day. This fuzz will appear on the answer buttons when the v3 scheduler is enabled, so if you are using a previous version and you’re noticing a slight discrepancy between what you select and the intervals your cards actually get, this is probably the cause.
Learning cards are also given up to 5 minutes of extra delay so that they don’t always appear in the same order, but answer buttons won't reflect that. It is not possible to turn this feature off.
Editing and More
You can click the Edit button in the bottom left to edit the current note. When you finish editing, you’ll be returned to study. The editing screen works very similarly to the add notes screen.
At the bottom right of the review screen is a button labeled More. This button provides some other operations you can do on the current card or note:
-
Flag Card: Adds a colored marker to the card, or toggles it off. Flags will appear during study, and you can search for flagged cards in the Browse screen. This is useful when you want to take some action on the card at a later date, such as looking up a word when you get home. If you're using Anki 2.1.45+, you can also rename flags from the browser.
-
Bury Card / Note: Hides a card or all of the note’s cards from review until the next day. (If you want to unbury cards before then, you can click the “unbury” button on the deck overview screen.) This is useful if you cannot answer the card at the moment or you want to come back to it another time. Burying can also happen automatically for cards of the same note.
With the old scheduler, if cards were in learning when they are buried, they are moved back to the new card queue or review queue prior to being buried.
With the 2.1 scheduler, however, burying cards does not reset a card's learning steps.
-
Set Due Date: Put cards in the review queue, and make them due on a certain date.
-
Suspend Card / Note: Hides a card or all of the note’s cards from review until they are manually unsuspended (by clicking the suspend button in the browser). This is useful if you want to avoid reviewing the note for some time, but don’t want to delete it. With the old scheduler, if cards were in learning when they are suspended, they are moved back to the new card queue or review queue prior to being suspended.
With the 2.1 scheduler, however, suspending cards does not reset a card's learning steps.
-
Options: Edit the options for the current deck.
-
Card Info: Displays statistical information about the card.
-
Mark Note: Adds a “marked” tag to the current note, so it can be easily found in the browser. This is similar to flagging individual cards, but works with a tag instead, so if the note has multiple cards, all cards will appear in a search for the marked tag. Most users will want to use flags instead.
-
Delete Note: Deletes the note and all of its cards.
-
Replay Audio: If the card has audio on the front or back, play it again.
-
Pause Audio: Pauses the audio if it is playing.
-
Audio -5s / +5s: Jump backwards / forward 5 seconds in the currently playing audio.
-
Record Own Voice: Record from your microphone for the purposes of checking your pronunciation. This recording is temporary and will go away when you move to the next card. If you want to add audio to a card permanently, you can do that in the edit window.
-
Replay Own Voice: Replay the previous recording of your voice (presumably after showing the answer).
Display Order
Studying will show cards from the selected deck and any decks it contains. Thus, if you select your “French” deck, the subdecks “French::Vocab” and “French::My Textbook::Lesson 1” will be shown as well.
The way Anki fetches cards from the decks depends on the algorithm used:
-
With the v1 scheduler, when a deck has subdecks, the cards will appear from each deck in turn.
-
With the v2 scheduler, when a deck has subdecks, reviews are taken from all children decks at once. The review limit of the child decks is ignored - only the limit of the deck you clicked on applies.
-
With the v3 scheduler each child deck's limit is also enforced, and you do not need to see the cards in deck order either. See the deck options section of the manual for more information.
By default, for new cards, Anki fetches cards from the decks in alphabetical order. So in the above example, you would get cards first from “French”, then “My Textbook”, and finally “Vocab”. You can use this to control the order cards appear in, placing high priority cards in decks that appear higher in the list. When computers sort text alphabetically, the “-” character comes before alphabetical characters, and “~” comes after them. So you could call the deck “-Vocab” to make them appear first, and you could call the other deck “~My Textbook” to force it to appear after everything else.
New cards and reviews are fetched separately, and Anki won’t wait until both queues are empty before moving on to the next deck, so it’s possible you’ll be exposed to new cards from one deck while seeing reviews from another deck, or vice versa. If you don’t want this, click directly on the deck you want to study instead of one of the parent decks.
Since cards in learning are somewhat time-critical, they are fetched from all decks at once and shown in the order they are due.
To control the order reviews from a given deck appear in, or change new cards from ordered to random order, please see the deck options. For more fine-grained ordering of new cards, you can change the order in the browser.
Siblings and Burying
Recall from the basics that Anki can create more than one card for each thing you input, such as a front→back card and a back→front card, or two different cloze deletions from the same text. These related cards are called 'siblings'.
When you answer a card that has siblings, Anki can prevent the card’s siblings from being shown in the same session by automatically 'burying' them. Buried cards are hidden from review until the clock rolls over to a new day or you manually unbury them using the “Unbury” button that’s visible at the bottom of the deck overview screen. Anki will bury siblings even if the siblings are not in the same deck (for instance, if you use the deck override feature).
You can enable burying from the deck options screen - there are separate settings for new cards and reviews.
Anki will only bury siblings that are new or review cards. It will not hide cards in learning, as time is of the essence for those cards. On the other hand, when you study a learning card, any new/review siblings will be buried.
Note: A card cannot be buried and suspended at the same time. Suspending a buried card will unbury it. Burying a suspended card does not work on Anki 2.1.49+, whereas on earlier versions, it will unsuspend the card.
Keyboard Shortcuts
Most of the common operations in Anki have keyboard shortcuts. Most of them are discoverable in the interface: menu items list their shortcuts next to them, and hovering the mouse cursor over a button will generally show its shortcut in a tooltip.
When studying, either Space or Enter will show the answer. When the answer is shown, you can use Space or Enter to select the Good button. You can use the 1-4 keys to select a specific ease button. Many people find it convenient to answer most cards with Space and keep one finger on 1 for when they forget.
The "Study Deck" item in the Tools menu allows you to quickly switch to a deck with the keyboard. You can trigger it with the '/' key. When opened, it will display all of your decks and show a filter area at the top. As you type characters, Anki will display only decks matching the characters you type. You can add a space to separate multiple search terms, and Anki will show only decks that match all the terms. So “ja 1” or “on1 ja” would both match a deck called “Japanese::Lesson1”.
Falling Behind
If you fall behind in your reviews, Anki will prioritize cards that have been waiting the longest. It does this by taking the cards that have been waiting the longest and showing them to you in a random order up until your daily review limit. This ordering ensures that no cards will be left waiting indefinitely, but it means that if you introduce new cards, their reviews won’t appear until you’ve gotten through your backlog.
If you wish to change the order of the overdue reviews, you can do so by creating a filtered deck.
When you answer cards that have been waiting for a while, Anki factors in that delay when determining the next time a card should be shown. Please see the section on Anki’s spaced-repetition algorithm for more information.
Adding/Editing
- Adding Cards and Notes
- Adding a Note Type
- 필드 커스터마이징
- Changing Deck / Note Type
- Organizing Content
- Editing Features
- Cloze Deletion
- Inputting Foreign Characters and Accents
- Unicode Normalization
Adding Cards and Notes
Recall from the basics that in Anki we add notes rather than cards, and Anki creates cards for us. Click 'Add' in the main window, and the Add Notes window will appear.
The top left of the window shows us the current note type. If it does not say "Basic," then you may have added some note types when you downloaded a shared deck. The text below assumes that "Basic" is selected.
The top right of the window shows us the deck cards will be added to. If you would like to add cards to a new deck, you can click on the deck name button and then click "Add".
Below the note type, you'll see some buttons, and an area labelled "Front" and "Back". Front and Back are called 'fields', and you can add, remove, and rename them by clicking the "Fields…" button above.
Below the fields is another area labelled "Tags". Tags are labels that you can attach to your notes, to make organizing and finding notes easier. You can leave the tags blank if you wish, or add one or more of them. Tags are separated by a space. If the tags area says
vocab check_with_tutor
…then the note you add would have two tags.
When you have entered text into the front and back, you can click the "Add" button or press Ctrl+Enter (Command+Enter on a Mac) to add the note to your collection. When you do so, a card will be created as well, and placed into the deck you chose. If you would like to edit a card you added, you can click the history button to search for a recently added card in the browser.
For more information on the buttons between the note type and the fields, please see the editor section.
Duplicate Check
Anki checks the first field for uniqueness, so it will warn you if you enter two cards with a Front field of "apple" (for example). The uniqueness check is limited to the current note type, so if you're studying multiple languages, two cards with the same Front would not be listed as duplicates as long as you had a different note type for each language.
Anki does not check for duplicates in other fields automatically for efficiency reasons, but the browser has a "Find Duplicates" function, which you can run periodically.
Effective Learning
Different people like to review in different ways, but there are some general concepts to keep in mind. An excellent introduction is this article on the SuperMemo site. In particular:
-
Keep it simple: The shorter your cards, the easier they are to review. You may be tempted to include lots of information "just in case," but reviews will quickly become painful.
-
Don't memorize without understanding: If you are studying a language, try to avoid large lists of words. The best way to learn languages is in context, which means seeing those words used in a sentence. Likewise, imagine you're studying a computer course. If you attempt to memorize the mountain of acronyms, you'll find it very difficult to make progress. But if you take the time to understand the concepts behind the acronyms, learning the acronyms will become a lot easier.
Adding a Note Type
While basic note types are sufficient for simple cards with only a word or phrase on each side, as soon as you find yourself wanting to include more than one piece of information on the front or back, it's better to split that information up into more fields.
You may find yourself thinking "but I only want one card, so why can't I just include the audio, a picture, a hint, and the translation in the Front field?" If you'd prefer to do that, that's fine. But the disadvantage of that approach is that all the information is stuck together. If you wanted to sort your cards by the hint, you wouldn't be able to do that as it is mixed in with the other content. You also wouldn't be able to do things such as moving the audio from the front to the back, except by laboriously copying and pasting it for every note. By keeping content in separate fields, you make it much easier to adjust the layout of your cards in the future.
To create a new type of note, choose Tools → Manage Note Types from the main Anki window. Then click "Add" to add a new type of note. You will now see another screen that gives you a choice of note types to base the new type on. "Add" means to base the newly created type on one that comes with Anki. "Clone" means to base the newly created type on one that is already in your collection. For instance, if you'd created a French vocab type already, you might want to clone that when creating a German vocab type.
After choosing OK, you will be asked to name the new type. The subject material that you are studying is a good choice here – things like "Japanese", "Trivia", and so on. Once you have chosen a name, close the Note Types window, and you will return to the adding window.
필드 커스터마이징
To customize fields, click the "Fields…" button when adding or editing a note, or while the note type is selected in the Manage Note Types window.
You can add, remove, or rename fields by clicking the appropriate buttons. To change the order in which the fields appear in this dialog and the add notes dialog, you can use the reposition button, which asks for the numerical position you want the field to have. So if you want to change a field to be the new first field, enter "1".
Do not use 'Tags', 'Type', 'Deck', 'Card', or 'FrontSide' as field names, as they are special fields and will not work properly.
The options at the bottom of the screen allow you to edit various properties of the fields to be used when adding and editing the cards. This is not where you customize what appears on your cards when reviewing; for that, please see templates.
Editing Font allows you to customize the font and size used when editing notes. This is useful if you want to make unimportant information smaller, or increase the size of foreign characters which are hard to read. The changes you make here do not affect how cards appear when reviewing: to do that, please see the templates section. If you have enabled the "type in the answer" function, however, the text you type will use the font size defined here. (For information about how to change the actual font face when typing the answer, please see the checking your answer section.)
Sort by this field… tells Anki to show this field in the Sort Field column of the browser. You can use this to sort cards by that field. Only one field can be the sort field at once.
Reverse text direction is useful if you are studying languages that display text from right to left (RTL), such as Arabic or Hebrew. This setting currently only controls editing; to make sure the text displays correctly during review, you'll need to adjust your template.
After you have added fields, you will probably want to add them to the front or back of your cards. For more information on that, please see the templates section.
Changing Deck / Note Type
While adding, you can click on the top left button to change note type, and the top right button to change deck. The window that opens up will not only allow you to select a deck or note type, but also to add new decks or manage your note types.
Organizing Content
Using Decks Appropriately
Decks are designed to divide your content up into broad categories that you wish to study separately, such as English, Geography, and so on. You may be tempted to create lots of little decks to keep your content organized, such as "my geography book chapter 1", or "food verbs", but this is not recommended, for the following reasons:
-
Lots of little decks may mean you end up seeing cards in a recognizable order. On older scheduler versions, new cards can only be introduced in deck order. And if you were planning to click on each deck in turn (which is slow), you will end up seeing all the "chapter 1" or "food verb" reviews together. This makes it easier to answer the cards, as you can guess them from the context, which leads to weaker memories. When you need to recall the word or phrase outside Anki, you won't always have the luxury of being shown related content first!
-
While less of a problem than it was in earlier Anki versions, adding hundreds of decks may cause slowdowns, and very large deck trees with thousands of items can actually break the display of the deck list in Anki versions before 2.1.50.
Using Tags
Instead of creating lots of little decks, it's a better idea to use tags and/or fields to classify your content. Tags are a useful way to boost search results, find specific content, and keep your collection organized. There are many ways of using tags and flags effectively, and thinking in advance about how you want to use them will help you decide what will work best for you.
Some people prefer using decks and subdecks to keep their cards organized, but using tags have a big advantage over decks for that: you can add several tags to a single note, but a single card can only belong to one deck, which makes tags a more powerful and flexible categorization system than decks in most cases. You can also organize tags in trees in the same way as you can do for decks.
For example, instead of creating a "food verbs" deck, you could add those cards to your main language study deck, and tag the cards with "food" and "verb". Since each card can have multiple tags, you can do things like search for all verbs, or all food-related vocabulary, or all verbs that are related to food.
You can add tags from the Edit window and from the Browser, and you can also add, delete, rename, or organize tags there. Please note that tags work at note level, which means that when you tag a card that has siblings, all the siblings will be tagged as well. If you need to tag a single card, but not its siblings, you should consider using flags instead.
Using Flags
Flags are similar to tags, but they will appear during study in the review window, showing a colored flag icon on the upper right area of the screen. You can also search for flagged cards in the Browse screen, rename flags from the browser and create filtered decks from flagged cards, but unlike tags, a single card can have only one flag at a time. Another important difference is that flags work at card level, so flagging a card that have siblings won't have any effect on the card's siblings.
You can flag / unflag cards directly while in review mode (by pressing CTRL + 1-7 on Windows or CMD + 1-7 on Mac) and from the Browser.
The "Marked" Tag
Anki treats a tag called "marked" specially. There are options in the review screen and browse screen to add and remove the "marked" tag. The review screen will show a star when the current card's note has that tag. And cards are shown in a different color in the browse screen when their note is marked.
Note: Marking is mainly left around for compatibility with older Anki versions; most users will want to use flags instead.
Using Fields
For those who like to stay very organized, you can add fields to your
notes to classify your content, such as "book", "page", and so on. Anki
supports searching in specific fields, which means you can do a search
for "book:my book" page:63 and immediately find what you're looking
for.
Custom Study and Filtered Decks
Using custom study and filtered deck you can create temporary decks out of search terms. This allows you to review your content mixed together in a single deck most of the time (for optimum memory), but also create temporary decks when you need to focus on particular material, such as before a test. The general rule is that if you always want to be able to study some content separately, it should be in a normal deck; if you only occasionally need to be able to study it separately (for a test, when under a backlog, etc.), then filtered decks created from tags, flags, marks or fields are better.
Editing Features
The editor is shown when adding notes, editing a note during reviews, or browsing.
On the top left are two buttons, which open the fields and cards windows.
On the right are buttons that control formatting. Bold, italic and underline work like they do in a word processing program. The next two buttons allow you to subscript or superscript text, which is useful for chemical compounds like H2O or simple mathematical equations like x2.
The rubber eraser button clears any formatting in the currently selected text — including the colour of the text, whether the selected text is bold, etc.
The next three buttons allow creating lists, text alignment and text indent. Then, there are two buttons to allow you to change text colour.
The […] button is visible when a cloze note type is selected.
You can use the paper-clip button to select audio, images, and videos from your computer's hard drive and attach them to your notes. Alternatively, you can copy the media onto your computer's clipboard (for instance, by right-clicking an image on the web and choosing 'Copy Image') and paste it into the field that you want to place it in. For more information about media, please see the media section.
The microphone icon allows you to record from your computer's microphone and attach the recording to the note.
The Fx button shows shortcuts to add MathJax or LaTeX to your notes.
The </> button allows editing the underlying HTML of a field.
Anki 2.1.45+ supports adjusting sticky fields directly from the editing screen. If you click on the pin icon on the right of a field, Anki will not clear out the field's content after a note is added. If you find yourself entering the same content into multiple notes, you may find this useful. On previous Anki versions, sticky fields were toggled from the Fields screen.
Most of the buttons have shortcut keys. You can hover the mouse cursor over a button to see its shortcut.
When pasting text, Anki will keep most formatting by default. If you hold down the Shift key while pasting, Anki will strip most of the formatting. Under Preferences, you can toggle "Paste without shift key strips formatting" to modify the default behaviour.
Cloze Deletion
'Cloze deletion' is the process of hiding one or more words in a sentence. For example, if you have the sentence:
Canberra was founded in 1913.
…and you create a cloze deletion on "1913", then the sentence would become:
Canberra was founded in [...].
Sometimes sections that have been removed in this fashion are said to be 'occluded'.
For more information on why you might want to use cloze deletion, see Rule 5 here.
Anki provides a special cloze deletion type of note, to make creating clozes easy. To create a cloze deletion note, select the Cloze note type, and type some text into the "Text" field. Then drag the mouse over the text you want to hide to select it, and click the […] button. Anki will replace the text with:
Canberra was founded in {{c1::1913}}.
The "c1" part means that you have created one cloze deletion on the sentence. You can create more than one deletion if you'd like. For example, if you select Canberra and click […] again, the text will now look like:
{{c2::Canberra}} was founded in {{c1::1913}}.
When you add the above note, Anki will create two cards. The first card will show:
Canberra was founded in [...].
…on the question, with the full sentence on the answer. The other card will have the following on the question:
[...] was founded in 1913.
You can also elide multiple sections on the same card. In the above example, if you change c2 to c1, only one card would be created, with both Canberra and 1913 hidden. If you hold down Alt (Option on a Mac) while creating a cloze, Anki will automatically use the same number instead of incrementing it.
Cloze deletions don't need to fall on word boundaries, so if you select "anberra" rather than "Canberra" in the above example, the question would appear as "C[…] was founded in 1913", giving you a hint.
You can also give yourself hints that don't match the text. If you replace the original sentence with:
Canberra::city was founded in 1913
…and then press […] after selecting "Canberra::city", Anki will treat the text after the two colons as a hint, changing the text into:
{{c1::Canberra::city}} was founded in 1913
When the card comes up for review, it will appear as:
[city] was founded in 1913.
For information on testing your ability to type in a cloze deletion correctly, please see the section on typing answers.
Please note that overlapping clozes are not supported. For example, the following field is invalid:
{{c1::Canberra was {{c2::founded}}}} in 1913
If you need to create clozes from overlapping text, add another Text field to your cloze, add it to the template, and then when creating notes, paste the text into two separate fields, like so:
Text1 field: {{c1::Canberra was founded}} in 1913

Text2 field: {{c2::Canberra}} was founded in 1913
The default cloze note type has a second field called Extra, that is shown on the answer side of each card. It can be used for adding some usage notes or extra information.
The cloze note type is treated specially by Anki, and cannot be created based on a regular note type. If you wish to customize it, please make sure to clone the existing Cloze type instead of another type of note. Things like formatting can be customized, but it is not possible to add extra card templates to the cloze note type.
Inputting Foreign Characters and Accents
All modern computers have built-in support for typing accents and foreign characters, and multiple ways to go about it. The method we recommend is by using a keyboard layout for the language you want to learn.
Languages with a separate script like Japanese, Chinese, Thai, and so on, have their own layouts specific to that language.
European languages that use accents may have their own layout, but can often by typed on a generic "international keyboard" layout. These work by typing the accent, then the character you want accented - e.g. an apostrophe (') then the letter a (a) gives á.
To add the international keyboard on Windows machines, please see http://www.techlanguage.com/tips/us_international.html
To add it on Macs, please see http://www.macworld.com/article/1147039/os-x/accentinput.html
Keyboards for a specific language are added in a similar way, but we can not cover them all here. For more information, please try searching Google for "input Japanese on a mac", "type Chinese on Windows 10", and so on.
If you are learning a right-to-left language, there are lots of other things to consider. Please see this page for more information.
The toolkit on which Anki is built has trouble dealing with a few input methods, such as holding down keys to select accented characters on macOS, and typing characters by holding down the Alt key and typing a numeric code on Windows.
Unicode Normalization
Text like á can be represented in multiple ways on a computer, such as
using a specific code for that symbol, or by using a standard a and then
another code for the accent on top. This causes problems when mixing input
from different sources, or using different computers - if your computer
handles keyboard input in one form, but the content is stored in a different
form, it will not match when searching, even though the end result appears
identical.
To ensure content can easily be found in searches, Anki normalizes the text to a standard form. For most users this process is transparent, but if you are studying certain material like archaic Japanese symbols, the normalization process can end up converting them to a more modern equivalent.
If you want character variants preserved, the following in the debug console will turn off normalization:
mw.col.conf["normalize_note_text"] = False
Any content added after that will remain untouched. The trade-off is that you may find it difficult to search for the content if you're switching between operating systems, or pasting content from mixed sources.
Card Templates
Card templates tell Anki which fields should appear on the front and back of your card, and control which cards will be generated when certain fields have text in them. By adjusting your card templates, you can alter the design and styling of many of your cards at once.
Card templates are covered in some of the intro videos:
The Templates Screen
You can modify card templates by clicking the "Cards..." button inside the editing screen.
For older Anki versions, on the top left is the front template, on the bottom left is the back template, and in between them is the card styling section. For Anki versions 2.1.28+ the front, back, and styling are no longer shown at the same time. You can switch between them with Ctrl+1, Ctrl+2, and Ctrl+3.
In Anki, templates are written in HTML, which is the language that web pages are written in. The styling section is CSS, which is the language used for styling web pages.
On the right is a preview of the front and back of the currently selected card. If you opened the window while adding notes, the preview will be based on the text you had typed into the Add Notes window. If you opened the window while editing a note, the preview will be based on the content of that note. If you opened the window from Tools → Manage Note Types, Anki will display each field’s name in parentheses in place of content.
At the top right of the window is an Options button that gives you options to rename or reorder the cards, as well as the following two options:
-
The 'Deck Override' option allows you to change the deck that cards generated from the current card type will be placed into. By default, cards are placed into the deck you provide in the Add Notes window. If you set a deck here, that card type will be placed into the deck you specified, instead of the deck listed in the Add Notes window. This can be useful if you want to separate cards into different decks (for instance, when studying a language, to put production cards in one deck and recognition cards in another). You can check which deck the cards are currently going to by choosing Deck Override again.
-
The 'Browser Appearance' option allows you to set different (perhaps simplified) templates for display in the Question and Answer columns of the browser; see browser appearance for more information.
Field Replacements
- Basic Replacements
- Newlines
- Text to Speech
- Special Fields
- Hint Fields
- Dictionary Links
- HTML Stripping
- Right To Left Text
- Media & LaTeX
- Checking Your Answer
Basic Replacements
The most basic template looks something like this:
{{Front}}
When you place text within curly brackets, Anki looks for a field by that name, and replaces the text with the actual content of the field.
Field names are case sensitive. If you have a field named Front,
writing {{front}} will not work properly.
Your templates are not limited to a list of fields. You can also include arbitrary text on your templates. For example, if you’re studying capital cities, and you’ve created a note type with a “Country” field, you might create a front template like this:
What's the capital city of {{Country}}?
The default back template will look something like this:
{{FrontSide}}

<hr id=answer>

{{Back}}
This means “show me the text that’s on the front side, then a divider line, and then the Back field”.
The 'id=answer' part tells Anki where the divider is between the question and the answer. This allows Anki to automatically scroll to the spot where the answer starts when you press 'show answer' on a long card (especially useful on mobile devices with small screens). If you don’t want a horizontal line at the beginning of the answer, you can use another HTML element such as a paragraph or div instead.
Newlines
Card templates are like web pages, which means a special command is required to create a new line. For example, if you wrote the following in the template:
one
two
In the preview, you’d actually see:
one two
To add a new line, you need to add a <br> code to the end of a line, like so:
one<br>
two
The br code stands for "(line) br(eak)".
The same applies for fields. If you want to display two fields, one on each line, you would use
{{Field 1}}<br>
{{Field 2}}
Text to Speech
This feature requires Anki 2.1.20, or AnkiMobile 2.0.56. AnkiDroid does not currently support this method.
To have Anki read the Front field in a US English voice, you can place the following in your card template:
{{tts en_US:Front}}
On Windows, macOS, and iOS, Anki will use the OS’s built in voices. On Linux, no voices are built in, but voices can be provided by add-ons, such as this one.
To see a list of all available languages/voices, place the following on your card template:
{{tts-voices:}}
If there are multiple voices that support your chosen language, you can specify desired voices in a list, and Anki will choose the first available voice. For example:
{{tts ja_JP voices=Apple_Otoya,Microsoft_Haruka:Field}}
This would use Otoya when on an Apple device, and Haruka when on a Windows PC.
Specifying a different speed is possible in some TTS implementations:
{{tts fr_FR speed=0.8:SomeField}}
Both speed and voices are optional, but the language must be included.
On a Mac, you can customize the available voices:
-
Open the System Preferences screen.
-
Click on Accessibility.
-
Click on Speech.
-
Click on the system voice dropdown, and choose Customize.
Some voices sound better than others, so experiment to choose the one you prefer. Please note that the Siri voice can only be used by Apple apps. Once you’ve installed new voices, you’ll need to restart Anki for the new voices to become available.
On Windows, some voices like Cortana can not be selected, as Microsoft does not make those voices available to other applications.
On a cloze note type, you can make Anki read only the elided sections
using the cloze-only filter, like so:
{{tts en_US:cloze-only:Text}}
The cloze-only filter is supported in Anki 2.1.29+ and AnkiMobile 2.0.65+.
Special Fields
There are some special fields you can include in your templates:
The note's tags: {{Tags}}

The type of note: {{Type}}

The card's deck: {{Deck}}

The card's subdeck: {{Subdeck}}

The type of card ("Forward", etc): {{Card}}

The content of the front template
(only valid in back template): {{FrontSide}}
FrontSide will not automatically play any audio that was on the front side of the card. If you wish to have the same audio play automatically on both the front and back of the card, you’ll need to manually include the audio fields on the back as well.
As with other fields, special field names are case sensitive - you must use
{{Tags}} rather than {{tags}} for example.
Hint Fields
It’s possible to add a field to the front or back of a card, but make it hidden until you explicitly show it. We call this a 'hint field'. Before adding a hint, please bear in mind that the easier you make it to answer a question in Anki, the less likely you are to remember that question when you encounter it in real life. Please have a read about the 'minimum information principle' on http://www.supermemo.com/articles/20rules.htm before proceeding.
First, you’ll need to add a field to store the hint in if you have not already. Please see the fields section if you’re not sure how to do this.
Assuming you’ve created a field called MyField, you can tell Anki to include it on the card but hide it by default by adding the following to your template:
{{hint:MyField}}
This will show a link labeled “show hint”; when you click it, the content of the field will be displayed on the card. (If MyField is empty, nothing will be shown.)
If you show the hint on the question and then reveal the answer, the
hint will be hidden again. If you want to have the hint always revealed
when the answer is shown, you will need to remove {{FrontSide}} from
your back template and manually add the fields you wish to appear.
It is not currently possible to use a hint field for audio — the audio will play regardless of whether you’ve clicked on the hint link.
If you want to customize the appearance or behaviour, you’ll need to implement the hint field yourself. We can not provide any support for doing so, but the following code should get you started:
{{#Back}}
<a class=hint href="#"
onclick="this.style.display='none';document.getElementById('hint4753594160').style.display='inline-block';return false;">
Show Back</a><div id="hint4753594160" class=hint style="display: none">{{Back}}</div>
{{/Back}}
Dictionary Links
You can also use field replacement to create dictionary links. Imagine you’re studying a language and your favourite online dictionary allows you to search for text using a web URL like:
http://example.com/search?q=myword
You could add an automatic link by doing the following in your template:
{{Expression}}

<a href="http://example.com/search?q={{Expression}}">check in dictionary</a>
The template above would allow you to search for each note’s expression by clicking on the link while reviewing. There is a caveat however, so please see the next section.
HTML Stripping
Like templates, fields are stored in HTML. In the dictionary link example above, if the expression contained the word "myword" without any formatting, then the HTML would be the same: "myword". But when you include formatting in your fields, extra HTML is included. If "myword" was bolded for example, the actual HTML would be "<b>myword</b>".
This can present a problem for things like dictionary links. In the above example, the dictionary link would end up being:
<a href="http://example.com/search?q=<b>myword</b>">check in dictionary</a>
The extra characters in the link would likely confuse the dictionary site, and you’re likely not to get any matches.
To solve this, Anki provides the ability to strip formatting from fields when they are replaced. If you prefix a field name with text:, Anki will not include any formatting. So a dictionary link that worked even with formatted text would be:
<a href="http://example.com/search?q={{text:Expression}}">check in dictionary</a>
Right To Left Text
If you’re using a language that reads from right to left, you’ll need to adjust the template like so:
<div dir=rtl>{{FieldThatHasRTLTextInIt}}</div>
Media & LaTeX
Anki does not scan templates for media references, because it is slow to do so. This has implications for including media on the template.
Static Sounds/Images
If you wish to include images or sounds on your cards that are the same for every card (eg, a company logo at the top of each card):
-
Rename the file so it starts with an underscore, eg "_logo.jpg". The underscore tells Anki that the file is used by the template and it should be exported when sharing the deck.
-
Add a reference to the media on your front or back template, like:
<img src="_logo.jpg">
Field References
Media references to fields are not supported. They may or may not display during review, and will not work when checking for unused media, importing/exporting, and so on. Examples that won’t work:
<img src="{{Expression}}.jpg">

[sound:{{Word}}]

[latex]{{Field 1}}[/latex]
Instead, you should include the media references in the field. Please see the importing section for more information.
Checking Your Answer
You can watch a video about this feature on YouTube.
The easiest way to check your answer is to click "Basic" at the top left of the card adding screen, and select "Basic (type in the answer)".
If you have downloaded a shared deck and would like to type in the answer with it, you can modify its card template. If it has a template like:
{{Native Word}}

{{FrontSide}}

<hr id=answer>

{{Foreign Word}}
To type in the foreign word and check if you are correct, you need to edit your front template so that it looks like this:
{{Native Word}}
{{type:Foreign Word}}
Note that we have added type: in front of the field we want to
compare. Since FrontSide is on the back of the card, the type answer box
will appear on the back as well.
When reviewing, Anki will display a text box where you can type in the answer, and upon hitting Enter or showing the answer, Anki will show you which parts you got right and which parts you got wrong. The text box’s font size will be the size you configured for that field (via the “Fields” button when editing).
This feature does not change how the cards are answered, so it’s still up to you to decide how well you remembered or not.
Only one typing comparison can be used on a card. If you add the above text multiple times, it will not work. It also only supports a single line, so it is not useful for comparing against a field that is comprised on multiple lines.
Anki uses a monospaced font for the answer comparison so that the “provided” and “correct” sections line up. If you wish to override the font for the answer comparison, you can put the following at the bottom of your styling section:
code#typeans { font-family: "myfontname"; }
Which will affect the following HTML for the answer comparison:
<code id=typeans>...</code>
Advanced users can override the default type-answer colors with the css classes 'typeGood', 'typeBad' and 'typeMissed'. AnkiMobile supports 'typeGood' and 'typeBad', but not 'typeMissed'.
If you wish to override the size of the typing box and don’t want to
change the font in the Fields dialog, you can override the default
inline style using !important, like so:
#typeans { font-size: 50px !important; }
It is also possible to type in the answer for cloze deletion cards. To
do this, add {{type:cloze:Text}} to both the front and back
template, so the back looks something like this:
{{cloze:Text}}
{{type:cloze:Text}}
{{Extra}}
Note that since the cloze type does not use FrontSide, this must be added to both sides on a cloze note type.
If there are multiple sections elided, you can separate the answers in the text box with a comma.
Type answer boxes will not appear in the "preview" dialog in the browser. When you review or look at the preview in the card types window, they will display.
Card Generation
- Reverse Cards
- Card Generation & Deletion
- Selective Card Generation
- Conditional Replacement
- Blank Back Sides
- Limitations in Older Anki Versions
- Adding Empty Notes
- Cloze Templates
Reverse Cards
You can watch a video about reversing cards on YouTube.
If you want to create cards that go in both directions (e.g., both “ookii”→“big” and “big”→“ookii”), you have several options. The simplest is to select the “Basic (and reversed card)” built-in note type. This will generate two cards, one in each direction.
If you want to generate reverse cards for only some of your material (perhaps you only want to take the time to study reverses for the most important material, or some of your cards don’t make sense reversed), you can select the “Basic (optional reversed card)” note type. This note type generates a forward-only card when you fill in only the first two fields; if you additionally enter something in the “Add Reverse” field (like a 'y'), Anki will generate a reverse card as well. The contents of this field will never be displayed on a card.
Card Generation & Deletion
Anki will not create cards with empty front sides. Thus if “My Field” was empty, and one card’s front template included only that field, the card would not be created.
If no cards can be created because all of the cards would have empty front sides, then the Add Notes window will warn you and not allow the note to be added until at least one card would be generated.
When you edit a previously added note, Anki will automatically create extra cards if they were previously blank but no longer are. If your edits have made some cards blank when they previously were not, however, Anki will not delete them immediately, as that could lead to accidental data loss. To remove the empty cards, go to Tools → Empty Cards in the main window. You will be shown a list of empty cards and be given the option to delete them.
Because of the way that card generation works, it is not possible to manually delete individual cards, as they would just end up being recreated the next time the note was edited. Instead, you should make the relevant conditional replacement fields empty and then use the Empty Cards option.
Anki does not consider special fields or non-field text for the purposes of card generation. Thus if your front template looked like the following, no card would be generated if Country was empty:
Where is {{Country}} on the map?
Selective Card Generation
Sometimes you may want to generate extra cards for only some of your material, such as testing your ability to recall the most important words of a set. You can accomplish this by adding an extra field to your note, and adding some text into it (such as "1") on the notes you want the extra card. Then in the card template, you can make the card’s creation depend on that field being non-empty. For more information on this, please see the conditional replacement section below.
Conditional Replacement
It is possible to include certain text, fields, or HTML on your cards only if a field is empty or not empty. An example:
This text is always shown.

{{#FieldName}}
    This text is only shown if FieldName has text in it
{{/FieldName}}

{{^FieldName}}
    This text is only shown if FieldName is empty
{{/FieldName}}
A real life example is only showing a label if the field is not empty:
{{#Tags}}
    Tags: {{Tags}}
{{/Tags}}
Or say you want to display a specific field in blue on the front of your card if there are extra notes on the back (perhaps the fact that there are notes serves as a reminder that you should spend more time thinking about the answer). You can style the field as follows:
{{#Notes}}
    <span style="color:blue;">
{{/Notes}}

{{FieldToFormat}}

{{#Notes}}
    </span>
{{/Notes}}
You can also use conditional replacement to control which cards are generated. This works since Anki will not generate cards which would have a blank front side. For example, consider a card with two fields on the front:
{{Expression}}
{{Notes}}
Normally a card would be generated if either the expression or notes field had text in it. If you only wanted a card generated if expression was not empty, then you could change the template to this:
{{#Expression}}
    {{Expression}}
    {{Notes}}
{{/Expression}}
And if you wanted to require both fields, you could use two conditional replacements:
{{#Expression}}
    {{#Notes}}
        {{Expression}}
        {{Notes}}
    {{/Notes}}
{{/Expression}}
Keep in mind that this only works when you place the conditional replacement code on the front of the card; if you do this on the back, you will simply end up with cards with a blank back side. Similarly, since this works by checking if the front field would be empty, it is important to make sure you wrap the 'entire' front side in the conditional replacement; for instance, the following would not work as expected:
{{#Expression}}
    {{Expression}}
{{/Expression}}
{{Notes}}
Blank Back Sides
Card generation only looks at the front side of the card. For example, if you have a front template:
{{Field 1}}
and a back template:
{{Field 2}}
Then a card will be generated if Field 1 is non-empty. If Field 2 is empty, the card will still be generated, and you will get a blank back side.
If you wish to avoid a blank back side, you will need to place a required field on the front template as a conditional, like so:
{{#Field 2}}
    {{Field 1}}
{{/Field 2}}
This will ensure the card is generated only if both Field 2 and Field 1 are non-empty.
Limitations in Older Anki Versions
The following limitations do not apply to Anki 2.1.28+ and AnkiMobile 2.0.64+.
Older Anki versions cannot use negated conditionals for card generation. For example, on Anki 2.1.28, the following would add a card if a field called AddIfEmpty is empty, and Front is non-empty:
{{^AddIfEmpty}}
    {{Front}}
{{/AddIfEmpty}}
On earlier Anki versions, the negated conditional is ignored, and card generation will depend only on Front being non-empty.
Mixing AND and OR conditions can also cause problems on older versions. For example, the following ("add the card if A OR B OR C is non-empty") is fine:
{{A}}
{{B}}
{{C}}
And the following ("add the card if A AND B AND C are non-empty") is fine:
{{#A}}
    {{#B}}
        {{#C}}
            {{A}}
        {{/C}}
    {{/B}}
{{/A}}
But the following ("add the card if A OR (B AND C) are non-empty") will not work properly:
{{A}}
{{#B}}
    {{#C}}
        {{B}}
    {{/C}}
{{/B}}
Adding Empty Notes
When you add a new note in Anki 2.1.28+ and AnkiMobile 2.0.64+, if the card templates and note fields combine to produce no cards, a blank card will be created using the first template. This allows you to add material even if it's incomplete, and modify it or the template later to make it valid. If you don't wish to keep an empty note, you can remove it with the Empty Cards function.
On older Anki versions, Anki refuses to add or import a note if no cards would be generated.
Cloze Templates
Please see the cloze deletion section for background info.
The cloze note type functions differently from regular note types. Instead of a customizable number of card types, it has a single type which is shared by all cloze deletions on a note.
As mentioned in the card generation section above, generation of regular cards depends on one or more fields on the question being non-empty. Cloze deletion note types are generated differently:
-
Anki looks on the front template for one or more cloze replacements, like {{cloze:FieldName}}.
-
It then looks in the FieldName field for all cloze references, like {{c1::text}}.
-
For each separate number, a card will be generated.
Because card generation functions differently for cloze deletion cards, {{cloze:…}} tags can not be used with a regular note type - they will only function properly when used with a cloze note type.
Conditional generation provides a special field so you can check which card you are rendering. If you wanted to display the "hint1" field on the first cloze, and "hint2" field on the second cloze for example, you could use the following template:
{{cloze:Text}}

{{#c1}}
    {{Hint1}}
{{/c1}}

{{#c2}}
    {{Hint2}}
{{/c2}}
스타일링 & HTML
- Card Styling
- Image Resizing
- Field Styling
- Audio Replay Buttons
- Text Direction
- Other HTML
- Browser Appearance
- Platform-Specific CSS
- Installing Fonts
- 야간 모드
- Fading and Scrolling
- Javascript
Card Styling
You can watch a video about styling cards on YouTube. The video shows Anki 2.0’s interface, but the concepts are largely the same.
In between the front and back template in the Cards screen is the card styling area. In that section, you can change the background color of the card, the default font, the text alignment, and so on.
The standard options available to you are:
font-family
The name of the font to use on the card. If your font has spaces in it
like "MS Unicode", then you need to surround the font name in double
quotes as in this sentence. It is also possible to use multiple fonts on
one card; for information on that, please see below.
font-size
The size of the font in pixels. When changing it, make sure you leave px
at the end.
text-align
Whether the text should be aligned in the center, left, or right.
color
The color of the text. Simple color names like 'blue', 'lightyellow',
and so on will work, or you can use HTML color codes to select arbitrary
colors. Please see this webpage for more
information.
background-color
The color of the card background.
Any CSS can be placed in the styling section – advanced users may wish to do things like add a background image or gradient, for example. If you’re wondering how to get some particular formatting, please search the web for information about how to do it in CSS, as there is a great deal of documentation available.
The styling is shared between all cards, which means that when you make an adjustment it will affect all cards for that note type. It is also possible to specify card-specific styling, however. The following example will use a yellow background on all cards except the first one:
.card {
  background-color: yellow;
}
.card1 {
  background-color: blue;
}
Image Resizing
Anki shrinks images to fit the screen by default. You can change this by adding
the following to the bottom of your styling section (outside of the default
.card { ... }):
img {
  max-width: none;
  max-height: none;
}
AnkiDroid sometimes has trouble scaling images to fit the
screen. Setting maximum
image dimensions using css should fix this, but seems to be ignored as of
AnkiDroid 2.9. A fix is to append !important to each style directive, for
example:
img {
  max-width: 300px !important;
  max-height: 300px !important;
}
If you try to change the style for images and find that the star that appears on marked cards is affected (for instance, it becomes way too large), you can target it with the following:
img#star {
  ...;
}
You can explore the styling of cards interactively by using Chrome:
https://addon-docs.ankiweb.net/porting2.0.html#webview-changes
Field Styling
The default styling applies to the whole card. You can also make certain fields or part of the card use a different font, color, and so on. This is particularly important when studying foreign languages, as Anki will sometimes be unable to correctly display characters unless an appropriate font has been chosen.
Say you have an “Expression” field, and you want to give it the OSX Thai font “Ayuthaya”. Imagine your template already reads:
What is {{Expression}}?

{{Notes}}
What we need to do is wrap the text we want to style in some HTML. We will put the following in front of the text:
<div class=mystyle1>
And the following behind it:
</div>
By wrapping the text like the above, we tell Anki to style the wrapped text with a custom style called “mystyle1”, which we will create later.
Thus if we wanted the entire “What is …?” expression to use the Thai font, we would use:
<div class=mystyle1>What is {{Expression}}?</div>

{{Notes}}
And if we wanted only the expression field itself to use the Thai font, we’d use:
What is <div class=mystyle1>{{Expression}}</div>?

{{Notes}}
After we’ve edited the template, we now need to move to the Styling section between the templates. Before editing it, it should look something like:
.card {
  font-family: arial;
  font-size: 20px;
  text-align: center;
  color: black;
  background-color: white;
}
Add your new style to the bottom, so it looks like:
.card {
  font-family: arial;
  font-size: 20px;
  text-align: center;
  color: black;
  background-color: white;
}

.mystyle1 {
  font-family: ayuthaya;
}
You can include any styling you want in the style. If you wanted to increase the font size too, you’d change the mystyle1 section to look like:
.mystyle1 {
  font-family: ayuthaya;
  font-size: 30px;
}
It’s also possible to bundle custom fonts with your deck, so you don’t need to install them on your computer or mobile device. Please see the installing fonts section for more info.
Audio Replay Buttons
When audio or text to speech is included on your cards, Anki will show buttons you can click on to replay the audio.
If you prefer not to see the buttons, you can hide them in the preferences screen.
You can customize their appearance in your card styling, for example, to make them smaller and colored, you could use the following:
.replay-button svg {
  width: 20px;
  height: 20px;
}
.replay-button svg circle {
  fill: blue;
}
.replay-button svg path {
  stroke: white;
  fill: green;
}
Text Direction
If you use a language that is written right-to-left, such as Arabic or Hebrew,
you can add the CSS direction property to the .card section for correct display during review:
.card {
  direction: rtl;
}
This will change the direction of the entire card. You can change the direction of only certain fields by wrapping their references in some HTML:
<div dir="rtl">{{Front}}</div>
To change the direction of fields in the editor, please see the editing section.
Other HTML
Your templates can contain arbitrary HTML, which means that all the layout possibilities used on internet web pages can also be used on your cards. Things like tables, lists, images, links to external pages and so on are all supported. With tables for example, you could change the layout so that the front and back of a card appear on the left and right instead of the top and bottom.
Covering all of HTML’s features is outside the scope of this manual, but there are plenty of good introductory guides to HTML available on the web if you’d like to learn more.
Browser Appearance
If your card templates are complex, it may be difficult to read the question and answer columns (called "Front" and "Back") in the card list. The "browser appearance" option allows you to define a custom template to be used only in the browser, so you can include only the important fields and change the order if you desire. The syntax is the same as in standard card templates.
Platform-Specific CSS
Anki defines some special CSS classes that allow you to define different styling for different platforms. The example below shows how to vary the font depending on where you’re reviewing:
.win .jp {
  font-family: "MS Mincho";
}
.mac .jp {
  font-family: "Hiragino Mincho Pro";
}
.linux .jp {
  font-family: "Kochi Mincho";
}
.mobile .jp {
  font-family: "Hiragino Mincho ProN";
}
And in the template:
<div class="jp">{{Field}}</div>
For different iOS devices, you can use '.iphone' and '.ipad'.
You can also use properties like .gecko, .opera, and .ie to select particular browsers when using AnkiWeb. Please see http://rafael.adm.br/css_browser_selector/ for a full list of options.
Installing Fonts
If you’re using Anki on a work or school computer where you don’t have permission to install new fonts, or you’re using Anki on a mobile device, it’s possible to add fonts directly to Anki.
To add a font to Anki, it must be in the TrueType format. TrueType fonts have a filename ending in .ttf, such as "Arial.ttf". Once you’ve located a TrueType font, we’ll need to add it to the media folder:
-
Rename the file, adding an underscore at the start, so it becomes like "_arial.ttf". Adding an underscore will tell Anki that this file will be used on a template, and should not be deleted when checking for unused media.
-
In your computer’s file browser, go to your Anki Folder, and then a folder called "User 1" (or your profile name if you’ve renamed/added profiles).
-
Inside the folder, you should see a folder called collection.media. Drag the renamed file to that folder.
After that, we need to update the template:
-
Click Add at the top of the main screen, and then select the note type you want to change with the top left button.
-
Click Cards.
-
In the styling section, add the following text to the bottom (after the last "}" character), replacing "_arial.ttf" with the name of the file you copied into your media folder:
@font-face {
  font-family: myfont;
  src: url("_arial.ttf");
}
Only change the "arial" part, not the "myfont" part.
After that, you can either change the font for the entire card, or for individual fields. To change the font for the entire card, simply locate the font-family: line in the .card section and change the font to "myfont". To change the font for only certain fields, please see the Field Styling instructions above.
Please make sure the filenames match exactly. If the file is called arial.TTF and you write arial.ttf in your card templates, it will not work.
야간 모드
You can customize the way templates appear when night mode is enabled in the preferences screen.
If you wanted a lighter grey background, you could use something like:
.card.nightMode {
  background-color: #555;
}
If you have a 'myclass' style, the following would show the text in yellow when night mode is enabled:
.nightMode .myclass {
  color: yellow;
}
Fading and Scrolling
Anki will automatically scroll to the answer by default. It looks for a HTML element with id=answer, and scrolls to that. You can place the id on a different element to adjust the scrolling position, or remove the id=answer to turn off scrolling.
The question side of a card fades in by default. If you wish to adjust this delay, you can place the following at the top of your front card template:
<script>
  qFade = 100;
  if (typeof anki !== "undefined") anki.qFade = qFade;
</script>
100 (milliseconds) is the default; set to 0 to disable fading.
Javascript
As Anki cards are treated like webpages, it is possible to embed some Javascript on your cards via the card template. For a good reference please read this post in the forums.
Because Javascript is an advanced feature and so many things can go wrong, Javascript functionality is provided without any support or warranty. We can not provide any assistance with writing Javascript, and can not guarantee any code you have written will continue to work without modification in future Anki updates. If you are not comfortable addressing any issues you encounter on your own, then please avoid using Javascript.
Each Anki client may implement card display differently, so you will need to test the behaviour across platforms. A number of clients are implemented by keeping a long running webpage and dynamically updating parts of it as cards are reviewed, so your Javascript will need to update sections of the document using things like document.getElementById() rather than doing things like document.write().
Functions like window.alert are also not available. Anki will write javascript errors to the terminal, so if you’re running on a Mac or Windows computer, you’ll need to manually catch the errors and write them to the document to see them. There is no debugger available, so to figure out problems you’ll need to break down your code until you discover which parts are causing problems.
설정
설정은 Windows/Linux의 도구 메뉴 또는 Mac의 Anki 메뉴에서 사용할 수 있습니다.
기본
그래픽 드라이버
Ank는 화면에 앱을 띄우기 위한 그래픽 드라이버가 필요합니다.
하드웨어 및 소프트웨어 구성에 따라 사용하시는 컴퓨터에 가장 적합한 드라이버는 다를 수 있습니다.
ANGLE 및 OpenGL은 소프트웨어 옵션보다는 성능이 우수하지만 일부 시스템에서는 올바르게 작동하지 않을 수 있습니다.
Mac에서는 OpenGL사용을 권장합니다.
오디오 재생버튼 보이기
오디오가 있는 카드의 학습 화면에 클릭 가능한 재생 버튼이 표시되는지 여부.
응답할 때 오디오 중단
카드에 답 보기를 할 때 현재 재생 중인 오디오파일을 정지할지를 설정합니다.
클립보드 이미지 PNG로 붙여넣기
기본적으로 Anki는 클립보드 이미지를 JPG 파일로 붙여넣어 디스크 공간을 절약합니다.
하지만 원하는 경우 이 옵션을 사용하여 PNG 이미지로 붙여넣을 수 있습니다.
PNG 이미지는 투명한 배경을 지원하며 무손실이지만 일반적으로 파일 크기가 훨씬 커집니다.
Paste without Shift strips formatting
기본적으로는 Shift 키를 누르지 않는 한 붙여넣을 때 굵은 글씨 및 색상과 같은 형식이 유지됩니다.
이 옵션은 사용할 시 반대로 작동합니다.
야간 모드
야간 모드에서는 Anki가 검은 배경에 카드를 흰색 텍스트로 표시합니다.
일부 카드 템플릿은 이 옵션을 활성화한 상태에서 올바르게 작동하기 위해 수정해야 할 수 있습니다.
자세한 내용은 야간 보드 템플릿 스타일링)을 참조하십시오.
카드를 추가할 때, 현재 뭉치에 넣음
Controls how note types and decks interact. The default of "When adding, default to current deck" means that Anki saves the last-used note type for each deck and selects it again then next time you choose the deck (and, in addition, will start with the current deck selected when choosing Add from anywhere). The other option, "Change deck depending on note type," saves the last-used deck for each note type (and opens the add window to the last-used note type when you choose Add). This may be more convenient if you always use a single note type for each deck.
노트 유형과 뭉치가 상호 작용하는 방식을 제어합니다. 기본 설정인 "카드를 추가할 때, 현재 뭉치에 넣음"은 Anki가 각 뭉치에 대해 마지막으로 사용한 노트 유형을 저장한 다음 카드 추가 선택창에서 뭉치를 선택하면, 해당 노트 유형을 불러옵니다(또한 어디에서나 추가를 할 때 현재 덱이 선택됩니다). 다른 옵션인 "노트 유형에 따라 뭉치 바꾸기"는 각 노트 유형에 대해 마지막으로 사용한 뭉치를 저장합니다 (그리고 추가를 선택하면 마지막으로 사용한 노트 유형에 대한 추가 창이 열립니다). 이 방법은 각 덱에 대해 항상 하나의 노트 유형을 사용하는 경우에 더 편리할 수 있습니다.
Default search text (기본 검색 텍스트) Allows you to customize the starting search text in the browser (eg, to start with "deck:current"). 탐색에서의 기본 검색 입력어를 설정할 수 있습니다. (예시: "deck:current")
User interface size (UI 크기) 인터페이스 크기가 작으면 이 설정을 통하여 확대하여 볼 수 있습니다.
일정 재조정
답 버튼 위에 다음 복습시점 표시
얼마나 후에 카드를 다시 학습한지 알고 싶을때 유용합니다.
남은 카드 개수를 복습 화면에 표시
이 옵션을 꺼서 화면 아래의 남은 카드 카드 개수를 없엘 수 있습니다.
복습하지 않은 긴 주기의 배운 카드 보기
2.1 스케줄러가 유효한 경우에만 표시됩니다.
보통은 1일 이상의 주기를 가진 학습 카드는 일반 학습 후 표시됩니다. 체크하면 Anki가 일반 리뷰 전에 보여 줍니다.
Legacy timezone handling
이 문서를 확인해주세요:
https://faqs.ankiweb.net/timezone-handling-changes.html
V3 Scheduler
Anki V3 스케쥴러:
https://faqs.ankiweb.net/the-2021-scheduler.html
새 카드와 복습 카드 섞기: v1/v2 스케줄러가 작동하는 경우에만 표시됩니다. 이 옵션에서 새로운 카드가 표시되는 타이밍(모든 복습과와 학습 전, 후)을 제어합니다.
하루가 시작되는 시각 Anki가 다음 날 카드를 언제 표시해야 하는지 제어합니다. 기본 설정인 '4시간 뒤'는 자정 무렵에 학습하는 경우 한 세션에 이틀 분량의 카드가 표시되지 않도록 합니다. 만약 매우 늦게 일어나거나 매우 일찍 일어난다면, 이 설정을 사용하여 학습 시간을 조정할 수 있습니다. 또한 1일의 경계를 넘는 카드는 리뷰 카드와 같이 예정된 날짜에 표시됩니다.
앞당겨 공부하기 제한
현재 뭉치에서 학습 중인 카드 외에 더 이상 학습할 것이 없을 때 Anki가 어떻게 작동할지 설정합니다.
기본 설정인 20분에서는 학습할 카드가 더이상 없을때, 학습까지 남은 시간이 20분 미만인 카드를 표시합니다.
이 값을 0으로 설정하면 Anki는 항상 카드의 학습시간이 돌아올때까지 기다리며
나머지 카드를 복습할 시간이 될 때까지 축하 화면을 표시합니다.
시간 제한
타임박스는 30분간의 학습 세션과 같이 긴 학습을 더 작은 조각으로 분할하여 집중할 수 있도록 도와주는 기술입니다.
타임박스 시간 제한을 0분이 아닌 분수로 설정하면 Anki는 지정된 시간 제한 동안 학습할 수 있는 카드 수를 주기적으로 표시합니다.
테트워크
네트워크 탭에는 AnkiWeb과의 동기화 관련 옵션이 있습니다.
- 로그인 되어 있을때, 이곳에서 로그아웃을 할 수 있습니다.
- '다음 동기화할 떄, 한 방향으로만 변경사항 적용' 옵션이 활성화되면 다음 동기화에서 업로드 또는 다운로드 여부를 묻습니다. 이 기능은 실수로 일부 변경을 한 경우 AnkiWeb에 있는 이전 버전으로 덮어쓰기를 원할 때 유용합니다.
Deck Options
- Presets
- Subdecks
- Daily Limits
- New Cards
- Lapses
- Timer
- Burying
- Display Order
- Audio
- Advanced
- Custom Scheduling
Deck options primarily control the way Anki schedules cards. It is recommended that you spend a few weeks with the defaults to get a feel for how Anki works before you start adjusting options. Please make sure you understand the options before changing them, as mistakes could reduce Anki's effectiveness.
Deck options are accessed by:
- Clicking the gear icon on the
Decksscreen. - Selecting a deck on the
Decksscreen, and then clickingOptionsat the bottom of the screen. - Clicking on
More>Optionswhile in review mode. - Pressing
owhile in review mode.
This page describes the options shown in Anki 2.1.45+, when you have the v2 or v3 scheduler enabled. On older versions, some options will not be available, or will appear in a different section.
Presets
Anki allows you to share options between different decks, to make updating options in many decks at once easy. To do this, options are grouped into presets. By default, all newly created decks use the same preset.
If you’d like to alter the settings on one deck but not other decks, click the arrow icon in the top right of the Deck Options window. The options are:
- Save: Saves all modifications you've made since opening the deck options screen.
- Add: Add a new preset, with the default options.
- Clone: Clone your current present, which is useful if you just want to modify certain options, keeping the rest as they are.
- Rename Changes the name of the current preset.
- Delete Deletes the current preset. This will require that the next sync is a one-way sync.
- Save to all subdecks. Like Save, but also assigns the selected preset to all subdecks of the currently selected deck.
Deck Options are not retroactive. For example, if you change an option that controls the delay after failing a card, cards that you failed prior to changing the option will have the old delay, not the new one.
Subdecks
If your deck has subdecks, each deck can optionally be assigned a different preset. When Anki shows a card, it will check which subdeck the card is in, and use the options for that deck. There are some exceptions:
- The new cards/day and reviews/day limits behave differently depending on the scheduler version you have selected.
- The display order options in the v3 scheduler are taken from the deck you select to study, not the deck of the current card.
For example, let's say you have this collection:
- Deck A (Preset 1)
  - Deck A::Subdeck B (Preset 2)
    - Card B1
    - Card B2
Preset 1 and 2 are identical, with two exceptions:
- Preset 1:
- New Cards - Learning steps: 1m 10m
- Display Order - New/review priority: Mix with reviews
- Preset 2:
- New Cards - Learning steps: 20m 2h
- Display Order - New/review priority: Show after reviews
If you choose to study Deck A:
- Learning steps for all new cards will be 20m 2h (preset 2 applies)
- All new cards will be mixed with reviews (preset 1 applies)
If you choose to study Subdeck B:
- Learning steps for all new cards will be 20m 2h (preset 2 applies)
- All new cards will be shown after reviews (preset 2 applies)
Daily Limits
New Cards/Day
Controls how many new cards are introduced each day you open the program. If you study fewer than the limit, or miss a day, the next day the counts will be back to your limit - they do not accumulate.
In the v3 scheduler, Anki uses the limits of the deck you select as an upper limit on the number of cards. This means if "French" has a limit of 20 cards and "French::Lesson 1" and "French::Lesson 2" both have limits of 15 cards, when you click on "French", you’ll get at most 15 cards from either child deck, and only 20 cards in total.
In the v1 or v2 scheduler, each parent applies its limits to its children. If you have decks in a grandparent-parent-child arrangement, both the grandparent and parent limits will alter how many cards are shown from the child, even if you click directly on the child. In the v3 scheduler, this has been simplified, and now each deck's limit controls how many cards from that specific deck can be used. Imagine that you have this collection:
- Parent deck (New Cards/Day: 20)
  - Child deck (New Cards/Day: 7)
    - Grandchild deck A (New Cards/Day: 5)
      - Cards 1 to 50
    - Grandchild deck B (New Cards/Day: 5)
      - Cards 51 to 100
- If you click on the Parent deck, you will get 10 new cards (from Grandchild decks A and B).
- If you click on the Child deck, you will get 7 new cards (from Grandchild decks A and B).
- If you click on any of the Grandchild decks, you will get 5 new cards.
Studying new cards will temporarily increase the number of reviews you need to do a day, as freshly learnt material needs to be repeated a number of times before the delay between repetitions can increase appreciably. If you are consistently learning 20 new cards a day, you can expect your daily reviews to be roughly about 200 cards/day. You can decrease the reviews required by introducing fewer new cards each day, or by turning off new card display until your review burden decreases. More than one Anki user has excitedly studied hundreds of new cards over their first few days of using the program, and then become overwhelmed by the reviews required.
If using the v3 scheduler, please keep in mind that the new count is capped by the review count. If your review limit is set to 200, and you have 190 reviews waiting, a maximum of 10 new cards will be introduced. If your review limit has been reached, no new cards will be shown. If you have a backlog of reviews and still want to introduce new cards, you can do so by suspending the reviews, or increasing your review limit. That said, it is recommended you hold off on new cards until you catch up instead, as introducing more new cards when you're behind will only make the backlog worse.
Maximum Reviews/Day
Allows you to set an upper limit on the number of reviews to show each day. When this limit is reached, Anki will not show any more review cards for the day, even if there are some waiting. If you study consistently, this setting can help to smooth out occasional peaks in due card counts, and can save you from a heart attack when returning to Anki after a week off. When reviews have been hidden due to this option, a message will appear in the congratulations screen, suggesting you consider increasing the limit if you have time.
In the v3 scheduler and v1 schedulers, the counts are affected by parents/selected decks in the same way as new cards.
In the v2 scheduler, the limit is taken solely from the deck you select - any limits on its parents or child decks are ignored.
The v3 scheduler includes learning cards with a 1+ day delay in the review count, so those learning cards will be subject to the daily limit.
New Cards
The settings in this section only affect new cards and cards in initial learning mode. Once a card has graduated (i.e. there are no more learning steps for this card), it becomes a review card, and the settings in this section are no longer applicable.
Learning Steps
Controls the number of learning repetitions, and the delay
between them. One or more delays, separated by spaces must be entered.
Each time you press Good during review, the card moves to the next step.
For example, let's say that your learning steps are 1m 10m 1d.
- When you press
Again, the card goes back to first step, and will be shown again approximately 1 minute later. - When you press
Goodon a new card, or a card answeredAgain, it will move to the next step, and be shown again in approximately 10 minutes. - When you press
Goodon a card after the 10 minute step, it will be delayed until the next day. - When you press
Goodon the card the next day, it will leave learning (i.e. it will graduate), and become a review card. It will be shown again after the delay configured by the graduating interval.
If there’s nothing else to study, Anki will show cards up to 20 minutes early by default. The amount of time to look ahead is configurable in the preferences.
Please see the learning section for more info on how steps work. Also, check this forum's post for more examples.
Day Boundaries
Anki treats small steps and steps that cross a day boundary differently. With small steps, the cards are shown as soon as the delay has passed, in preference to other waiting cards like reviews. This is done so that you can answer the card as closely to your requested delay as possible. In contrast, if the interval crosses a day boundary, it is automatically converted to days.
Graduating Interval
The delay in days between answering "Good" on a learning card with no steps left, and seeing the card again as a review card. Please see the example in the previous section.
Easy Interval
The delay between answering Easy on a learning
card, and seeing it in review mode for the first time.
The Easy button immediately turns a learning card into a review card,
and assigns it the delay you have configured. It should always be at least
as long as the graduating interval, and typically a few days longer.
Insertion Order
Controls whether Anki should add new cards into the deck randomly, or in order. When you change this option, Anki will re-sort the decks using the current Option Group. Cards with a lower due number will be shown first when studying, by default. Changing this option will automatically update the existing position of new cards.
One caveat with random order mode: if you review many of your new cards, and then add more new cards, the newly added material is statistically more likely to appear than the new cards that were already in the deck. For example, if you have 100 cards in random order, then review the first 50, newly added cards are still given position 1-100, but as you have already reviewed the first 50, the newly added cards are more likely to appear earlier. To correct this, you can change the order to Ordered mode and back again to force a re-sort.
When you select random order, Anki will randomize your notes, keeping the cards of a given note close together. The cards of a given note are shown in the order, in which their card types appear, so that siblings are introduced consistently — otherwise you could end up in a state where some notes had all their cards introduced and other notes had only one or two. Please see the "bury related" and "display order" sections below for more info.
Lapses
When you forget a review card, it is said to have 'lapsed', and the card must be relearnt. The default behaviour for lapsed reviews is to reset the interval to 1 (i.e. make it due tomorrow), and put it in the learning queue for a refresher in 10 minutes. This behaviour can be customized with the options listed below.
Relearning Steps
The same as 'learning steps', but for forgotten reviews. When you fail a card
(press Again), the card enters the relearning phase, and before it becomes a
review card again, you will have to pass all the relearning steps — or, alternatively, press
Easy on the card.
If you leave the steps blank, the card will skip relearning, and will be assigned a new review delay.
Minimum Interval
Specifies a minimum number of days a card should wait after it finishes relearning. The default is one day, meaning once relearning is finished, it will be shown again the next day.
Leeches
Control the way Anki handles leeches. Please see the leeches section for more information.
Timer
Anki monitors how long it takes you to answer each question, so that it can show you how long was spent studying each day. The time taken does not influence scheduling. The default limit is 60 seconds. If you take longer than that, Anki assumes you have walked away from your computer or have been distracted, and limits the recorded time to 60 seconds, so that you don’t end up with inaccurate statistics. If you consistently take longer than 60 seconds to answer a card, you may want to either consider raising this limit, or ideally, making your cards simpler.
Burying
Please see this section for more information.
Display Order
The options in this section are taken from the deck you select to study, not the deck of the currently displayed card.
This section is only available when you have the v3 scheduler enabled.
Some further information about display order is available in the studying section.
New Card Gather Priority
Controls how Anki gathers cards from each subdeck.
With the default Deck ordering, cards are gathered from each subdeck in order,
stopping when the limit of the selected deck has been exceeded. This is faster,
and allows you to priorize subdecks that are closer to the top. Decks / subdecks
are always ordered alphabetically, so you can give them a numeric prefix like
001 to control the order they are shown. You can also use _ and ~ as a
prefix to place items at the top or bottom.
Although position order depends initially on the 'Insertion Order' setting above, you can manually reposition cards in different ways.
New Card Sort Order
Controls how cards are sorted after they have been gathered. By default, Anki sorts by template first, to avoid multiple cards of the same note from being shown in succession. This results in cards appearing in the order they have been added, with the first card template (eg front->back) appearing before later card templates (eg back->front).
New/Review Priority
Whether new cards should be mixed in with reviews, or shown before or after them.
Interday Learning/Review Priority
Whether learning cards with a 1+ day delay should be mixed in with reviews, or shown before or after them. Because learning cards tend to be harder than reviews, some users prefer to see them at the end (getting the easy stuff done first), or at the start (allowing more time to review forgotten ones).
Review Sort Order
The default order prioritizes cards that have been waiting longer, which works well when you are up to date, or when you only have a small backlog. If you have taken an extended break or have fallen behind in your reviews, you may want to consider changing the sort order temporarily. Sorting by ascending intervals will ensure cards with shorter delays are shown first, and by descending intervals will allow you to work through the easier material first.
Choosing the Deck, then due date option will ensure reviews are shown for each subdeck in turn. This is generally not recommended, as having material appear consistently in the same order makes it easier to guess the answer based on context, and may lead to weaker memories.
Audio
By default, Anki automatically plays audio on the front and back of
cards. If you check Don't play audio automatically, Anki will not play
audio until you press the replay audio key, r or F5.
Always include question side when replaying audio controls whether audio from the question side should be played when replaying the audio while an answer is shown. Please note that it does not control what happens when you show the answer; for that please see this section.
Advanced
Maximum Interval
Allows you to place an upper limit on the time Anki will wait to reshow a card. The default is 100 years; you can decrease this to a smaller number if you’re willing to trade extra study time for higher retention.
Starting Ease
Controls the easiness that cards start out with. It is
set when a card graduates from learning for the first time. It defaults
to 2.50, meaning that once you have finished learning a card, answering
Good on subsequent reviews will increase the delay by approximately
2.5x (e.g. if the last delay was 10 days, the next delay would be around 25
days). Based upon how you rate the card in subsequent reviews, the
easiness may increase or decrease from its starting value.
Easy Bonus
An extra multiplier applied to the interval when a review card is answered
Easy. With the default value of 1.30, Easy will give an interval that is
1.3 times the Good interval (e.g. if the Good interval was 10 days, the Easy
interval would be around 13 days).
Interval Modifier
An extra multiplier that is applied to all reviews. At its default of 1.00 it does nothing. If you set it to 0.80, though, for example, intervals will be generated at 80% of their normal size (so a 10 day interval would become 8 days). You can thus use the multiplier to make Anki present cards more or less frequently than it would otherwise, trading study time for retention or vice versa.
For moderately difficult material, the average user should find they remember approximately 90% of mature cards that come up for review. You can find out your own performance by opening the graphs/statistics for a deck and looking at the Answer Buttons graph - mature retention is the correct% on the right side of the graph. If you haven’t been studying long, you may not have any mature cards yet. As performance with new cards and younger cards can vary considerably, it’s a good idea to wait until you have a reasonable amount of mature reviews before you start drawing conclusions about your retention rate.
On the SuperMemo website, they suggest that you can find an appropriate multiplier for a desired retention rate. Their formula boils down to:
log(desired retention%) / log(current retention%)
Imagine we have a current retention rate of 85% and we want to increase it to 90%. We’d calculate the modifier as:
log(90%) / log(85%) = 0.65
You can use Google to calculate it for you.
If you plug the resulting 65% into the interval modifier, you should find over time that your retention moves closer to your desired retention.
One important thing to note however is that the trade-off between time spent studying and retention is not linear: we can see here that to increase our retention by 5 percentage points, we would have to study 35% more frequently. If the material you are learning is very important then it may be worth the extra effort – that is, of course, something you will need to decide for yourself. If you are simply worried that you are forgetting too much, then you may find investing more time at the initial learning stage and/or using mnemonics will give you more gain for less effort.
One final thing to note is that Anki forces a new interval to be at least 1 day longer than it was previously, so that you do not get stuck reviewing with the same interval forever. If your goal is to repeat a card once a day for multiple days, you can do that by setting more learning mode steps, instead of by adjusting this modifier.
Hard Interval
The multiplier used when you use the Hard button. The percentage is relative
to the previous interval: e.g. with a default of 1.20, a card with a 10-day interval
will be given 12 days.
New Interval
The multiplier used when you use the Again button on a review card. The
default 0.00 means that a review card's delay is reset to zero when you forget it
(which then becomes 1 day after the minimum interval is
applied).
If changed from the default, it is possible for forgotten cards to preserve part of their previous delay. For example, if a card had a 100 day interval, and you set the New Interval to 0.20, the new interval would be 20 days.
While preserving part of the interval may seem to make sense, SuperMemo has observed that preserving part of the delay can actually be counter-productive. For this reason, we recommend you leave it on the default setting.
Custom Scheduling
Please see this page.
AnkiWeb 연동
AnkiWeb은 콜렉션을 기기간 동기화해주고 온라인에서 학습할 수 있게 해주는
서비스 입니다. 아래의 단계를 따라하기전, 무료 회원가입 을 하여 주세요.
소개 영상
빠르게 동기화에 대해 알고싶다면, 동기화 소개 영상을 확인하세요.
셋업
장치간 동기화를 시작할려면 메인화면 오른쪽 상단의 동기화 버튼(단축키 Y)을 눌러주세요.
등록 과정에서 작성한 AnkiWeb 아이디와 비밀번호를 입력하는 창이 나타납니다.
컬렉션을 처음 동기화하면 Anki에서 업로드 또는 다운로드 여부를 묻습니다. 컴퓨터에 카드가 있고 AnkiWeb 계정이 비어 있는 경우 "업로드"를 선택하여 데이터를 AnkiWeb으로 보냅니다. 다른 장치에서 AnkiWeb에 카드가 있고 컴퓨터에 카드가 없는 경우 "다운로드"를 선택하여 빈 로컬 컬렉션을 AnkiWeb에 있는 카드로 대체합니다. 양쪽 디바이스에 다른 카드가 있는 경우 데이터 손실을 방지하기 위해 추가 작업이 필요합니다
초기 단방향 동기화가 완료되면 Anki는 몇 가지 예외를 제외하고 여러 기기에서의 변경 사항을 자동으로 병합할 수 있습니다.
1대의 기기으로 Anki를 사용하고 있는 여러명의 유저가 각각 유저의 프로필을 만들어 사용하는 경우, 각 유저는 동기화하는 독자적인 AnkiWeb 계정을 작성할 필요가 있습니다. 하나의 AnkiWeb 계정으로 여러 프로필을 동기화하려고 하면 데이터가 손실됩니다.
자동 동기화
동기화가 활성화되면 컬렉션이 닫히거나 열릴 때마다 Anki가 자동으로 동기화됩니다. 수동으로 동기화하려면 Anki 환경설정에서 자동 동기화를 사용 불가능으로 설정할 수 있습니다.
버튼 색
일반 동기화가 필요한 경우 동기화 버튼이 파란색으로, 전체 동기화가 필요한 경우 빨간색으로 변경됩니다.
미디어
관련 영상: https://www.youtube.com/watch?v=phP9GGG-PxY
Anki는 노트에 사용되는 소리와 이미지를 동기화합니다. 미디어 폴더에 미디어가 추가 또는 제거되었을 때는 알 수 있지만 기존 파일을 추가 또는 제거하지 않고 편집했는지 여부는 알 수 없습니다. 편집 내용을 확인하려면 파일 추가 또는 삭제도 필요합니다.
USB 플래시 드라이브에서 Anki를 실행하는 경우 NTFS 파일 시스템을 사용해야 합니다. Anki는 FAT32 파일 시스템에서 미디어 변경을 감지하지 못할 수 있습니다.
충돌
관련 영상: https://www.youtube.com/watch?v=UEAcpfMQnjo
통상적인 상황에서는 학습과 노트 편집을 병합할 수 있으므로 동기화하기 전에 2개의 다른 기기에서 학습 또는 편집하면 Anki가 두 위치 모두에서 변경 내용을 보존합니다. 같은 카드를 2개의 다른 기기에서 학습했을 경우, 양쪽의 학습가 리비전 이력에 표시되며, 카드는 최근 대답한 상태로 유지됩니다.
Anki가 병합할 수 없는 몇 가지 상황이 있습니다. 이는 주로 메모 형식과 관련이 있습니다. 새 필드 추가 또는 카드 템플릿 제거 등이 있습니다. 병합할 수 없는 작업을 수행하면 Anki가 경고를 표시하고 작업을 중단할 수 있는 옵션을 제공합니다. 계속하도록 선택할 경우 컬렉션을 다음에 동기화할 때 단방향 동기화가 강제됩니다.
또는 동기화 중에 특정 문제가 감지되면 단방향 동기화로 강제됩니다. 동기화 문제가 계속 발생할 경우 지원 사이트에 게시해 주십시오.
단방향 동기화가 필요한 경우 동기화 할 시 컬렉션을 AnkiWeb에서 다운받을지 AnkiWeb에 업로드할지를 선택해야 합니다. 양쪽에서 변경이 이루어진 경우 한쪽 기기의 변경만 보존할 수 있습니다.
업로드를 선택하면 로컬 디바이스의 콘텐츠가 AnkiWeb으로 전송됩니다. 그런 다음 다른 기기에서 동기화할 때에는 다운로드를 선택하여 해당 컨텐츠의 복사본을 가져오도록 해야 합니다.
다운로드를 선택하면 로컬 변경이 AnkiWeb에 있는 데이터로 대체됩니다.
모든 기기가 동기화되면 이후 동기화는 서로다른 기기의 변경을 자동으로 병합하는 일반 동작으로 돌아갑니다.
전체 업로드 또는 다운로드를 강제하는 경우 (예를 들어 실수로 한쪽 뭉치를 삭제하여 삭제를 동기화하는 것이 아니라 뭉치를 복원하는 경우), 툴 -> 설정-> 네트워크 -> 다음 동기화 때, 한 방향으로 변경 사항 적용하기 체크박스를 켜고 정상적으로 동기화할 수 있습니다. (사용할 쪽을 선택할 수 있습니다.)
단방향 동기화를 강제하면 카드 동기화에만 영향을 줍니다. 미디어는 정상적으로 동기화됩니다. AnkiWeb에서 삭제할 파일이 있는 경우 먼저 클라이언트가 완전히 동기화되어 있는지 확인하십시오. 동기화가 최신 상태가 되면 (미디어 확인 기능을 통해) 삭제한 파일은 다음 동기화 시 AnkiWeb에서 제거됩니다.
병합 충돌
Because the first sync can only sync changes in one direction, if you have added different content to different devices or profiles before setting syncing up, content on one device will be lost if you overwrite it with the content from the other device. With some work, it is possible to manually merge data into a single collection.
Start by taking a backup on each device/profile, in case something goes wrong. With the computer version you can use File>Export to export "all decks" with scheduling information and media files included, and save the file somewhere safe. In AnkiMobile, the Add/Export button on the decks list screen will let you export all decks with media.
Next, if one of your devices is a mobile device, synchronize it first. If there’s a conflict, choose "upload" to overwrite any existing data on AnkiWeb with the data from your mobile device. If both devices/profiles are on your computer, synchronize the device/profile with the most number of decks first.
Now return to the other device/profile. If automatic syncing is enabled, a message may pop up asking if you want to upload or download. Click the cancel button - we don’t want to sync yet.
Once you’re looking at the deck list, click the cog icon next to the first deck, and choose "export". Export the content with scheduling information and media included, and save the .apkg file somewhere. Now you’ll need to repeat this for each top-level deck.
Once all top-level decks have been exported, click the sync button at the top right, and choose "download", which will overwrite the local content with the content you synced from your other device.
You can now use File>Import to import the .apkg files you exported earlier, which will merge the exported content with the existing content, so everything will be in one place.
방화벽
Anki는 동기화할 떄에는 HTTPS 전송이 가능해야 하고 ankiweb.net, ankiweb.net, sync2.ankiweb.net에 접속하여 동기화할 수 있어야 합니다.
이러한 도메인은 시간이 지남에 따라 변경될 수 있으며 이들이 가리키는 IP 주소도 변경될 수 있습니다.
따라서 향후 방화벽규칙을 갱신해야 할 가능성을 줄이기 위해 *.ankiweb.net 에 와일드카드접근을 허용하는 것을 권장합니다.
컴퓨터에 방화벽이 있는 경우 Anki에 대한 예외를 추가해야 합니다. 직장 또는 학교 네트워크에 접속하고 있는 경우는, 네트워크 관리자에게 문의해 주세요.
프록시
인터넷에 접속하기 위해 프록시가 필요한 경우 Windows 또는 MacOS에 있는 경우 Anki는 자동으로 시스템 프록시 설정을 선택하고 다른 플랫폼에 있는 경우 HTTP_PROXY 환경변수를 적용합니다.
Anki는 프록시가 수동으로 구성되고 암호가 필요하지 않은 경우에만 시스템 설정을 선택할 수 있습니다. 시스템에서 자동 프록시 설정을 사용하는 경우 또는 사용자 이름과 비밀번호가 필요한 프록시를 사용하는 경우 프록시 설정을 Anki에게 수동으로 알려야 합니다.
Anki에게 프록시 설정을 알리려면 프록시 서버를 가리키는 HTTPS_PROXY 환경변수를 정의합니다.
다음과 같이 표시됩니다:
http://user:pass@proxy.company.com:8080
사용자 이름 또는 비밀번호에 특수문자 @(예를 들어 user@workdomain.com)가 포함되어 있는 경우
다음과 같이 @를 %40으로 변경해야 합니다.
http://user%40workdomain.com:pass@proxy.company.com:8080
Anki 2.0에서는 HTTPS_PROXY가 아닌 HTTP_PROXY가 검색됩니다.
Windows에서 환경 변수를 설정하려면 구글검색 을 참고하세요.
Mac에서 환경변수를 설정하려면 이 링크 를 참고하세요.
보안 접속을 가로채거나 자체 인증서를 사용하여 네트워크가 잠기면, Anki가 SSL 에러를 발생시킬 가능성이 있습니다. 이러한 환경에서는 에드온을 사용하여 오류를 회피할 수 있습니다.
대체 해결법은 로컬 프록시 서버를 설치하고 해당 프록시 서버를 일반 프록시 서버로 지정하는 것입니다. 그런 다음 Anki에게 로컬 프록시를 사용하도록 지시할 수 있습니다. 그러면 요청이 일반적으로 사용하는 프록시로 리디렉션됩니다.
프로필
여러명이 하나의 컴퓨터에서 Anki를 사용하면, 각각의 사용자별로 프로필을 분리할 수 있습니다. 각각의 사용자 프로필은 각자 다른 컨텐츠와 프로그램 설정을 가집니다. 단 확장 프로그램은 프로필들끼리 공유됩니다.
프로필은 [파일]메뉴의 [프로필 전환]을 사용하여 변경할 수 있습니다.
오직 하나의 프로필만 AnkiWeb에 연동될 수 있습니다. 컴퓨터에 다른 사용자가 있는 경우 각 사용자는 프로필에 대해 별도의 AnkiWeb 계정을 설정해야 합니다. 여러 프로필을 동일한 AnkiWeb 계정에 연동하려고 하면 데이터가 제대로 연동되지 않습니다. 또한 프로필은 다수의 사용자가 사용되도록 설계되어 있으며, 자신의 콘텐츠를 분할하는 데 권장되지 않습니다. 혼자서 여러 프로필을 만든 경우 이들을 하나의 프로파일로 병합하는 것이 가장 좋습니다. 내보내기/불러오기 기능을 사용하여 프로필을 하나로 합칠 수 있습니다.
AnkiDroid는 프로필 기능을 지원하지 않습니다.
프로필 창
프로필 창에서는 ([파일]->[프로필 전환]:
- 열기 / 추가 / 이름변경 / 프로필 삭제.
- 프로그램 종료
- 자동백업에서 복구
- "다운그레이드 및 종료": 이전 버전의 Anki에서 컬렉션을 여는 경우에 필요합니다. 이 절차를 건너뛰면 이전 Anki 버전에서 컬렉션을 열 때 오류 메시지가 표시될 수 있습니다. 현재 버전으로 돌아가서 다운그레이드를 한 후 다시 이전 버전에서 열어야 합니다.
Browsing
- Table Modes
- Sidebar
- Search Box
- Card/Note Table
- Editing Area
- Menus and Actions
- Find and Replace
- Finding Duplicates
The Browse window allows you to search through your cards and notes, and edit them. It is opened by clicking Browse in the main window, or by pressing B. It is comprised of three sections: the sidebar on the left, the card/note table on the top right, and the editing area on the bottom right. By positioning the mouse between two sections, it is possible to click and drag to expand one section and shrink the other.
Table Modes
Anki 2.1.45+ offers two modes: either cards or notes are shown in the data table. You can change the current mode by clicking the switch at the top, to the left of the search area, or pressing Alt+T. The switch also indicates if Cards or Notes are currently shown.
Note: For the sake of simplicity, this manual generally assumes the Cards mode to be the active one. Whenever selecting/finding/etc. "cards" is mentioned, the reader may substitute it for "cards or notes depending on the active mode".
Sidebar
The sidebar on the left allows quick access to common search terms. On Anki 2.1.45+, it also provides a searchbar, facilities to edit tags and decks, and a choice of two different tools, which are discussed in the following sections. You can switch tools using the toolbar at the top of the sidebar or the shortcuts Alt+1/2.
Search Tool
With this tool, the sidebar behaves as in previous versions: Clicking on an item will search for it.
You can hold down Ctrl (Command on Mac) while clicking in order to append the clicked item to the current search with an AND condition, instead of starting a new search. If you wanted to show learning cards that were also in the German deck for instance, you could click on "Learning", then Ctrl-click on "German".
You can hold down Shift to create an OR search instead of an AND. For example, you could click one deck, then Shift-click another to show cards from either of the decks in the same view.
You can hold down Alt (Option on Mac) in order to reverse the
search (prepend a -): for example, to show all cards in a current deck that
do not have a certain tag. Alt/Option can be combined with
either Ctrl or Shift (e.g. clicking with Ctrl+Alt
will result in adding a new search term that is negated).
On Anki 2.1.39+, you can also hold down both Ctrl and
Shift together when clicking a search term to replace all occurrences of the
same kind of search with the new one.
Let's say you had previously typed in a complicated search expression like
deck:Swahili (is:due or tag:important)
and now want to perform the same search for your Urdu deck. You can hold down
Ctrl+Shift while clicking the Urdu deck in the sidebar to obtain the
following search expression:
deck:Urdu (is:due or tag:important).
Selection Tool
The Selection tool allows for selecting multiple items at the same time by holding down Ctrl
or Shift while clicking. It also enables drag-and-drop to reorder decks and tags.
Here is an example: Say you have the tags Math, Calculus, and Algebra.
Click on the Calculus tag, then Ctrl-click on the Algebra tag. Now both
tags are selected, click and drag any of the two onto the Math tag to make them
both children of this tag. Behind the scene, Anki has renamed the two tags to
Math::Calculus and Math::Algebra respectively and updated your notes accordingly.
Another use case for selecting multiple items is searching: If you right-click on a selection of items, you can choose Search > All/Any Selected. This can be combined with keyboard modifiers as described in Search Tool to append the resulting search to the current search.
Saved Searches
If you regularly search for the same thing, you can save the current search by right-clicking the topmost item in the sidebar, choosing “Save Current Search” and typing in a name. You can also drag and drop any sidebar item onto this area to add an equivalent saved search, effectively pinning it at the top.
Editing Items
You can delete or rename tags, decks, and saved searches directly from the sidebar, from the right-click menu, or by using a shortcut key (Del and F2 on Windows). Deletion even works for multiple items at once (see Selection Tool).
Finding Items
To find a certain item in the sidebar tree, type part of its name into the searchbar at the top to temporarily hide all items not matching the search.
Search Box
Above the card list is a search box. You can type in various things there to search for cards. For information on the search syntax, see Searching.
Card/Note Table
The table's rows represent cards or notes that match the current search. When you click on a row, the corresponding note will be shown in the bottom section.
Rows
If you drag the mouse or hold Ctrl or Command to select multiple rows, the editor will be temporarily hidden. Various operations (such as changing the deck) can operate on multiple cards or notes at once, independent of the active mode. Therefore in Cards mode, a note is considered to be selected if any of its cards is selected, and in Notes mode, a card is considered to be selected if its note is selected.
Other operations (like showing card information) only operate on a single card or note. This is called the current card or note, which is usually the one that was last selected or clicked. In Cards Mode, again, the current note is the note of the current card and in Notes mode, the current card is the first card of the current note.
The background colour will change depending on the card and note. In Cards mode, the first match will be used:
- if the card is flagged, use the flag colour,
- if the card is suspended, yellow,
- if the card's note is marked, purple.
In Notes mode, colour is only applied to marked notes.
For more information about marked notes and suspended cards, see Editing and
More.
Columns
The columns are configurable: right click on one (or Ctrl-click on a Mac) to choose which columns you'd like to see. You can drag columns to reorder them. Clicking on a column will sort by that column; click again to reverse the sort order. Note that you cannot sort by the Question and Answer columns.
All columns are available for both Cards and Notes mode but sometimes with slightly different names and data. The following table lists the behaviours for both modes.
| Column | Cards mode | Notes mode |
|---|---|---|
| Answer | The back side of the card in one line with the question stripped. You can also choose a custom format in the card type editor instead. | The same as in Cards mode, only for the first card of the note. |
| Card(s) | The name of the card's template. | The number of cards the note has. |
| Card Modified | The last time changes were made to the card (e.g. when you reviewed the card and the review history and interval were updated). | The last time changes were made to one of the note's cards. |
| Created | The same as in Notes mode for the card's note. | The date the note was created. |
| Deck | The name of the deck the card is in. | The number of different decks the note's cards are in, or the deck name if all cards are in the same deck. |
| Due | The due date for cards in review or (re)learning, and the position in the new card queue for new cards. The line is wrapped in brackets if the card is suspended or buried. Sorting is done by type and only then by date or position. | The due date for the note's next due review or (re)learning card that is not suspended, buried or in a filtered deck. |
| (Avg.) Ease | The card's ease if it is not new. | The average ease for the note's cards that are not new. |
| (Avg.) Interval | The card's interval if the card is in review or relearning. | The average interval for the note's cards that are in review or relearning. |
| Lapses | How often the card was rated “Again”. | The total lapses for all cards of the note. |
| Note | The same as in Notes mode for the card's note. | The name of the note's notetype. |
| Note Modified | The same as in Notes mode for the card's note. | The last time the note (e.g. the content of a field) was edited. |
| Question | The front side of the card in one line. You can also choose a custom format in the card type editor instead. | The same as in Cards mode, only for the first card of the note. |
| Reviews | How often the card has been reviewed. | The total review count for all cards of the note. |
| Sort Field | The same as in Notes mode for the card's note. | The content of the note's field that is defined as the notetype's sort field. Only this one field can be displayed and sorted by. You can change the sort field by clicking Fields... in the editing area. |
| Tags | The same as in Notes mode for the card's note. | The note's tags. |
Editing Area
The bottom right area displays the note of the currently selected row. For more information about cards and notes, see Getting Started. For more information on formatting buttons, see Editing.
You can see a preview of what the currently selected card would look like when reviewing by clicking the Preview button at the top of the editing area. Note that this will not display any type-the-answer fields on your cards, which makes it easier to preview the cards quickly. In Notes mode, the preview is shown for the first card of the selected note.
Menus and Actions
At the top of the browser window, you find a toolbar with various menus which in turn offer various actions that can be performed in the browser.
Edit
| Name | Action |
|---|---|
| Undo | Revert the most recently performed operation. |
| Select All | Select all rows displayed. |
| Select Notes | Show only the currently selected notes and select all rows. |
| Invert Selection | Select those rows not selected, and deselect the currently selected rows. |
| Create Filtered Deck | Show the filtered deck dialog and set the current browser search as a filter. Use Alt / Option to set the second filter instead (requires scheduler version 2+). |
Notes
Most of the following actions operate on the selected notes. They are also available through a context menu when a selected row is right-clicked in Notes mode. In Cards mode, they can be found in a submenu of the context menu.
| Name | Action |
|---|---|
| Add Notes | Open the Add dialog. |
| Export Notes | Open the Export dialog. |
| Add Tags | Add provided tags to all selected notes. |
| Remove Tags | Enter tags and remove them from all selected notes. |
| Clear Unused Tags | Remove all tags from the sidebar that are not used by any notes. |
| Toggle Mark | If the current note is marked (i.e., has the Marked tag), unmark all selected notes. If the current is not marked, mark all selected notes. |
| Change Notetype | Convert the selected notes from one type to another. For example, imagine you have a Russian notetype and a Computer notetype, and you accidentally added some computer-related text into a Russian note. You can use this option to fix that mistake. The scheduling of cards is not affected. Changing the type of a note requires a one-way sync. |
| Find Duplicates | Open the Duplicates dialog. |
| Find and Replace | Open the Find and Replace dialog. |
| Manage Notetypes | Open the Notetypes dialog. |
| Delete | Delete all selected notes and their cards. It is not possible to remove individual cards, as individual cards are controlled by the templates. |
Cards
The following actions operate on the currently selected cards. They are also available through a context menu when a selected row is rightclicked in Cards mode. In Notes mode, they can be found in a submenu of the context menu.
| Name | Action |
|---|---|
| Change Deck | Move currently selected cards to a different deck. |
| Set Due Date | Turn cards into review cards, and make them due on a certain date. This can be useful for moving cards forward or back a few days when your study schedule is interrupted. Entering a range like 60-90 will make the selected cards due between 60 and 90 days from now. New cards will have their interval set to the same delay, but reviews will be rescheduled without changing their current interval, unless '!' is included at the end of the range. |
| Forget | Move currently selected cards to the end of the new queue. The existing review history is preserved. |
| Reposition | Change the order new cards will appear in. You can find out the existing positions by enabling the due column, as described in the table section above. If you run the reposition command when multiple cards are selected, it will apply increasing numbers to each card in turn. By default the number increases by one for each card, but this can be adjusted by changing the "step" setting. The Shift position of existing cards option allows you to insert cards between currently existing ones, pushing the currently existing ones apart. For instance, if you have five cards and you want to move 3, 4, and 5 between 1 and 2, selecting this setting would cause the cards to end up in the order 1, 3, 4, 5, 2. By contrast, if you turn this option off, 1 and 2 will get the same position number (and it will thus be unpredictable which of the cards with the same number comes up first). Please note that when enabled, any card with a higher position will be modified, and all of those changed cards will need to be sent the next time you sync. |
| Toggle Suspend | Suspend or unsuspend all selected cards, depending on whether the current card is suspended or not. |
| Flag | Toggle the flags of all selected cards. Whether a flag is added or removed depends on whether the current card has the chosen flag. |
| Info | Show various information about the current card, including its review history. For more information, see Card Info. |
Go
This menu exists to provide keyboard shortcuts to jump to various parts of the browser, and to go up and down the card list.
Find and Replace
This dialog allows for replacing text on notes. As described above, it is available from the toolbar and the table's context menu.
The first input field is for the text that is going to be replaced, the second one for the replacement. Next, there is a dropdown menu that allows you to specify where Anki should look for text to replace: in a note's tags (requires Anki 2.1.45+), in all fields, or just in a specific field (only fields belonging to a selected note will be listed).
By default, only selected notes will be affected. If you want to lift that restriction, you can untick the "selected notes only" checkbox (requires Anki 2.1.45+).
The regular expression option allows you to perform complex replacements. For example, assume there is the following text in a field:
<img src="pic.jpg" />
We use these settings:
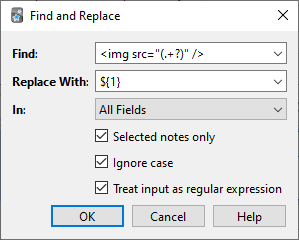
(Note that on Anki versions prior to 2.1.28, you would need to replace ${1}
with \1.)
Then the assumed field content will change to:
pic.jpg
A full discussion on regular expressions is outside the scope of this document. There are a number of syntax guides available on the web:
- For Anki 2.1.28+, see https://docs.rs/regex/latest/regex/index.html#syntax.
- For older Anki versions, see http://docs.python.org/library/re.html.
Finding Duplicates
You can use the Notes > Find Duplicates option to search for notes that have the same content. When you open the window, Anki will look at all of your note types and present a list of all possible fields. If you want to look for duplicates in the Back field, you’d select it from the list and then click Search.
By default, it will search in all note types that have the field you provided. This differs from the duplicate check when you add cards manually, which is limited to a single note type.
The Optional filter text box allows you to narrow down where Anki will look for duplicates. If you only want to search for duplicates in the "French Vocab" and "French Verbs" note types, you would enter:
"note:french vocab" or "note:french verbs"
Or you might want to look only for duplicates in a particular deck, so you could use:
"deck:myDeck"
The search syntax is the same as used when searching in the browser. For more information, see Searching.
You can click one of the links in the search results list to display the duplicate notes in that set. If the search brings up a large number of duplicates, you may wish to instead click the Tag Duplicates button, which will tag all matching notes with duplicate. You can then search for this tag in the browser and handle them all from the same screen.
Filtered Decks & Cramming
- Custom Study
- Home Decks
- Creating Manually
- Order
- Steps & Returning
- Counts
- Due Reviews
- Reviewing Ahead
- Rescheduling
- Catching Up
When you study a regular deck in Anki, only a limited number of cards are shown: the cards Anki thinks you are about to forget, and a daily limit of new cards. This is generally useful, as it ensures you don't spend more time studying than necessary. But sometimes it can be useful to step outside of these normal limits, such as when you need to review for a test, focus on particular material, and so on. To make this possible, Anki provides a different type of deck called a 'filtered deck'.
Filtered decks offer a lot of possibilities. They can be used for previewing cards, cramming cards before a test, studying particular tags, catching up on a backlog with a particular sort order, reviewing ahead of schedule, going over the day's failed cards, and more.
Custom Study
The easiest way to create a filtered deck is with the Custom Study button, which appears at the bottom of the screen when you click on a deck. It offers some convenient preset filters for common tasks like reviewing the cards that you have failed that day. It will create a filtered deck called "Custom Study Session" and automatically open it for you.
If an existing "Custom Study Session" deck exists, it will be emptied before a new one is created. If you wish to keep a custom study deck, you can rename it from the deck list.
Here is a summary of each of the options:
Increase today's new card limit
Add more new cards to the deck you are currently studying. Note that
unlike other options, this does 'not' create a new filtered deck, it
modifies the existing deck.
Increase today's review card limit
If not all reviews due today were shown because of the daily review limit,
this option allows you to show more of them. As with the new cards
option, this modifies the existing deck.
Review forgotten cards
Show all the cards, for which you've answered Again (1) within the number of days
you specify.
Review ahead
Show cards that will be due in the near future (the number of days you
specify). This is useful for working through some of your older cards
before a vacation, but it will not help with cards you have learnt
recently. Please see the reviewing ahead section
below for more info.
Preview new cards
Show cards that you have recently added, without converting them to
review cards as they are answered.
Study by card state or tag
Select a certain number of cards from the current deck to study. You can
choose to select new cards only, due cards only, or all cards; after you
click "Choose Tags", you can also limit the selected cards by tags. If
you wish to see all the cards in the deck (for instance, to study before
a big test), you can set the number of cards to more than the number of
cards in the deck.
Home Decks
When a card is moved to a filtered deck, it retains a link to the deck, from which it came. That previous deck is said to be the card's 'home deck'.
Cards automatically return to their home deck after they are studied in the filtered deck. This can be after a single review, or after multiple reviews, depending on your settings.
It is also possible to move all cards back to their home decks at once:
-
The "Empty" button in the study overview moves all cards in the filtered deck back to their home deck, but does not delete the empty filtered deck. This can be useful if you want to fill it again later (using the Rebuild button).
-
Deleting a filtered deck does the same thing as "Empty" does, but also removes the emptied deck from the deck list. No cards are deleted when you delete a filtered deck.
In the old scheduler, if you create, rebuild, empty, or delete a filtered deck while cards are still in learning, they will be turned back into new cards. In the case of failed reviews in relearning, any remaining relearning steps will be skipped. This was fixed in the v2 scheduler so cards are no longer reset.
Creating Manually
Advanced users can create filtered decks with arbitrary search strings (or 'filters'), instead of relying on the preset filters. To create a filtered deck manually, choose Create Filtered Deck from the Tools menu.
When you click the Build button, Anki finds cards that match the settings you specified, and temporarily moves them from their existing decks into your new filtered deck for study.
If you wish to fetch cards again using the same filter options (for instance, if you want to study all cards with a particular tag every day), you can use the Rebuild button at the bottom of the deck's overview screen.
The search area controls what cards Anki will gather. All of the searches possible in the browser are also possible for filtered decks, such as limiting to tags, finding cards forgotten a certain number of times, and so on. Please see the searching section of the manual for more information on the different possibilities.
Filtered decks cannot pull in cards that are suspended, buried, or already in a different filtered deck. And if you are using the v1 scheduler, cards in (re)learning will not be included either. For this reason, a search in the browser may reveal cards that do not end up in the filtered deck.
The limit option controls how many cards will be gathered into the deck. The order you select controls both the order cards are gathered in, and the order they will be reviewed in. If you select "most lapses" and a limit of 20 for example, then Anki will show you only the 20 most lapsed cards.
Order
The "cards selected by" option controls the order that cards will appear in. If the maximum number of cards you select is lower than the number of cards that match the filter criteria, Anki will exclude the cards at the end of this sorted list first.
Oldest seen first
Display those cards first, that you haven't seen in reviews for the longest
time.
Random
Randomize the order of all cards that match the filter criteria (use no
set order).
Increasing intervals
Display cards that have the smallest interval first.
Decreasing intervals
Display cards that have the largest interval first.
Most lapses
Display those cards first, that you have failed the most times.
Order added
Display cards that you added first (i.e. those cards that have the earliest
creation date).
Order due
Display cards with the earliest due date first.
Latest added first
Display those cards first, that you have most recently added to the deck.
(This is the opposite of 'Order added'.)
Relative overdueness
Display those cards first, that are most overdue in relation to their current
interval (for instance, a card with a current interval of 5 days
overdue by 2 days displays before a card with a current interval of 5
years overdue by a week). This is useful if you have a large backlog
that may take some time to get through and you want to review those cards
first, that you are most in danger of forgetting.
Steps & Returning
Please see the section on learning as a reminder of how steps work.
By default, Anki will use the steps of a card’s home deck. If a new card would normally be reviewed twice when being learnt, the same thing will happen when you study it in a filtered deck.
Cards return to their home deck when (re)learning is complete. Thus if you have 3 learning steps, a new card will return to its home deck upon three presses of "Good" or a single press of "Easy".
v1 and v2 scheduler
In the v1 scheduler, the custom steps option allows you to override the home deck’s steps and provide your own steps instead. The provided steps apply to both cards being learnt, lapsed reviews, and reviews ahead of time. Please note, however, that from the v2 scheduler filtered decks no longer support custom steps.
v3 scheduler
Filtered decks with rescheduling disabled show 4 buttons in the v3 scheduler - the provided delay applies to the Again button, and Hard/Good will use 1.5x and 2x the provided delay. Easy will remove the card.
Counts
In a filtered deck, reviews that were already due are displayed in the review count as normal. Learning cards and non-due reviews are counted in the new card count, due to how the underlying implementation works. Reviews that were not due are not scheduled like new cards however: Anki uses a special algorithm that takes into account how close they were to their normal due time when reviewed.
Due Reviews
If the filtered deck includes cards that were due for review, they will be shown like they would have been in their original deck: they appear in the review card count at the bottom of the screen, and there are four choices for how well you remembered. Upon a correct answer, the card will be moved back to its home deck, and its next delay adjusted using the home deck's settings. If you forget the card, it will be shown according to the relearning steps defined in the home deck.
Reviewing Ahead
If your search included cards that are not due, Anki will show the reviews ahead of time.
Anki uses a special algorithm for these reviews that takes into account how early you are reviewing. If the cards were almost due to be shown, they will be given a new delay similar to what they would have received if you had reviewed them on time. If the cards are reviewed soon after they were scheduled however, their new delay will be similar to their previous delay. This calculation works on a sliding scale.
Because reviewing a card shortly after it is scheduled has little impact on scheduling (e.g. a card due tomorrow with a one day interval will remain due tomorrow if reviewed early), the "review ahead" custom study setting is not appropriate for repeated use. If used to go through a week's worth of cards before a trip, the mature cards will be rescheduled into the future and the new cards will remain at small intervals, because you don't know them well enough for them to be rescheduled further. If you review ahead again the next day, all you'll end up doing is going through those same new cards again, to little benefit.
Early reviews are included in the new card count rather than the review count, and will be shown according to the number of relearning steps defined in the home deck (unless you have provided custom steps). This means that if you have customized the number of relearning steps in the home deck, the non-due card may be shown more than once.
If you have multiple steps, Anki will only consider the first answer when deciding the next delay, and like relearning in normal decks, "Good" and "Easy" differ only in the step change and not the resulting delay.
Rescheduling
By default, Anki will return cards to their home decks with altered scheduling, based on your performance in the filtered deck. There is a reschedule cards based on my answers option available which alters this behaviour.
From the v2 scheduler, when rescheduling is disabled, cards are shown in a simple "preview mode", and when they are returned to the original deck, they are returned exactly as they started.
In the v1 scheduler, cards were presented more similarly to how they normally are, but studying cards had side effects, and the original position of new cards was lost when you studied them.
Catching Up
Filtered decks can be useful for catching up when you've fallen behind in your reviews. One Anki user describes the way they use the filtered decks to catch up as follows:
I did this for a backlog of 800 cards with filtered subdecks. Worked
very well for me.

Just Due filter with: "is:due prop:due>-7"

Over Due filter with: "is:due prop:due<=-7"

The Just Due deck will then contain cards that became due in the past
week. That's the deck you should study every day as it gets the cards
that become due regularly. With this you can study as if there weren't
any backlog.

The Over Due deck will contain your backlog — cards which you didn't
study in time. You can study them the same way you would study new
cards. They go back into the regular cards, so the number of overdue
will never grow as long as you keep your Just Due deck in check.

How long it takes depends on how many overdue cards you study each day
in addition to the ones that become due regularly. You can still motor
through them when you feel like it - or you can do a specific number per
day like you would for new cards. Up to you.
검색
Anki의 탐색 화면과 뭉치 필터 기능은 일반적인 방법으로 특정 카드/노트를 검색합니다.
간단한 검색
검색 상자에 텍스트를 입력하면 Anki가 일치하는 노트를 찾아 해당 카드를 표시합니다. Anki는 노트의 모든 필드를 검색하지만 태그를 검색하지는 않습니다(태그를 검색하는 방법은 이 섹션의 뒷부분을 참조하십시오). 몇 가지 예:
dog
"dog"를 포함하고 있는 노트를 찾습니다. (예: "dog", "doggy", "underdog")
dog cat
"dog"와 "cat" 을 둘다 포함하고 있는 노트를 찾습니다. (예: "raining cats and dogs")
dog or cat
"dog"또는 "cat"이 포함된 노트를 찾습니다.
dog (cat or mouse)
"dog"와 "cat"이 포함된 노트 또는 "dog"와 "mouse"가 포함된 노트를 찾습니다.
-cat
"cat"이 포함되지 않은 노트를 찾습니다.
-cat -mouse
"cat"과 "mouse"가 포함되지 않은 노트를 찾습니다.
-(cat or mouse)
"-cat -mouse"와 동일함
"a dog"
"atta dog", "a dog"와 같이 정확한 순서를 가진 노트를 찾습니다. ("dog a", "adog"등은 찾지 않습니다.)
-"a dog"
"a dog"라는 정확한 문구가 없는 노트를 찾습니다.
d_g
d,<아무 문자(한글자),>,g 와 같은 노트를 찾습니다. (예: "dog", "dig", "dug")
d*g
d,<아무 문자(한글자 이상)또는 공백,>,g 와 같은 노트를 찾습니다. (예: "dg", "dog", "dung")
w:dog
단어에서 "dog"를 찾습니다. ("dog"는 검색되지만, "doggy", "underdog"등은 검색되지 않습니다)
Anki 2.1.24+ 또는 AnkiMobile 2.1.61+ 버전이 필요합니다.
w:dog*
"dog"와 "doggy"는 검색되지만 "underdog"는 안됩니다.
w:*dog
"dog"와 "underdog"는 검색되지만 "doggy"는 안됩니다.
상기 내용에 대한 설명:
-
검색어는 공백으로 구분됩니다.
-
여러 검색어가 제공되는 경우 Anki는 모든 용어와 일치하는 노트를 찾습니다. 각 용어 사이에 암묵적인 'and'가 삽입됩니다. Anki 2.1.24+ 및 Anki Mobile 2.0.60+에서는 "cat and dog"는 "dog cat"과 동일하지만 오래된 Anki 버전은 "and"를 검색해야 하는 다른 단어로 취급합니다.
-
여러개중 하나만 일치해도 되는 경우 "or"을 사용할 수 있습니다.
-
검색어에 마이너스 기호를 추가하여 일치하지 않는 노트를 찾을 수 있습니다..
-
cat(cat or mouse)와 같이 괄호 안에 검색어를 넣어 그룹화할 수 있습니다. 이것은 OR과 AND 검색을 조합할 때 중요합니다. 예를 들어 괄호 안에 'dog cat' 또는 'dog mouse'가 있으면 'dog and cat' 또는 'mouse'와 일치합니다. -
Anki는 설정한 필드 정렬의 포맷 내에서만 검색할 수 있습니다. 예를 들어 필드 중 하나에
exa*mple"을 추가하면 해당 필드가 정렬 필드가 아닌 경우 "example"을 검색할 때 일치하지 않습니다. 단어의 형식이 지정되지 않았거나 단어의 중간 형식이 변경되지 않으면 Anki는 모든 필드에서 해당 단어를 찾을 수 있습니다. -
표준 검색에서는 대소문자를 구분하지 않습니다.a-z는 A-Z와 일치하며, 그 반대도 마찬가지입니다. 키릴 문자와 같은 다른 문자는 표준 검색에서는 대소문자를 구분하지만 단어 검색이나 정규 표현식(
w:,re:)을 사용하면 대소문자를 구분하지 않습니다.
필드로 제한
특정 필드에 일부 텍스트가 포함된 경우에만 Anki에게 일치하도록 요청할 수 있습니다. 위의 검색과 달리 필드를 검색하려면 기본적으로 '정확한 일치'가 필요합니다.
front:dog
Front 필드가 정확히 "dog"인 노트를 찾습니다. "a dog"라고 하는 필드는 일치하지 않습니다.
front:*dog*
Front 필드 내에서 "dog"가 포함된 노트를 찾습니다.
front:
전면 필드가 비어 있는 노트를 찾습니다.
front:_*
전면 필드가 비어 있지 않은 노트를 찾습니다.
front:*
전면 필드가 비어 있는지 여부에 관계없이 노트를 찾습니다.
fr*:text
"fr"로 시작하는 필드에서 노트를 찾습니다. Anki 2.1.24+ 또는 AnkiMobile 2.1.60+ 의 버전이 필요합니다.
태그, 뭉치, 카드 및 노트
tag:animal
"animal" 또는 "animal::"과 같은 하위 태그가 있는 노트를 찾습니다.
tag:none
태그가 붙어 있지 않은 노트를 찾습니다.
tag:ani*
"ani"로 시작하는 태그가 있는 노트를 찾습니다.
deck:french
"french" 뭉치 또는 "french::Vocab"와 같은 하위 뭉치에서 카드를 찾습니다.
deck:french -deck:french::*
"french" 뭉치에 있는 카드를 찾지만 하위 뭉치는 찾지 않습니다.
deck:"french vocab"
뭉치에 띄어쓰기가 있을경우 쌍따움표를 사용합니다.
"deck:french vocab"
이러한 방식도 위와 같습니다.
deck:filtered
필터링된 뭉치만 찾습니다.
-deck:filtered
필터링되지 않은 뭉치만 찾습니다.
card:forward
Forward 카드를 찾습니다.
card:1
템플릿 번호로 카드 검색 - 예를 들어 노트의 두 번째 삭제 부분을 찾으려면 card:2를 사용합니다.
note:basic
"basic"노트타입을 가진 카드를 찾습니다.
악센트/문자 조합 무시
Anki 2.1.24 또는 AnkiMobile 2.0.60 이상의 버전이 필요함.
nc:를 사용하여 결합 문자를 제거할 수 있습니다. 예를 들어 다음과 같습니다:
nc:uber
"uber", "über", "Über"와 같은 단어가 검색될 수 있습습니다.
nc:は
"は", "ば", "ぱ" 와 같은 단어와 매치됩니다.
(문자 조합을 무시하는 검색은 일반 검색보다 속도가 느립니다)
정규식
노트를 정규식으로 검색하기 위해서는 Anki 2.1.24 또는 AnkiMobile 2.0.60 이상의 버전이 필요합니다
정규식으로 검색하려면 re:로 검색을 시작합니다. Anki는 간단하게 하기 위해서 이하를 원시 입력으로서 취급하기 때문에, 거기에 기재되어 있는 룰에 주의해 주세요.
몇몇 예제:
"re:(some|another).*thing"
"some" 또는 "other"가 있고 0자 이상의 문자가 있는 후 "thing"가 나오는 단어를 찾습니다.
re:\d{3}
3자리의 숫자가 있는 노트를 찾습니다.
정규 표현식은 특정 필드 검색도 가능합니다. 특정 필드의 일반 검색과 달리 필드의 정규 표현식은 정확히 일치할 필요가 없습니다. 예:
front:re:[a-c]1
"Front"필드 내에서 대문자 또는 소문자 a1, B1, c1에 해당하는 글자를 찾습니다.
front:re:^[a-c]1$
위와 같으나 다른 텍스트가 a1/b1/c1 앞 또는 뒤에 있으면 일치하지 않습니다.
Anki 2.1.50 부터 정규식이 태그를 지원합니다:
tag:re:^parent$
"parent:: child"와 같은 하위 태그를 무시하고 "parent" 태그가 정확히 지정된 노트를 찾습니다.
"tag:re:lesson-(1[7-9]|2[0-5])"
"lesson-17"에서 "lesson-25"사이의 태그를 가진 노트를 찾습니다.
정규식에 대한 자세한 내용은 여기서 배울 수 있습니다: https://regexone.com/lesson/introduction_abcs
몇가지 주의할 점:
- 검색에서는 기본적으로 대소문자를 구분하지 않습니다. 대소문자를 구분하려면 처음에
(?-i)를 사용합니다. - 공백이나 줄바꿈 같은 텍스트는 HTML에서 다르게 표시될 수 있습니다. 편집 화면에서 HTML 편집기를 사용하여 기본 HTML 내용을 볼 수 있습니다.
- Anki의 regex 지원에 대한 자세한 내용은 regex crate 매뉴얼을 참조하십시오. https://docs.rs/regex/1.3.9/regex/
카드 상태
is:due
학습을 대기중인 새 카드와 복습 카드를 찾습니다.
is:new
새 카드
is:learn
학습중인 카드
is:review
복습 (만기일이 아닌것도 포함)카드와 만기된 카드들
is:suspended
수동으로 무시된 카드
is:buried
자동또는 수동적으로 만료된 카드
new scheduler에서는 Anki가 수동으로 추가된 카드와 자동으로 추가된 카드를 구분하므로 한 세트를 다른 세트 없이 해제할 수 있습니다.
기한이 지난 카드는 다음 중 몇 가지 카테고리로 분류되므로 보다 정확한 결과를 얻기 아래 검색어를 사용하는것이 도움이 될 수 있습니다.
is:learn is:review
기한이 만료되어 재학습 대기 중인 카드
-is:learn is:review
유효기간이 지난 카드를 포함하지 않는 복습 카드
is:learn -is:review
처음 배우는 카드
flag:1
빨간 플래그를 설정한 카드
flag:2
오렌지 플래그를 설정한 카드
flag:3
초록색 플래그를 설정한 카드
flag:4
파란색 플래그를 설정한 카드
flag:5
분홍색 플래그를 설정한 카드
flag:6
청록색 플래그를 설정한 카드
flag:7
보라색 플래그를 설정한 카드
카드 속성
prop:ivl>=10
10일 이상의 간격을 가진 카드
prop:due=1
학습일이 내일인 카드
prop:due=-1
학습일이 어제인 아직 대답하지 않은 카드
prop:due>-1 prop:due<1
어제와 내일 사이에 학습일이 돌아오는 카드
prop:reps<10
답이 10회 미만인 카드
prop:lapses>3
3회 이상 재학습에 들어간 카드
prop:ease!=2.5
기본보다 쉽거나 어려운 카드
최근 이벤트
추가됨
added:1
오늘 추가된 카드
added:7
지난 1주일간 추가된 카드
노트 추가 시간이 아닌 카드 추가 시간에 대해 체크하기 때문에 오래 전에 노트를 추가했더라도 기간 내에 생성된 카드가 포함됩니다.
수정됨
edited:n
지난 n일 동안 노트 텍스트가 추가/삭제된 카드.
Anki 2.1.28 / AnkiMobile 2.0.64 이상의 버전이 필요함.
대답됨
rated:1
오늘 대답된 카드
rated:1:2
오늘 어려움(2)으로 대답된 카드
rated:7:1
7일동안 다시(1)으로 대답된 카드
rated:31:4
지난 달동안 쉬움(4)으로 대답된 카드
2.1.39 이전 버전에서는 최대 31일 까지 난이도 검색을 할 수 있습니다.
첫번째 대답됨
버전 2.1.45 이상에서는 다음과 같이 첫 번째 복습만 검색할 수 있습니다:
introduced:1
오늘 처음으로 답한 카드
introduced:365
지난 1년간 처음 답한 카드
문자 이스케이프
이 섹션은 Anki 2.1.36+ 용으로 작성되었습니다. 이전 버전에서는 특정 상황에서 이스케이프 문자를 지원하지 않았습니다.
이전 섹션에서 볼 수 있듯이 _, *, " 와 같은 일부 문자는 Anki에서 특별한 의미를 갖고 있습니다. 검색에서 이러한 문자를 찾아야 할 경우에는 Anki에게 일반 문자처럼 취급하라고 말해주어야 합니다.
-
공백
공백을 포함하여 검색하려면"이러한 단어"를 쌍따움표로 묶으십시오. 콜론 검색의 경우 콜론 후의 내용만 가져오는 옵션도 있습니다.part:"after the colon" -
",*,_
문자를 특별한 의미 없이 그대로 처리하려면 문자 앞에 백슬래시를 추가합니다. 예를들면,_는 임의의 단일 문자와 일치하지만\_은 실제 언더바만 일치합니다. -
\
백래시는 다른 문자에서 특별한 의미를 제거하기 위해 사용되기 때문에 백래시도 특별하게 취급됩니다. 실제 백슬래시를 검색할 필요가 있는 경우\대신\\를 사용합니다. -
(,)
전체 검색어를 쌍따옴표로 묶거나 백슬래시를 사용하여 괄호를 검색할 수 있습니다. 즉,"some(text)"와some\(text\)는 모두 같으나some(text)는 같지 않다. -
-
예를들어 검색어를-dog로 시작하면dog가 포함되지 않은 모든 것을 검색합니다. 만약 실제 하이픈을 검색하고 싶으면,\-.-,"-.-"와 같이 백슬래쉬를 사용하거나 쌍따움표를 사용할 수 있습니다. -
:
콜론은 다른 기능으로 사용되지 않기 위해선 이스케이프 되어야 합니다.w:e:b->w\:e\:b -
&,<,>
&,<,>는 Anki에서 검색할때 html로 처리되며 제대로 동작하지 않습니다. 하지만 해당 글자를 검색하고 싶은 경우에는&는&로,<는<로,>는>로 사용될 수 있습니다. 예를들어,<&text>는<&text>를 의미합니다.
원시 입력
특정 키워드(예: re:) 앞에 오는 텍스트는 원시 입력으로 처리됩니다.
즉, 위에 열거된 검색 키워드들은 대부분 그 의미를 잃게됩니다.
이러한 상황에서는 애매모호함을 방지하기 위해 최소한의 이스케이프만 필요합니다.
-
"는 반드시 이스케이프 되어야 합니다. -
공백 및 이스케이프되지 않은 괄호는 따옴표로 묶어야 합니다.
-
검색어는 홀수 개수의 백슬래시로 끝날 수 없습니다.
객체 ID
nid:123
ID가 123인 노트를 찾습니다.
cid:123,456,789
ID가 123,456,789인 노트를 찾습니다.
노트 및 카드 ID는 탐색의 카드 정보 창에서 확인할 수 있습니다. 이러한 검색은 에드온 개발을 하거나 데이터베이스와 긴밀하게 작업할 때 유용합니다.
불러오기
Anki can import text files, packaged Anki decks created by the export feature, Mnemosyne 2.0 .db files, and SuperMemo .xml files. To import a file, click the File menu and then "Import".
Text Files
Any plain text file that contains fields separated by commas, semicolons or tabs can be imported into Anki, provided some conditions are met.
-
The files must be plain text (myfile.txt). Other formats like myfile.xls, myfile.rtf, myfile.doc must be saved as a plain text file first.
-
The files must be in UTF-8 format (see below).
-
Anki determines the number of fields in the file by looking at the first (non-commented) line. Any lines in the file which have a different number of fields will be ignored.
-
The first line also defines the separating character – if Anki finds a ';' on the first line it will use that, if it finds a comma it’ll use that, etc.
Fields in your text file can be mapped to any field in your notes, including the tags field. You can choose which field in the text file corresponds to which field in the note when you import.
When you import a text file, you can choose what deck to put the cards in. Keep in mind that if you have the deck override option set for one or more of your templates, the cards will go to that deck rather than the one you’ve selected.
This is an example of a valid file:
foo bar; bar baz; baz quux
apple; banana; grape
There are two ways to include newlines in fields.
Escape the multi-lines by placing the contents of the field in quotation marks:
hello; "this is
a two line answer"
two; this is a one line one
Because quotes are used to mark where a field begins and ends, if you wish to include them inside your field, you need to replace a single doublequote with two doublequotes to "escape" them from the regular handling, like so:
field one;"field two with ""escaped quotes"" inside it"
When you use a spreadsheet program like Libreoffice to create the CSV file for you, it will automatically take care of escaping double quotes.
Use HTML new lines:
hello; this is<br>a two line answer
two; this is a one line one
You need to turn on the "allow HTML in fields" checkbox in the import dialog for HTML newlines to work.
Escaped multi-lines will not work correctly if you are using cloze deletions that span multiple lines. In this case, please use HTML newlines instead.
You can also include tags in another field and select it as a tags field in the import dialog:
first field; second field; tags
This is an example of a valid file where the first line is ignored (#):
# this is a comment and is ignored
foo bar; bar baz; baz quux
field1; field2; field3
Spreadsheets and UTF-8
If you have non-Latin characters in your file (such as accents, Japanese and so on), Anki expects files to be saved in a 'UTF-8 encoding'. The easiest way to do this is to use the free LibreOffice spreadsheet program instead of Excel to edit your file, as it supports UTF-8 easily, and also exports multi-line content properly, unlike Excel. If you wish to keep using Excel, please see this forum post for more information.
To save your spreadsheet to a file Anki can read with LibreOffice, go to File>Save As, and then select CSV for the type of file. After accepting the default options, LibreOffice will save the file and you can then import the saved file into Anki.
HTML
Anki can treat text imported from text files as HTML (the language used for web pages). This means that text with bold, italics and other formatting can be exported to a text file and imported again. If you want to include HTML formatting, you can check the "allow HTML in fields" checkbox when importing. You may wish to turn this off if you’re trying to import cards whose content contains angle brackets or other HTML syntax.
If you wish to use HTML for formatting your file but also wish to include angle brackets or ampersands, you may use the following replacements:
| Character | Replacement |
|---|---|
| < | < |
| > | > |
| & | & |
Importing Media
If you want to include audio and pictures from a text file import, copy the files into the collection.media folder. Do not put subdirectories in the media folder, or some features will not work.
After you’ve copied the files, change one of the fields in your text file as follows.
<img src="myimage.jpg">
or
[sound:myaudio.mp3]
Alternatively, you can use the find and replace feature in the browse screen to update all the fields at once. If each field contains text like "myaudio", and you wish to make it play a sound, you’d search for (.*) and replace it with "[sound:\1.mp3]", with the 'regular expressions' option enabled.
When importing a text file with these references, you must make sure to enable the "Allow HTML" option.
You might be tempted to do this in a template, like:
<img src="{{field name}}">
Anki doesn’t support this for two reasons: searching for used media is expensive, as each card has to be rendered, and such functionality isn’t obvious to shared deck users. Please use the find & replace technique instead.
Bulk Media
Another option for importing large amounts of media at once is to use the media import add-on. This add-on will automatically create notes for all files in a folder you select, with the filenames on the front (minus the file extension, so if you have a file named apple.jpg, the front would say 'apple') and the images or audio on the back. If you would like a different arrangement of media and filenames, you can change the note type of the created cards afterwards.
Adding Tags
If you want to add 'tag1' and 'tag2' to every line you’re importing, add the following to the top of the text file:
tags:tag1 tag2
Duplicates and Updating
When importing text files, Anki uses the first field to determine if a note is unique. By default, if the file you are importing has a first field that matches one of the existing notes in your collection and that existing note is the same type as the type you’re importing, the existing note’s other fields will be updated based on content of the imported file. A drop-down box in the import screen allows you to change this behaviour, to either ignore duplicates completely, or import them as new notes instead of updating existing ones.
The duplicate check is done for your 'entire collection', not just in the current deck. If Anki is indicating that notes have not changed when you expected them to be imported, please check that the notes are not already in your collection somewhere.
If you have updating turned on and older versions of the notes you’re importing are already in your collection, they will be updated in place (in their current decks) rather than being moved to the deck you have set in the import dialog. If notes are updated in place, the existing scheduling information on all their cards will be preserved.
For info on how duplicates are handled in .apkg files, please see the Deck Packages section.
내보내기
내보내기를 통해 컬렉션의 일부를 텍스트 파일 또는 패키지화된 Anki 뭉치로 저장할 수 있습니다. 내보내려면 파일>'내보내기'를 사용하세요.
텍스트 파일
"텍스트 파일로 정리한 노트"를 선택하면 Anki가 노트 내용을 텍스트 파일로 저장합니다. 각각의 필드들은 탭으로 구부됩니다. 내보낸 파일을 편집하고 첫 번째 필드를 수정하지 않으면 나중에 해당 파일을 Anki로 다시 가져올 수 있습니다. 동일한 노트 유형으로 다시 가져올 경우 Anki는 편집한 내용에 따라 노트를 업데이트합니다. 첫 번째 필드도 편집해야 하는 경우 첫 번째 필드가 실제 텍스트가 아닌 ID 번호가 되도록 노트 유형의 형식을 변경해야 합니다 Add note id 추가 프로그램을 설치하면 쉽게 설정할 수 있습니다. 텍스트를 다시 가져올 때 형식을 보존하기 위해 텍스트는 모든 HTML 형식을 포함하여 내보냅니다.
패키지
'패키지 '는 카드, 노트, 노트 유형 및 .apkg 또는 .colpkg으로 끝나는 파일에 번들된 사운드 또는 이미지로 구성됩니다. 패키지 를 사용하여 사람들 간에 카드를 전송하거나 컬렉션의 일부를 백업할 수 있습니다.
패키지에는 2가지 종류가 있습니다.
컬랙션 패키지 (.colpkg)
스케줄이 포함된 모든 데크를 내보내는 경우 이를 '컬렉션 패키지'라고 합니다. Anki는 전체 컬렉션을 .colpkg으로 끝나는 파일에 복사하여 바탕화면에 저장합니다. 컬렉션 패키지는 컬렉션을 백업하거나 다른 장치에 복사하는 데 사용됩니다.
이전 버전의 Anki로 작성된 컬렉션 패키지를 collection.apkg이라고 부릅니다.
나중에 이 파일을 가져오면 Anki는 컬렉션의 현재 카드를 모두 삭제하고 컬렉션을 파일 내의 항목으로 바꿉니다. 이것은, 컬렉션을 기기간에 복사하는 경우에 편리합니다.
컬렉션 패키지를 가져올 때 컬렉션의 기존 미디어는 삭제되지 않습니다. 미사용 미디어를 삭제하려면 툴 -> 미디어 체크를 사용하세요.
뭉치 꾸러미 (.apkg)
뭉치 꾸러미에는 하나의 뭉치(중첩된 경우 자식 뭉치까지)가 포함되어 있습니다. 파일명은 .apkg으로 끝나지만 collection.apkg 이외의 파일명을 가집니다. 뭉치 꾸러미를 불러오면 Anki는 내용을 컬렉션을 덮어쓰지 않고 추가합니다.
같은 노트를 가진 패키지를 여러번 불러온 경우 Anki는 최신에 변경된 카드로 유지합니다. 따라서 업데이트된 덱을 다운로드하면 업데이트된 버전의 편집도 컬렉션에서 수행되지만, 컬렉션에서 편집한 후 변경되지 않은 덱을 다시 가져오면 컬렉션의 변경 내용이 유지됩니다.
복습 일정 정보를 포함하지 않는 경우 Anki는 사용자가 다른 사용자와 덱을 공유하고 있는 것으로 간주하고 마크된 태그와 거머리 태그를 삭제하여 해당 태그가 깨끗한 복사본을 갖도록 합니다.
Backups
Automatic backups
Anki will create automatic backups of your card data. These include the text on your cards and your scheduling information, but do not include sounds or image files.
Automatic backups can be useful to recover from mistakes, but you should not rely solely on them. Because they are stored on your local device, they will not protect you if you device breaks or is stolen. We recommend you combine them with manual backups.
Restoring
To restore from an automatic backup:
- Open Anki, and choose Switch Profile from the File menu.
- Click on the "Open Backup" button.
- Select the backup you wish to restore from.
When restoring from a backup, any changes made since the backup was created will be lost.
Anki disables automatic syncing and backups when you restore from a backup. Once you're happy that you've restored the correct backup, close and re-open Anki to return to normal.
Anki 2.1.50+
Backups are created periodically. You can configure the time between backups in the preferences screen. The default is 30 minutes.
Certain operations will trigger a backup, even if the configured time has not elapsed yet:
- A one-way sync download
- Importing a .colpkg file using File>Import
- Tools>Check Database
After backups are two days old, Anki will start removing some of the older ones. You can control how many daily, weekly and monthly backups you'd like to keep.
Older Anki versions
Each time your collection is closed (when closing Anki, switching profiles, or doing a full sync download), Anki creates a backup. By default it will store up to 30 backups; you can adjust this in the preferences.
Manual colpkg backups
Restoring
You can restore from a manual backup by using File>Import.
Creating
In Anki 2.1.50+, you can use File>Create Backup to trigger an immediate backup. This functions like regular automatic backups, and does not include media files.
To create a backup that includes your sounds and images:
- Select Export from the File menu.
- Ensure "Anki collection package (.colpkg)" is selected.
- Enable the "include media" option.
This will create a .colpkg file that contains all of your cards and any sounds/images they use. We recommend you store the file somewhere safe, like a different device, or a cloud-based file storage service like Dropbox or Google Drive.
AnkiWeb
Synchronising your collection with AnkiWeb provides some level of protection against your device being lost or stolen. If you need to restore your collection from AnkiWeb, you can force a one-way sync in the preferences screen, or sync from a new device, and then choose "Download".
Deletion log
Anki logs deleted notes to a text file called deleted.txt in your profile folder. These notes are in a text format that can be read by File>Import, though please note the import feature only supports a single note type at one time, so if you have deleted notes from different note types, you'll need to split the file into separate files for each note type first.
Managing Files and Your Collection
- Checking Your Collection
- File Locations
- Startup Options
- DropBox and File Syncing
- Network Filesystems
- Running from a Flash Drive
- Backups
- Inaccessible Harddisk
- Permissions of Temp Folder
- Corrupt Collections
Checking Your Collection
It is a good idea to occasionally check your collection file for problems. You can do this via the Tools>Check Database menu item. Checking the database ensures the file has not been corrupted, rebuilds some internal structures, and optimizes the file.
When you check the database, your tag list is also rebuilt. When you delete individual decks or cards, Anki does not update the list of used tags, as it's inefficient to do so. If you want to clear old tags out from the list that are no longer in use, checking your database is the way to do it.
Please note that Anki will automatically optimize your collection once every 2 weeks. This optimization ensures the collection performs well, but it does not check for errors or rebuild the tag list when automatically optimizing.
File Locations
On Windows, the latest Anki versions store your Anki files in your
appdata folder. You can access it by opening the file manager, and
typing %APPDATA%\Anki2 in the location field. Older versions of Anki
stored your Anki files in a folder called Anki in your Documents
folder.
On Mac computers, recent Anki versions store all their files in the
~/Library/Application Support/Anki2 folder. The Library folder is
hidden by default, but can be revealed in Finder by holding down the
option key while clicking on the Go menu. If you're on an older Anki
version, your Anki files will be in your Documents/Anki folder.
On Linux, recent Anki versions store your data in
~/.local/share/Anki2, or $XDG_DATA_HOME/Anki2 if you have set a
custom data path. Older versions of Anki stored your files in
~/Documents/Anki or ~/Anki.
Within the Anki folder, the program-level and profile-level preferences are stored in a file called prefs.db.
There is also a separate folder for each profile. The folder contains:
-
Your notes, decks, cards and so on in a file called collection.anki2
-
Your audio and images in a collection.media folder
-
A backups folder
-
Some system files
You should never copy or move your collection while Anki is open. Doing so could cause your collection to become corrupt. Please do not move or modify the other files in the folder either.
Startup Options
If you have made a destructive change on one computer and have an undamaged copy on another computer, you may wish to start Anki without syncing in order to use the full sync option without first downloading the changes. Similarly, if you are experiencing problems with Anki, you might want to (or might be instructed to) disable add-ons temporarily to see if one might be causing the problem. You can do both of these things by holding down the Shift key while starting Anki.
It is possible to specify a custom folder location during startup. This is an advanced feature that is primarily intended to be used with portable installations, and we recommend you use the default location in most circumstances.
The syntax to specify an alternate folder is as follows:
anki -b /path/to/anki/folder
-
If you have multiple profiles, you can pass -p <name> to load a specific profile.
-
To change the interface language, use -l <iso 639-1 language code>, such as "-l ja" for Japanese.
If you always want to use a custom folder location, you can modify your shortcut to Anki. On Windows, right-click on the shortcut, choose Properties, select the Shortcut tab, and add "-b \path\to\data\folder" after the path to the program, which should leave you with something like
"C:\Program Files\Anki\anki.exe" -b "C:\AnkiDataFolder"
You can also use this technique with the -l option to easily use Anki in different languages.
On Windows, you should use a backslash (\) not a forward slash (/).
On a Mac there is no easy way to alter the behaviour when clicking on the Anki icon, but it is possible to start Anki with a custom base folder from a terminal:
open /Applications/Anki.app --args -b ~/myankifolder
Alternatively, you can define the environment variable "ANKI_BASE". On Windows, you can define the environment variable with:
set "ANKI_BASE=C:/path/to/AnkiDataFolder"
On Linux and macOS, you can use:
export ANKI_BASE="/path/to/AnkiDataFolder"
DropBox and File Syncing
We do not recommend you sync your Anki folder directly with a third-party synchronization service, as it can lead to database corruption when files are synced while in use.
If you just want to synchronize your media, you can link external folders into services like DropBox. Please see DropboxWiki: Sync Folders Outside Dropbox (archive.org) for more info.
If you wish to keep your collection in sync as well, it is strongly recommended that you create a script that copies your files from your synced folder to a local folder, launches Anki, and then copies the files back when Anki is closed. This will ensure that the files are never synchronized while they are open.
Network Filesystems
We strongly recommend you have Anki store your files on a local hard disk, as network filesystems can lead to database corruption. If a network filesystem is your only option, regular use of Tools>Check Database to detect corruption is recommended.
Running from a Flash Drive
On Windows, Anki can be installed on a USB / flash drive and run as a portable application. The following example assumes your USB drive is drive G.
-
Copy the \Program Files\Anki folder to the flash drive, so you have a folder like G:\Anki.
-
Create a text file called G:\anki.bat with the following text:
g:\anki\anki.exe -b g:\ankidata
If you would like to prevent the black command prompt window from remaining open, you can instead use:
start /b g:\anki\anki.exe -b g:\ankidata
- Double-clicking on anki.bat should start Anki with the user data stored in G:\ankidata.
The full path including drive letter is required - if you try using
\anki\anki.exe instead you will find syncing stops working.
Media syncing with AnkiWeb may not work if your flash drive is formatted as FAT32. Please format the drive as NTFS to ensure media syncs correctly.
Backups
Please see this section.
Inaccessible Harddisk
If Anki can't write to files in the Anki folder, a message will be displayed on startup saying that Anki can't write to the harddisk, and Anki will close. If you're unsure how to fix the permissions, please contact someone near you who is knowledgeable about computers and can help you out.
Permissions of Temp Folder
Anki uses the system's temporary folder to store temporary data. If the permissions of this folder have been changed from the default settings by a rogue app or buggy antivirus app, Anki will not function properly.
If you're on a Windows 7 machine, the general steps to fix the problem are listed below. As this is somewhat complicated, please ask someone knowledgeable about Windows if you are not sure.
-
Click on the start bar, and type in %temp% (including the percents), then hit Enter.
-
Go up one folder, and locate the temp folder. Right click on it, and choose Properties.
-
In the security tab, click on Advanced.
-
Click on the Owner tab. If you're not listed as the owner, click the button to take ownership.
-
On the permissions tab, ensure that you have full control. On a default W7 install the control will actually be inherited from c:\users\your-username.
Corrupt Collections
Anki uses a file format that is robust against program and computer crashes, but it's still possible for your collection to become corrupt if the files are modified while Anki is open, stored on a network drive, or corrupted by a bug.
When you run Tools>Check Database, you will receive a message if Anki detects the file has been corrupted. The best way to recover from this is to restore from the most recent automatic backup, but if your backup is too old, then you can attempt to repair the corruption instead.
On Linux, make sure sqlite3 is installed. On a Mac, it should be installed already. On Windows, download http://www.sqlite.org/sqlite-3_6_23.zip.
Next, create a backup of your collection.anki2 file, in case something goes wrong with the steps below.
Linux/macOS
Open a terminal, change to the folder your collection is located in, and type:
sqlite3 collection.anki2 .dump > dump.txt
Open the resulting dump.txt file in a text editor, and look at the final line. If it reads "rollback;", change it to "commit;"
Then run the following in a terminal:
cat dump.txt | sqlite3 temp.file
Make sure you use temp.file - do not put collection.anki2 on the right, or you will blank out the file. When you're done, proceed to the final step.
Windows
Copy the sqlite3.exe program and your deck to your desktop. Then go to
Start>Run and type in cmd.exe.
If you're on a recent Windows, the command prompt may not start on your desktop. If you don't see desktop displayed in the command prompt, type something like the following, replacing 'administrator' with your login name.
cd C:\Users\Administrator\Desktop
Then type:
sqlite3 collection.anki2 .dump > dump.txt
Open the resulting dump.txt file in a text editor, and look at the final line. If it reads "rollback;", change it to "commit;"
Then run the following in a terminal:
type dump.txt | sqlite3 temp.file
Make sure you use temp.file - do not put collection.anki2 on the right, or you will blank out the file. When you're done, proceed to the final step.
Final Step
Check that you didn't get an error message, and that temp.file is not empty. The procedure optimizes the collection in the process, so it's normal for the new file to be somewhat smaller than the old one.
When you've confirmed the file is not empty:
-
rename the original collection.anki2 file to something else
-
rename temp.file to collection.anki2
-
move collection.anki2 back into your collection folder, overwriting the old version
-
start Anki and go to Tools>Check Database to make sure the collection has been successfully restored.
통계
Card Info
You can display information about a card by using the Cards>Info menu item, by right-clicking on the card and then selecting Info, or by pressing I on the review screen. Most of the displayed information should be self-explanatory. A few notes:
Position
Only shown when the card is new, it shows the order the card will appear
in relative to other new cards. The position can be changed in the
browser.
Interval
The delay from one review to the next. Times are abbreviated; "0s, 1m,
3h, 4d, 5mo, 6y" refers to seconds, minutes, hours, days, months and
years respectively.
Ease
The approximate amount the interval will grow when you answer a review
card with the "Good" button.
Statistics
The statistics window is accessed by clicking on Stats button at the top of the main window, or by pressing T. The statistics window will show statistics from the currently selected deck and any subdecks. If you select the checkbox "collection" at the top, statistics will be shown for your entire collection instead. You can also display graphs for arbitrary searches by adding filters in the search box at the top (2.1.28+).
(Anki 2.1.28+ introduced redesigned graphs. The old graphs are currently still accessible with a Shift-click on the Stats button.)
By default, Anki 2.1.28+ will show you statistics for the last 12 months. You can change this to all history scope or deck life scope at the top. (The "today" section at the top remains of course unaffected by this selection.)
Older versions of Anki will by default show you statistics for the previous month. You can change this to a year scope or deck life scope at the bottom. (Again, the “today” section at the top is unaffected by this selection.)
Clicking on "Save PDF" at the bottom will save a PDF document of the statistics to a file on your desktop to make it easy to share your statistics with others.
When you delete notes, their review history is maintained in Anki. It will not be included when looking at statistics for a specific deck (as Anki has no way of knowing which deck the deleted cards belonged to), but will be included when you look at statistics for the whole collection.
Types of Cards
The stats window uses some terms that you may not be familiar with:
Mature
A mature card is one that has an interval of 21 days or greater.
Young
A young card is one that has an interval of less than 21 days, but is
not in learning.
Learn
A learning card is one that is still in learning mode (using whatever
steps may be defined in the deck’s options).
Relearn
A relearning card is a card that you have failed in review mode, thus
returning it to learning mode to be relearned.
Unseen
An unseen card is one that has been added to your collection but has not
yet entered learning mode. Unseen cards are sometimes referred to as
"new" cards, especially when they are in the "new" queue to be shown for
the first time.
Today
At the top of the statistics window is a brief list of textual statistics about the reviews that you have completed today. A “review” in this context is 'one answering of a card', so a card might count as multiple reviews if it needed to be seen multiple times, and a learning card answered also counts as a “review.” A couple of the stats whose meaning may not be immediately obvious:
Again Count
This is the number of reviews that you have failed (i.e., pressed Again
on). The correct percentage listed afterwards is the number of cards you
did 'not' fail divided by the total number of cards you studied.
Learn, Review, Relearn, Filtered
The number of reviews that were learning cards, review cards, relearning
cards, or studied in a filtered deck when not due.
The stats for the current day are not a good overall indicator of your learning progress; everyone has bad days and good days, and seeing that you got a lower percentage correct on a particular day should not be cause for concern. The remainder of the stats, which take longer periods of time into account, will give more useful information if you wish to try to change your study habits or scheduling settings based on your performance.
The “today” statistics are unaffected by the time period selected at the bottom of the window.
The Graphs
Future Due
This graph shows an estimated number of reviews that will be due on a
given day in the future if you learn no new cards and fail no cards. The
bars and the left axis show the number of cards due on each day if you
study all cards each day, while the line and the right axis show the
number of cards due on that day if you don’t study at all until then.
Note that the forecast graph does not count reviews that are currently
overdue, so if you have a large backlog, the overdue cards will not be
displayed.
Reviews
This graph counts the number of card reviews you have done. The bars may
correspond to days, weeks, or months, depending on the time period
you’ve selected at the bottom of the screen. The differently colored
blocks show how many of the cards you answered on each day were
mature, young, relearning, or learning cards.
There is also a separate group for cards answered in a filtered/cram
deck while they were not due. The line and the right axis shows the
cumulative total for each type of review as time progresses across the
graph (so at 0 days, it would display the number for the entire time
period displayed on the graph).
Card Counts
This pie chart shows what percentage of your deck or collection consists
of mature, unseen, young/learn, and suspended cards. If you wish to
calculate a more precise percentage, the key shows the exact number of
cards in each section, and the total number of cards is displayed to the
side.
Review Time
This graph works exactly like Review Count, except that it deals with
the amount of time you spent on each card rather than the number of
cards answered.
Review Intervals
This graph displays the number of cards that have a given interval (the
delay between two reviews). The line and the right axis tell you what
percentage of your cards have an interval of less than or equal to the
time below that point. The time scope has a different effect on this
graph than other graphs: rather than changing which cards or period of
studying is included, it limits how far out the intervals are displayed
to (so 14-month intervals are not displayed at all on a 1-year graph).
Hourly Breakdown
This graph shows what percentage of total reviews you have passed (i.e.,
not pressed Again on) during given hours. The larger, darker bars and
left axis show the success rate; the thinner, lighter bars and right
axis show the number of reviews you’ve made at that hour (so you know
how significant the results are).
Answer Buttons
This graph shows how many times you’ve chosen the Again, Hard, Good, or
Easy button while studying learning/new, young, and
mature cards. Anki also displays the percentage
of correct reviews for each type of card.
Manual Analysis
If you’re interested in getting information from your statistics other than what Anki provides, it is possible to access the data directly. Because of the complexity involved, this is not something we can provide any support for.
One option is to write an add-on that adds another graph or more details to the statistics window. There are several add-ons of this sort on AnkiWeb already, which you can look at to get an idea of how it works.
A more powerful and more complex option is to extract the review log information directly from Anki’s database and analyze it in an external program. Anki uses a database format called SQLite. There are many tools available for working with SQLite databases; one of the easiest to start with is called SQLite Browser, which will allow you to look around the database as well as export a CSV version of tables for import into another program.
The most important table for statistics is the 'revlog' table, which stores an entry for each review that you conduct. The columns are as follows:
id
The time at which the review was conducted, as the number of
milliseconds that had passed since midnight UTC on January 1, 1970.
(This is sometimes known as 'Unix epoch time', especially when in
straight seconds instead of milliseconds.)
cid
The ID of the card that was reviewed. You can look up this value in the
id field of the 'cards' table to get more information about the card,
although note that the card could have changed between when the revlog
entry was recorded and when you are looking it up. It is also the
millisecond timestamp of the card’s creation time.
usn
This column is used to keep track of the sync state of reviews and
provides no useful information for analysis.
ease
Which button you pressed at the end of the review (1 for Again, 4 for
Easy).
ivl
The new interval that the card was pushed to after the review. Positive
values are in days; negative values are in seconds (for learning cards).
lastIvl
The interval the card had before the review. Cards introduced for the
first time have a last interval equal to the Again delay.
factor
The new ease factor of the card in permille (parts per thousand). If the
ease factor is 2500, the card’s interval will be multiplied by 2.5 the
next time you press Good.
time
The amount of time (in milliseconds) you spent on the question and
answer sides of the card before selecting an ease button.
type
This is 0 for learning cards, 1 for review cards, 2 for relearning cards,
and 3 for early "cram" cards (cards being studied in a filtered deck when they
are not due).
미디어
Anki는 노트에 사용된 소리와 이미지를 컬렉션의 폴더에 저장합니다. 폴더 위치와 관련된 정보는 파일 위치글을 확인하세요. 에디터의 클립 아이콘을 사용하거나 필드에 붙여넣기하여 Anki에 미디어를 추가할 수 있습니다(미디어는 이동하지 않고 미디어 폴더로 복제됩니다). 이렇게 하면 컬렉션의 미디어를 쉽게 백업하거나 다른 컴퓨터로 이동할 수 있습니다.
미디어 파일 이름에 공백이나 퍼센트 기호와 같은 특수 문자가 포함되어 있는 경우
HTML 편집기에서와 탐색기에서 파일 이름이 표시되는 방식은 다릅니다. 예를 들어 hello 100%.jpg 라는 파일이 있는경우 HTML에디터에서는
hello%20100%25.jpg로 표시됩니다.
내부적으로 Anki는 여전히 원본 파일 이름을 사용하기 때문에 검색 또는 검색 및 바꾸기를 사용하여 파일 이름을 수정하려면 HTML 에디터가 아닌 디스크에 표시되는 이름을 사용해야 합니다.
텍스트 파일로 내보내는 것도 기본 이름을 볼 수 있는 방법입니다.
미디어 확인
도구 -> 미디어 검사... 메뉴에서 이 도구를 사용하여 노트와 미디어를 스캔할 수 있습니다. 미디어 폴더에는 있지만 노트에서는 사용되지 않거나 노트에서 파일이 사용되지만 미디어가 누락된 것들에 관한 보고서를 생성합니다. It does not scan question or answer templates, which is why you can’t place media references to fields in the template. 질문 또는 답변 템플릿의 경우에는 검색되지 않으므로 템플릿에서는 필드에 미디어를 추가할 수 없습니다.
모든 카드에 정적 이미지 또는 사운드가 필요한 경우 미디어 확인 시 무시하도록 Anki에게 알려주기 위해 위해 접두사 _(예시: _dog.jpg)를 붙입니다. 사용하지 않은 미디어 체크를 사용하여 미디어를 삭제하면 Anki가 해당 미디어를 운영 체제의 휴지통 폴더로 이동하므로 삭제해서는 안 되는 미디어를 실수로 삭제한 경우 복구할 수 있습니다.
수동으로 미디어 추가
Anki의 인터페이스를 통해 미디어를 추가하면 Anki는 파일명을 서로 다른 운영체제에서 작동하도록 변경하고 매우 긴 파일명을 잘라냅니다.
수동으로 미디어 폴더에 파일을 추가할 경우 나중에 도구 -> 미디어 확인을 사용하여 파일 이름이 올바르게 인코딩되어 있는지 확인해야 합니다. 이 단계를 건너뛰면 동기화 시 호환되지 않는 파일들을 모두 건너뜁니다.
지원하는 포멧
Anki는 사운드와 비디오를 지원하기 위해 mpv(및 mplayer)라는 프로그램을 사용합니다. 다양한 파일 형식이 지원되지만 AnkiWeb 및 모바일 앱에서는 몇몇 포멧이 잘 작동하지 않을 수 있습니다. 보편적으로는 음악에는 mp3, 영상에는 mp4가 사용됩니다.
Math and Symbols
MathJax
MathJax is a modern, browser-based typesetting system, useful for mathematical and chemical equations. It does not require the installation of any extra software, so it is easy to use, and it is recommended for most users.
MathJax is supported out of the box on Anki 2.1+, AnkiMobile, and AnkiDroid 2.9+.
To try it out:
-
Type the following in a field:
\sqrt{x} -
Select the text you just typed.
-
Click the rightmost button in the editor, and choose "MathJax inline" from the menu. Anki will change the text so it reads:
\(\sqrt{x}\) -
If you click the Cards… button, you’ll see a preview of how the equation will appear when the card is reviewed.
Anki’s MathJax support expects content in TeX format. If you’re not
familiar with TeX formatting, please see this
cheatsheet.
Please note that point 2 does not apply in Anki - Anki uses \( and
\) for inline equations, and \[ and \] for display equations.
If you want to use newlines in a MathJax expression, please use Shift+Enter instead of just Enter, as a normal newline will prevent MathJax from working correctly.
Anki includes built in support for mhchem for rendering chemical equations. Please see the 'chemical equations' section and the following sections for more information: https://mhchem.github.io/MathJax-mhchem/
It is possible to customize some settings.
LaTeX
LaTeX is a powerful typesetting system, useful for entering mathematical formulas, chemical formulas, musical notation and so on. Anki provides some support for LaTeX, allowing you to enter LaTeX code in your notes. When you review a card, Anki will call LaTeX and display the generated image instead.
LaTeX is more work to set up, and images can only be generated with the computer version of Anki - though once generated, the images can be displayed by mobile clients. Because of the extra complexity LaTeX brings, it is only recommended for users that need more features than MathJax provides.
Assumed Knowledge
Anki’s LaTeX support is not turn-key: it is assumed that you know how to use LaTeX already, and that you have it installed. If you have no experience with LaTeX, please consult one of the many guides available on the internet. If you are having trouble with markup, please ask on a LaTeX forum.
To install LaTeX, on Windows use MiKTeX; on macOS use MacTex, and on Linux use your distro’s package manager. Dvipng must also be installed.
On Windows, go to Settings in MikTek’s maintenance window, and make sure "Install missing packages on the fly" is set to "No", not to "Ask me first". If you continue to have difficulties, one user reported that running Anki as an administrator until all the packages were fetched helped.
On macOS, LaTeX has only been tested with MacTex and BasicTex. If you use BasicTex, you need to install dvipng separately, with the following command:
sudo tlmgr update --self; sudo tlmgr install dvipng
The command may not be on the path, so you may need to provide the full path, eg /usr/local/texlive/2014basic/bin/x86_64-darwin/tlmgr.
If you are not using the above LaTeX packages, you will need to use the edit LaTeX add-on to specify the full path to latex and dvipng.
Web/Mobile
When you review a card with LaTeX on it, Anki will generate an image for that LaTeX and place the image in your collection’s media folder for future use. The web & mobile clients will display these images if they already exist, but can not generate the images on their own.
To avoid having to review all your cards at least once before you can study on the other clients, Anki can generate the images in bulk for you. To generate all the images, please go to Tools>Check Media. After that, syncing should upload the generated media to AnkiWeb and the other clients.
Example
The most general way to input LaTeX content is to surround it with [latex][/latex] tags. There’s a shortcut button for this documented in the editor section.
[latex] tags must be used inside a field - placing them in the card template will cause problems.
For example, entering the following on the front of an Anki flashcard:
Does [latex]\begin{math}\sum_{k = 1}^{\infty}\frac{1}{k}\end{math}[/latex] converge?
will produce this when the flashcard is viewed:
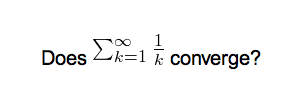
The formula in the example above is called a 'text formula', because it is displayed right within the non-mathematical text. In contrast, the following example shows a 'displayed formula':
Does the sum below converge?

[latex]\begin{displaymath}\sum_{k = 1}^{\infty}\frac{1}{k}\end{displaymath}[/latex]
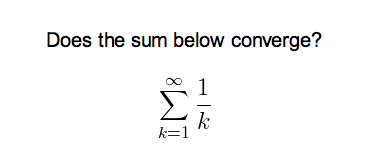
'Text formulas' and 'display formulas' are the most common type of LaTeX expressions, so Anki provides abbreviated versions of them. Expressions of the form:
[latex]\begin{math}...\end{math}[/latex]
can be shortened to
[$]...[/$]
and expressions of the form
[latex]\begin{displaymath}...\end{displaymath}[/latex]
can be shortened to
[$$]...[/$$]
For example, the two LaTeX snippets shown before are equivalent to
Does [$]\sum_{k = 1}^{\infty}\frac{1}{k}[/$] converge?
and
Does the sum below converge?

[$$]\sum_{k = 1}^{\infty}\frac{1}{k}[/$$]
respectively.
Packages
Anki allows you to customize the LaTeX preamble so you can import custom packages for chemistry, music and so on. For example, imagine you find an example file for chemtex on the internet:
\documentclass[a4paper,12pt]{report}
\usepackage{chemtex}
\begin{document}

\initial
\begin{figure}[h]\centering
\parbox{.3\textwidth}{\ethene{H}{H$_3$C}{CH$_3$}{Br}}
\hfil
\parbox{.3\textwidth}{\cbranch{H}{S}{H}{S}{C}{S}{}{S}{H}
  \xi=-200 \cright{}{Q}{C}{D}{O}{S}{OH}}
\hfil
\parbox{.3\textwidth}{\hetisix{Q}{Q}{Q}{Q}{Q}{Q}{O}{Q}{O}
  \xi=-171 \fuseup{Q}{Q}{Q}{Q}{D}{Q}{D}{Q}{D}}
\caption{Chemie mit {\tt CHEMTEX}\label{a1}}
\end{figure}

\end{document}
Firstly, follow the documentation of the package and MiKTeX/MacTex in order to install the package. To check the package is working, you’ll want to put code like the above into a .latex file and test if you can compile it from the command line. Once you’ve confirmed that the package is available and working, we can integrate it with Anki.
To use the package with Anki, click "Add" in the main window, then click the note type selection button. Click the "Manage" button, then select the note type you plan to use and click "Options". The LaTeX header and footer are shown. The header will look something like:
\documentclass[12pt]{article}
\special{papersize=3in,5in}
\usepackage{amssymb,amsmath}
\pagestyle{empty}
\setlength{\parindent}{0in}
\begin{document}
To use chemtex, you’d add the usepackage line in the earlier example, so it looks like:
\documentclass[12pt]{article}
\special{papersize=3in,5in}
\usepackage{amssymb,amsmath}
\usepackage{chemtex}
\pagestyle{empty}
\setlength{\parindent}{0in}
\begin{document}
After that, you should be able to include lines like the following in your Anki cards:
[latex]\ethene{H}{H$_3$C}{CH$_3$}{Br}[/latex]
Template Conflicts
As of Anki 2.1.20 / AnkiMobile 2.0.56 / AnkiDroid 2.13, this workaround is no
longer required, as {{field}} text inside fields no longer causes problems. If
you need to support older versions and want to keep using this syntax, please
make sure you place the {{=<% %>=}} string at the very top of your front and
back template, as recent Anki versions will not recognize it anywhere but the
start.
For older versions:
It’s not uncommon for {{ and }} to pop up in LaTeX code when writing mathematical equations. To ensure that your LaTeX equations don’t conflict with Anki’s field replacements, it’s possible to change the separator to something else.
For example, if you have a template:
{{latex field}}
Changing it to the following will make it unlikely that the LaTeX will conflict:
{{=<% %>=}}
<%latex field%>
Cloze Conflicts
Cloze deletions are terminated with }}, which can conflict with a }}
appearing in your LaTeX. To prevent LaTeX from being interpreted as a closing
cloze marker, you can put a space between any double closing braces that do not
indicate the end of the cloze, so
{{c1::[$]\frac{foo}{\frac{bar}{baz}}[/$] blah blah blah.}}
will not work, but
{{c1::[$]\frac{foo}{\frac{bar}{baz} }[/$] blah blah blah.}}
will (and LaTeX ignores spaces in math mode, so your equation will render the same). If you want to avoid adding the extra space into the rendered text (for example, when you are making Cloze cards for learning programming languages), another option is to use a HTML comment when editing the card in HTML mode:
{{c1::[$]\frac{foo}{\frac{bar}{baz}<!-- -->}[/$] blah blah blah.}}
You may use either workaround if you need to use the :: character
sequence within the Cloze-deleted text. The first card generated for the
following note text will read [type] in C++ is a type-safe union:
{{c1::std:<!-- -->:variant::~type~}} in C++ is a {{c2::type-safe union}}
Unsafe Commands
Anki prohibits certain commands like \input or \def from being used on cards or in templates, because allowing them could allow malicious shared decks to damage your system. (To be on the safe side, these commands are prohibited even in comments, so if you’re getting this error but don’t think you’ve used one, please double-check any comments you have in your headers, templates, and cards.) If you need to use these commands, please add them to a system package and import that package as described in the previous section.
Leeches
Leeches are cards that you keep on forgetting. Because they require so many reviews, they take up a lot more of your time than other cards.
Anki can help you identify leeches. Each time a review card 'lapses' (is failed while it is review mode), a counter is increased. When that counter reaches 8, the note is tagged as a leech, and the card is suspended. The threshold, and whether to suspend or not, can be adjusted in the deck options.
Anki will continue to issue leech warnings periodically for a difficult card. The warning interval is half the initial leech threshold. That is, if you have Anki configured to warn at 8 lapses, future warnings will happen every 4 lapses. (12, 16, etc)
Once a leech is found, there are a number of ways you can handle it.
Waiting
Some leeches are caused by 'interference'. For example, an English learner may have recently learnt the words "disappoint" and "disappear". As they look similar, the learner may find themselves confusing the two when trying to answer. In these situations, it’s often productive to concentrate on just one idea. When that idea is firmly ingrained in your mind, you can then return to learning the other idea. So in these situations, you may want to leave one of the words suspended until you have learnt the other one well, and then unsuspend it in the browser.
Deleting
Another way to manage leeches is to delete them. Consider if the material you’re struggling with is important enough to make it worth your while. By selectively deleting difficult and obscure items, you can dedicate more time to learning other material, and studying becomes a lot more fun.
Editing
Another approach is to change the way the information is presented. Perhaps the cards you have created have too much information on them, or perhaps you’re trying to memorize something without fully understanding it. Sometimes spending some time changing the way the card is phrased can help. It’s also a good time to think about making a mnemonic to help you remember.
확장 프로그램
Anki의 기능은 확장 프로그램으로 확장할 수 있습니다. 확장 프로그램을 통해 특정 언어에 대한 추가 지원, 스케줄링에 대한 추가 제어 등의 기능을 사용할 수 있습니다.
사용 가능한 애드온 목록을 확인하려면 [도구] -> [확장 프로그램] 메뉴 항목을 선택하고 [확장 프로그램 가져오기...]을 클릭합니다.
확장 프로그램이 제대로 동작하지 않거나 오류를 발생시키는 경우 "삭제" 옵션을 사용하여 제거할 수 있습니다.
확장 프로그램은 Anki의 코드베이스 중 임의의 부분을 사용하고 수정하기 때문에 Anki를 업데이트하면 이전 확장 프로그램과 호환되지 않을 수 있습니다. Anki 업데이트 후 확장 프로그램이 작동하지 않으면 제작자에게 문의하고 확장 프로그램이 업데이트될 때 까지는 이전 버전의 Anki를 계속 사용하는 것을 추천합니다.
Ankiweb의 대부분의 애드온 페이지에는 '개발자에게 연락하기(Contact Author)' 버튼이 있으며, 많은 개발자가 애드온에 이메일 주소를 포함하고 있기 때문에 개발자에게 문의할 필요가 있는 경우 이를 사용할 수 있습니다.
만약 확장 프로그램을 어떻게 만드는지 알고 싶으시면, 확장 프로그램 제작 가이드를 참고하세요.
기타
메뉴 단축키
윈도우와 리눅스에서는 Alt 키를 누르고 강조된 키를 누름으로서 메뉴 단축키를 사용할 수 있습니다
macOS는 이 기능을 지원하지 않지만 특정 메뉴 항목에 바로 가기를 할당할 수 있습니다. 자세한 내용은 http://lifehacker.com/343328/create-a-keyboard-shortcut-for-any-menu-action-in-any-program를 참조해 주세요.
디버그 콘솔
디버그 콘솔을 사용하여 설정을 변경하거나 무언가를 확인 해야하는 경우가 생길 수 있습니다. Anki가 디버그 콘솔에 텍스트를 입력하도록 요청하지 않는 한 이는 필요하지 않을 것입니다. 에드온 개발자는 에드온 작성 가이드)를 참조하세요.
디버그 콘솔 사용해야 할 경우에는 다음 단축키를 사용할 수 있습니다:
윈도우: Ctrl+Shift+;
맥: Command+Shift+;
몇몇 영어가 아닌 키보드에서는 ;대신 : 또는 +를 사용해야 할 수 있습니다.
창이 뜨면 맨 위에 붙여 넣으라고 한 텍스트나 입력할 글자를 넣어주세요. 완료되면 Ctrl+Return(Mac의 경우 Command+Return)을 누르면 아래 섹션에 일부 텍스트가 나타납니다. 결과물을 붙여 넣어야 할 경우엔 아래 영역에서 복사하여 지원 담당자에게 다시 붙여 넣으십시오.
Ctrl+Return 대신에 Ctrl+Shift+Return를 사용한 경우 원하는 다답을 얻지 못할 수 있습니다. 알수없는 오류가 발생하였으면 Shift키를 누르고 있지 않았는지 확인해보세요.
Contributing
Sharing Decks Publicly
To share decks with the general public, synchronize them with AnkiWeb, then log into AnkiWeb and click on "Share" from the menu next to the deck you wish to share.
If you shared a deck previously (including with previous versions of Anki), you can update it by clicking "Share" as above. Updating a shared deck will not reset the download counts or ratings. You can delete a shared deck that you have uploaded using the Delete button on the shared deck's page.
When updating a deck, AnkiWeb expects the deck to be at the same location as before. If you shared a deck when it was called "Korean Verbs" for example, and then renamed it to "Korean::Korean Verbs", resharing will not be able to update the existing copy. If you have forgotten the original name, you can guess it by downloading the deck on ankiweb and importing it (File > Import) in a new profile (File > Switch profile > Add). Then you can copy the exact name of the deck when it was first shared. If this doesn't work, please contact support.
When you update a shared deck, users who downloaded the deck previously will not automatically receive updates. If they download the deck again and re-import it, newly added material will be imported without altering their existing study progress, provided neither you nor the user has altered the note type since the first import.
Sharing Decks Privately
If you’d like to share decks with a limited group of people (such as a study group or class) rather than the general public, you can do so by sharing them outside of AnkiWeb.
To share a deck privately, go to the File menu and choose Export. Select a single deck (not "All Decks"), and turn off "include scheduling information". This will produce an .apkg file which you can share with others.
You can share the .apkg file by emailing it to people, placing it on a website or shared folder, or using a free file sharing service like Dropbox or Google Drive and sending people a link.
Both the computer version and mobile clients make it easy to import from an apkg file simply by clicking or tapping on it. AnkiWeb does not have the ability to import apkg files however, so the recipients of your deck will need to have the computer version or Anki on their mobile device.
When a user imports an .apkg file, cards that already exist in their collection will be ignored and any new cards will be added. As long as they use the same note type, modified cards will also be updated. To prevent data loss, cards that have been deleted in the new apkg file will not be deleted in the user’s collection, so if you need to delete cards from users' decks for whatever reason, you will need to contact them about it.
Sharing Add-ons
Please see https://addon-docs.ankiweb.net/sharing.html
Translating Anki
Please see https://translating.ankiweb.net
Contributing Code
Anki's source code is available at https://github.com/ankitects/anki
Before contributing, please see contributing.md.
자주 묻는 질문
https://faqs.ankiweb.net 을 확인하세요.
자료들
SuperMemo 사이트에는 반복과 기억 대한 많은 정보가 있습니다.http://www.supermemo.com/
Michael Nielsen은 장기 기억과 Anki를 어떻게 사용하는지에 대해 http://augmentingcognition.com/ltm.html를 작성 하였습니다. 또한 트윗 시리즈로 https://twitter.com/michael_nielsen/status/957763229454774272또한 제공하고 있습니다.
일부 의대생들은 의대에서 Anki를 사용하는 것에 초점을 맞춘 유료 가이드를 만들고 있습니다. https://courses.ankipalace.com/
Soren Bjornstad는 기억, SRS 및 Anki를 효과적으로 사용하는 방법에 대한 다양한 글을 작성했습니다.